2.5.1 New Powerlight
The original GameCube powerlight (a red light) sits on the same board as the original controller ports. As we removed this board entirely, we need to install a new power led light. And to make the end result as good looking as possible we want to use our favorite color of choice in form of USB-Led Stripes. (Note: make sure to read through the whole article before starting to work.)
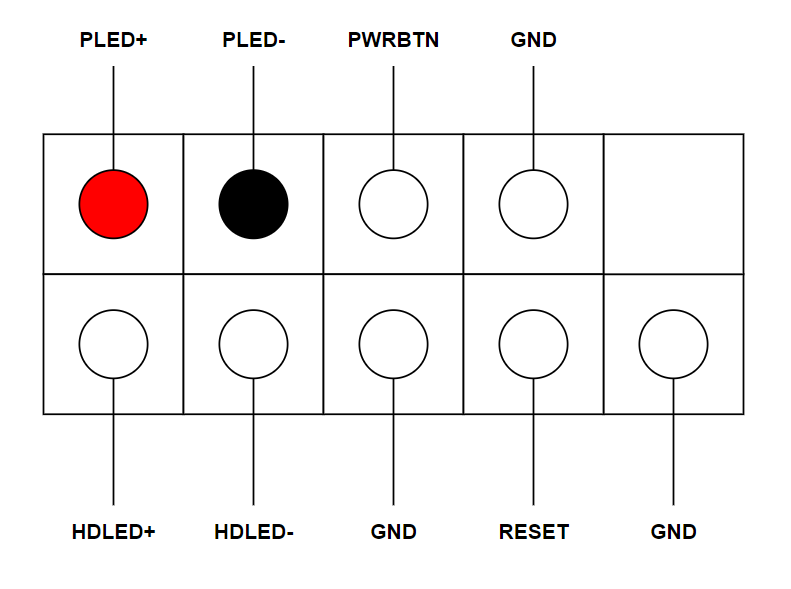
First of all, we want to use the motherboard's built-in Power-Led pins to power the USB LED-Stripes. In order to connect the stripes to the motherboard pins we use two jumper cables.
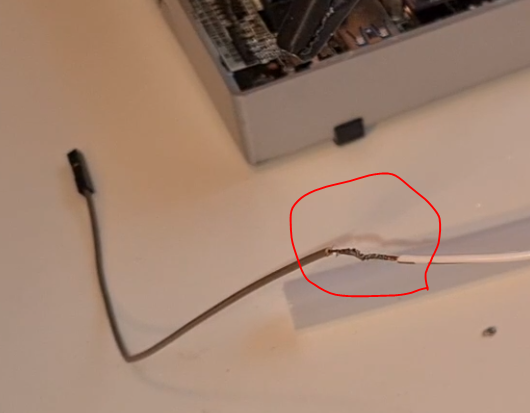
We just have to cut off the USB-Connector at the end of the USB LED-Stripe cable and remove its isolation.
Now we want to remove the isolation and the plastic from two jumper cables on one side. (female to female) Next we carefully twist the copper wires from each of jumper cables together with the wires of each USB-Cable. (Really try to twist them tightly together) At the end we want to have two cables/connections.
When we want to solder the cables together, we first apply some flux onto the twisted wires and start soldering afterwards.
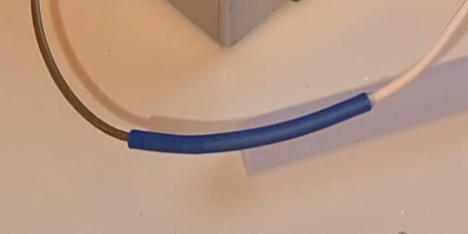
Once we are done, we want to put on shrink tubes over the soldered wires to secure/isolate them.
Now we have to connect the jumper cables to the correct system header pins on the motherboard.
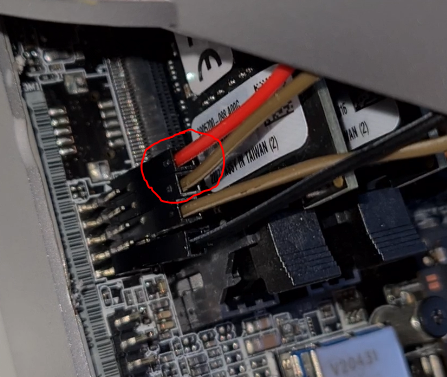
If you connected everything right, you can now turn the PC on and observe if the LED starts to glow.
Next up we need to figure out how to glue the stripes to the correct place inside the case.
Locate the milky transparent plastic part inside the top half of the GameCube's case near the disk lid.
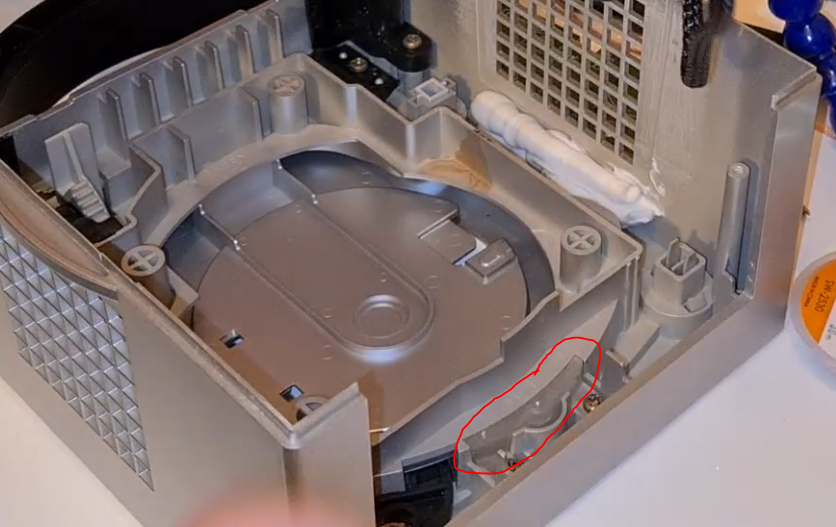
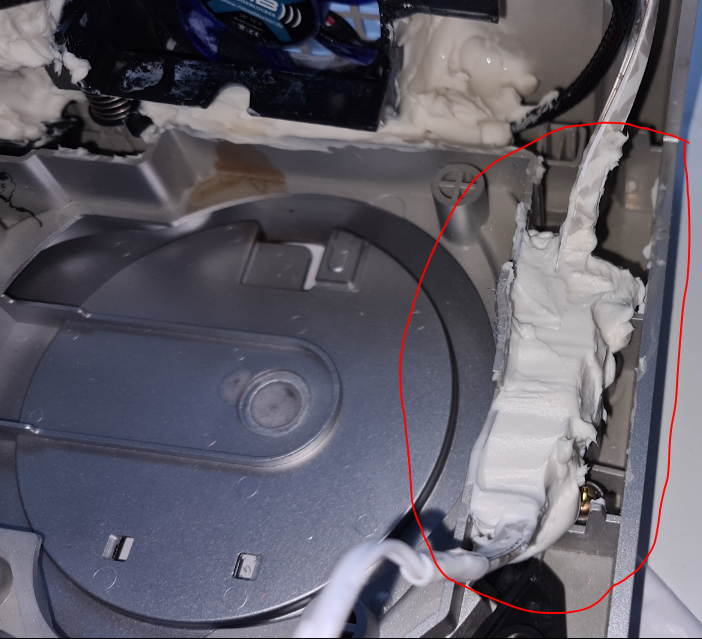
That's where we want to place one LED of the stripe. We have to place/orientate one LED of the stripe directly and as centered as possible above/onto this plastic part. (You can also try out holding the stripe on the plastic while its glowing to determine how to place the stripe onto the plastic to get the brightest light out of it.) Once you positioned it right, use a bit hot glue to keep it in place. (Note: Keep in mind that a bit of wiggle room is required before and after the actual gluing point. It is needed once we close the case and might be needed to have enough space for the controller ports! So, just keep a little bit of stripe length before and after the actual gluing point to have enough wiggle room like its shown in the below picture.) Also, the hot glue hardens a bit faster.
Next, we add some more Power Assembly Adhesive on top to prevent the stripe from moving out of place. Note: Don’t apply too much power glue! If the glue itself raises to high it interferes with the controller ports and the corresponding adapter board!
While we are at it, we also want to apply some glue to the Reset-Button of the original case so it stays down and looks like the original hardware. (Make sure the reset button is in its normal position like it is on original hardware before gluing it.)
Now we can cut off the remaining length of the led stripes if we want to and let the glue harden for twenty-four hours.
As we still have some led-stripe length left we also want to add a bit of glow to the GameCube’s air exhaust where our new case fan sits. Therefore, we carefully route the stripe near the case's exhaust grid near the bottom. We want to twist the stripe about 45 degrees so it basically shines upwards but also out of the grid from the bottom.
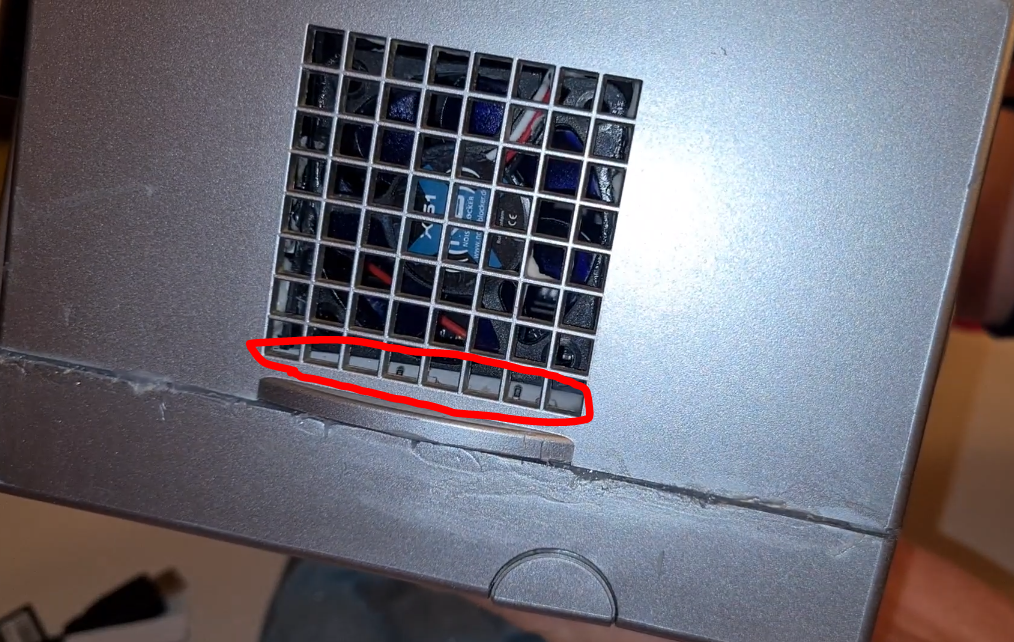
Here I also recommend keeping everything in place by applying a tiny bit of hot glue first followed by power glue. Once we are done here, we can cut off the remaining length of the stripes and wait for twenty four hours until the glue got hard.
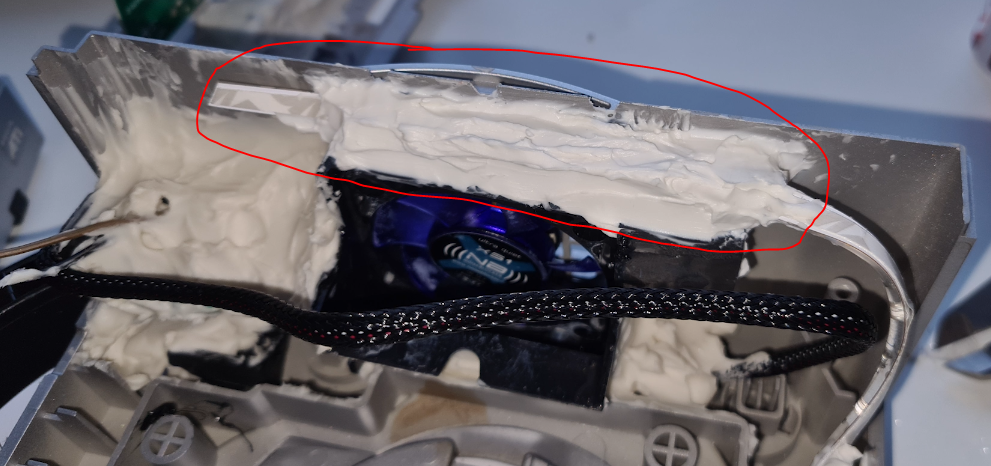
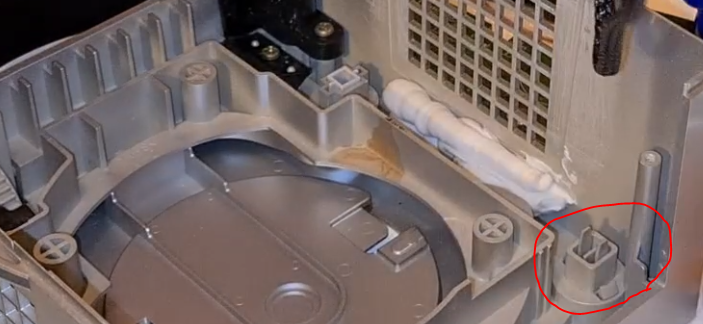
Here you can also see the needed wiggle room for the stripe on the right.
We should now have a brightly glowing powerlight at the top of the GameCube "replacing" the original one that only turns on once the pc is turned on.