2.3.2 Powerbutton
As seen on the "Case Fan" section the fan chassis also holds the original powerbutton. We want to use the original powerbutton of the gamecube to power on the PC itself. Therefore, we have to solder some jumper cables onto the button and place the fan chassis on the right height within the top part of the gamecube case so the button can be pressed correctly. (Note: this part is a bit tricky and might be a lot easier with an 3D-Printer to get a better mounting mechanism)
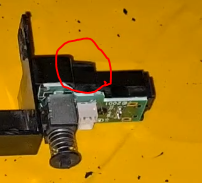
In order to get to the soldering point that we need, we need to remove/Dremel a small hole/opening of black plastic at the back of the powerbutton. This is the first tricky part of two. Only remove as much as you need to solder two wires! If it is to difficult, carefully remove the powerbutton PCB from the fan chassis with a Dremel or soldering iron. However doing so, will make the second part even more tricky!
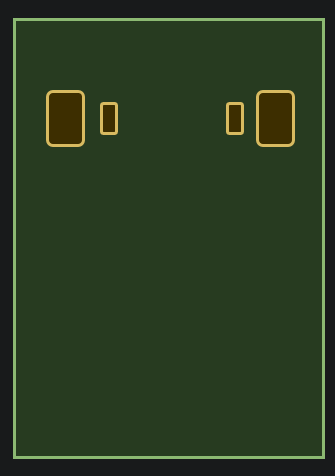
Unfortunately, I don’t have a good picture where the two jumper cables should be soldered to. Take a look at this sketch which shows the back of the button's PCB. We want to solder the cables to the small point right next to the powerbutton mount on the PCB.
As you can see there are four solder points. Two of them are already occupied (the outer ones) they hold the actual button itself. The inner ones are the ones that we want to solder our wires on. Just add a bit of solder to the tip of the jumper cable (Male to female) and on the soldering point on the PCB. (If the solder does not hold onto the jumper tip, add a bit of flux and try again). Now you can solder the wire to the soldering point. I recommend putting hot glue or assembly glue onto the soldered cables so they can’t be ripped out losing their soldered connection.
This is by far the most difficult part in the whole project. First, we want to use Power assembly adhesive to glue the fan chassis to the actual game-cube case. We sandpaper the side of the game-cube case where the original fan was with sandpaper as well as the fan chassis's own plastic and clean it afterwards with some isopropyl removing any dust. Then I recommend getting familiar with the correct height the black fan chassis that holds the powerbutton needs so the button can be pressed correctly down like on the original hardware. This is a pure try and error game and would be easier with a small 3D-Printed mounting bracket or something like it. I recommend marking the correct height of the fan chassis inside the game-cube case once you feel you have the right position and height.
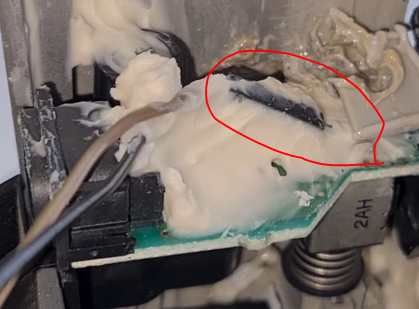
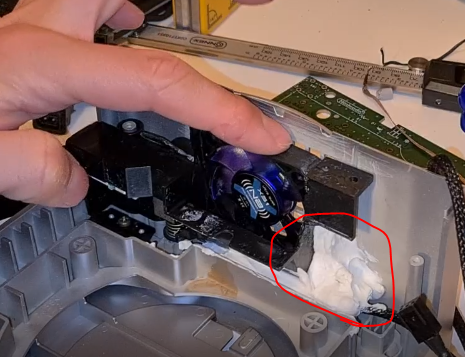
Now we apply the assembly glue in the case and press the fan chassis down upon it. We need to make sure that no glue goes onto the button or the small plastic piece of the original case that pushes the button down!
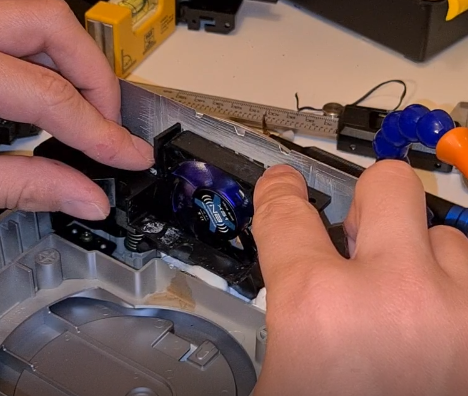
As you can see on the first picture, we only applied the glue and sandpapered the case from the inside. Also, no glue touches the plastic that pushes down the powerbutton!
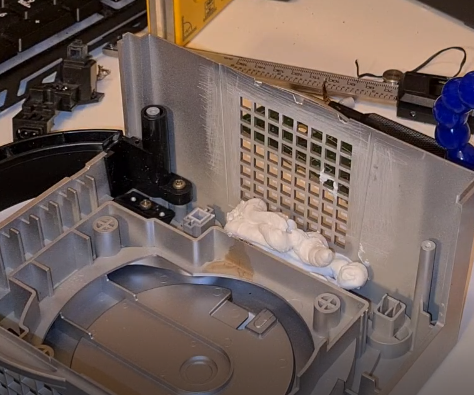
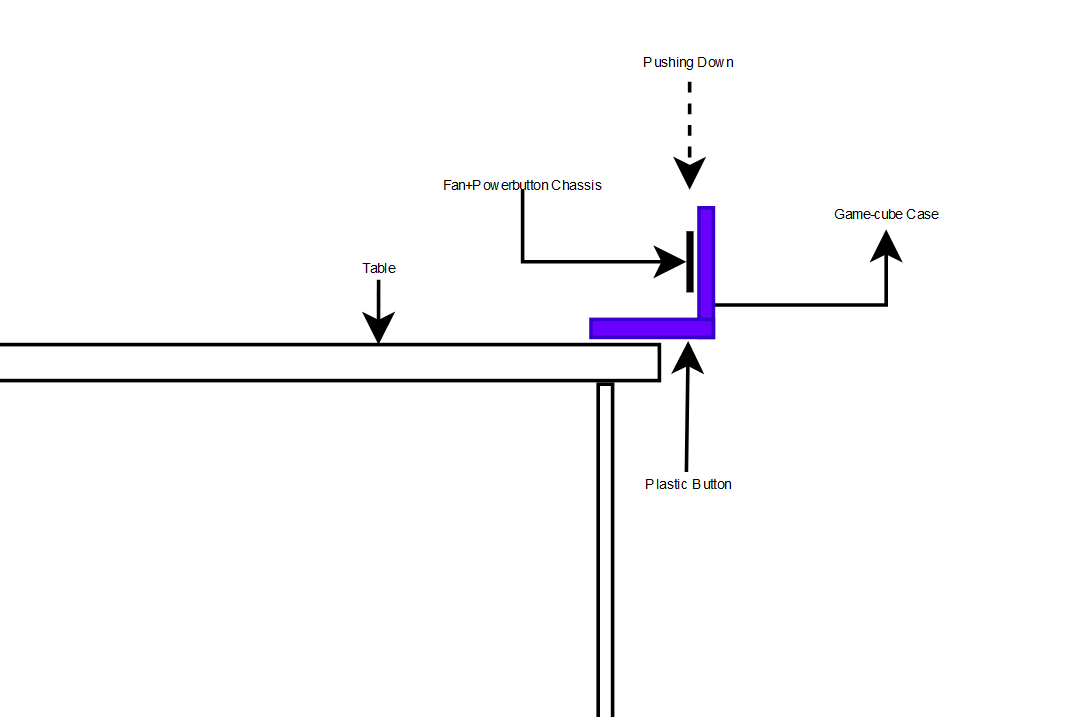
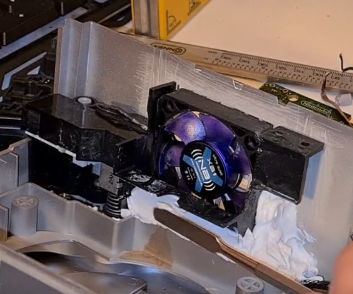
Note on the second picture that we carefully align the fan chassis on the glue so we reach the correct height in which the powerbutton can be pressed like it would with original hardware. I recommend lying the case on the edge of a table so you can press the "powerbutton-preasureplate" of the case itself from the bottom. So, a part of the case is hanging over the edge. Now you can align the fan chassis and check if you can press the button like you would on original hardware. Don't worry about the glue as it takes a lot longer to get hard than hot glue or epoxy. (Unfortunately, this fact also makes it harder at the same time.) Note: The "plastic button" like its position is shown on the sketch, is the one that we want to press to power the system on. Just like on original hardware.
If you separated the powerputton from the fan chassis you will have to find the correct position for the button to be pressed correctly on a much smaller piece making it far more difficult to align.
You have the right position height if you can press the button with the plastic grey button of the original gamecube like you would on original hardware. (Meaning the button would stay down after one press and go up again after the next press.)
Once you find the right position, add more glue to the side of the fan chassis to make sure everything stays perfectly in place. Once you've done that you need to double check if the button can still be pressed correctly and realign the fan chassis if needed while the glue is still soft.
I recommend using a small spatula to apply the glue more precisely and evenly.
Now this glue needs to rest one day in order to get hard.
Note: please ignore the missing jumper cables for the powerbutton on some of the pictures. If you are building the game-cube right now, you should already have them sticking out of the fan chassis like described before.
We should have a game-cube top case part that holds the original fan chassis with a new more powerful fan. In addition, we aligned the powerbutton of the fan chassis correctly to the game-cube case so we can press it as we would do on regular original hardware. The powerbutton should now have two unconnected female to male jumper cables soldered to it. Everything should be rested for one day.