Tutorial
This tutorial explains the basic controls of the plugin. Checkout the gallery for some suggestions of cool stuff that can actually be done.
Install the tool as specified in the README notes.
First, select any mesh:

Then run the tool from the Add > Curves Menu or the prompt:


Then the curve is generated, and you can tweak the settings shown in the next section:

The first thing the plugin does, is it can replace the selected input mesh with a more complicated mesh derived from the first. This can produce interesting effects in the resulting weaving. The Remesh Type settings are
- None - leave the mesh unchanged
- Edge Subdivide - subdivide every edge
- Medial - subdivide every edge, then cut out every original vertex and replace it with a fan of triangles spanning the newly added vertices.
These operations are also available as a standalone operator called Geometric Remesh.
These let you control how strands are run over the surface of the input mesh. Strands only every cross each other at midpoints of edges in the input mesh.
The Weave Type setting lets you choose between Celtic Knots and Twills.
- Celtic knots twist every pair of overlapping strands in the same direction.
- Twill twists overlapping strands clockwise or anticlockwise to best fit the twill pattern of "two up, two down".
When selecting celtic knot, you can also choose the Twist Proportion to select what proportion of edges the strands should be twisted at.
Once the weaving has been decided, there are three different ways of using the weave:
- Bezier - Output a 3d bezier curve for each strand in the weave.
- Pipe - Create a mesh from the bezier by applying a circular bevel (can be v. slow for large meshes)
- Ribbon - Create a mesh with a chain of polygons for each strand in the weave. The ribbon faces have UVs set.
Weave Up and Weave Down determine what offset to apply to each strand when two strands cross each other. The offset is applied in the direction of the edge normal at the crossing point.
Handle Type, Crossing Stength and Crossing Angule give tighter control over the beziers. They are discussed in more detail below.
Thickness is used for pipes, and determines the radius of the bevel circle. If weave up and weave down are equal to ± the thickness, then the pipes will nestle as close as possible.
Length and Breadth control the sizing of the ribbon, as a proportion of the face the ribbon covers.
Coloring type creates new materials and assigns them to the mesh.
- Per-strand assigns a unique material to each strand (i.e. single loop)
- Per-braid tries to assign as few materials as possible, while ensuring that any two crossing strands get different materials.
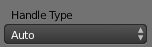
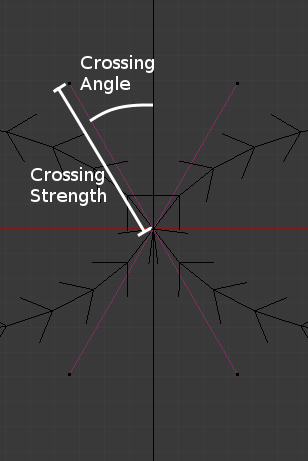
The handle type can be auto or aligned. This sets the handle types in the generated path. Specifically, auto instructs Blender to chose the best curve handles for giving a smooth curve, while aligned allows manual overriding (while still enforcing some smoothness). The Crossing Angle and Crossing Strenth below can configure aligned handles further.
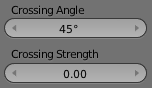
Crossing settings are only used when the aligned handle type is selected above. These control which direction the curve handles point, each time two curves cross over each other (which occurs once for each edge in the original mesh). Here is an example showing how the angles are set for two curves crossing over a vertically aligned edge.