AWS Quickstart
This quickstart guide helps new users run YOLOv5 🚀 on an Amazon Web Services (AWS) Deep Learning instance ⭐. AWS offers a Free Tier and a credit program to get started quickly and affordably. Other quickstart options for YOLOv5 include our Colab Notebook , GCP Deep Learning VM and our Docker image at https://hub.docker.com/r/ultralytics/yolov5

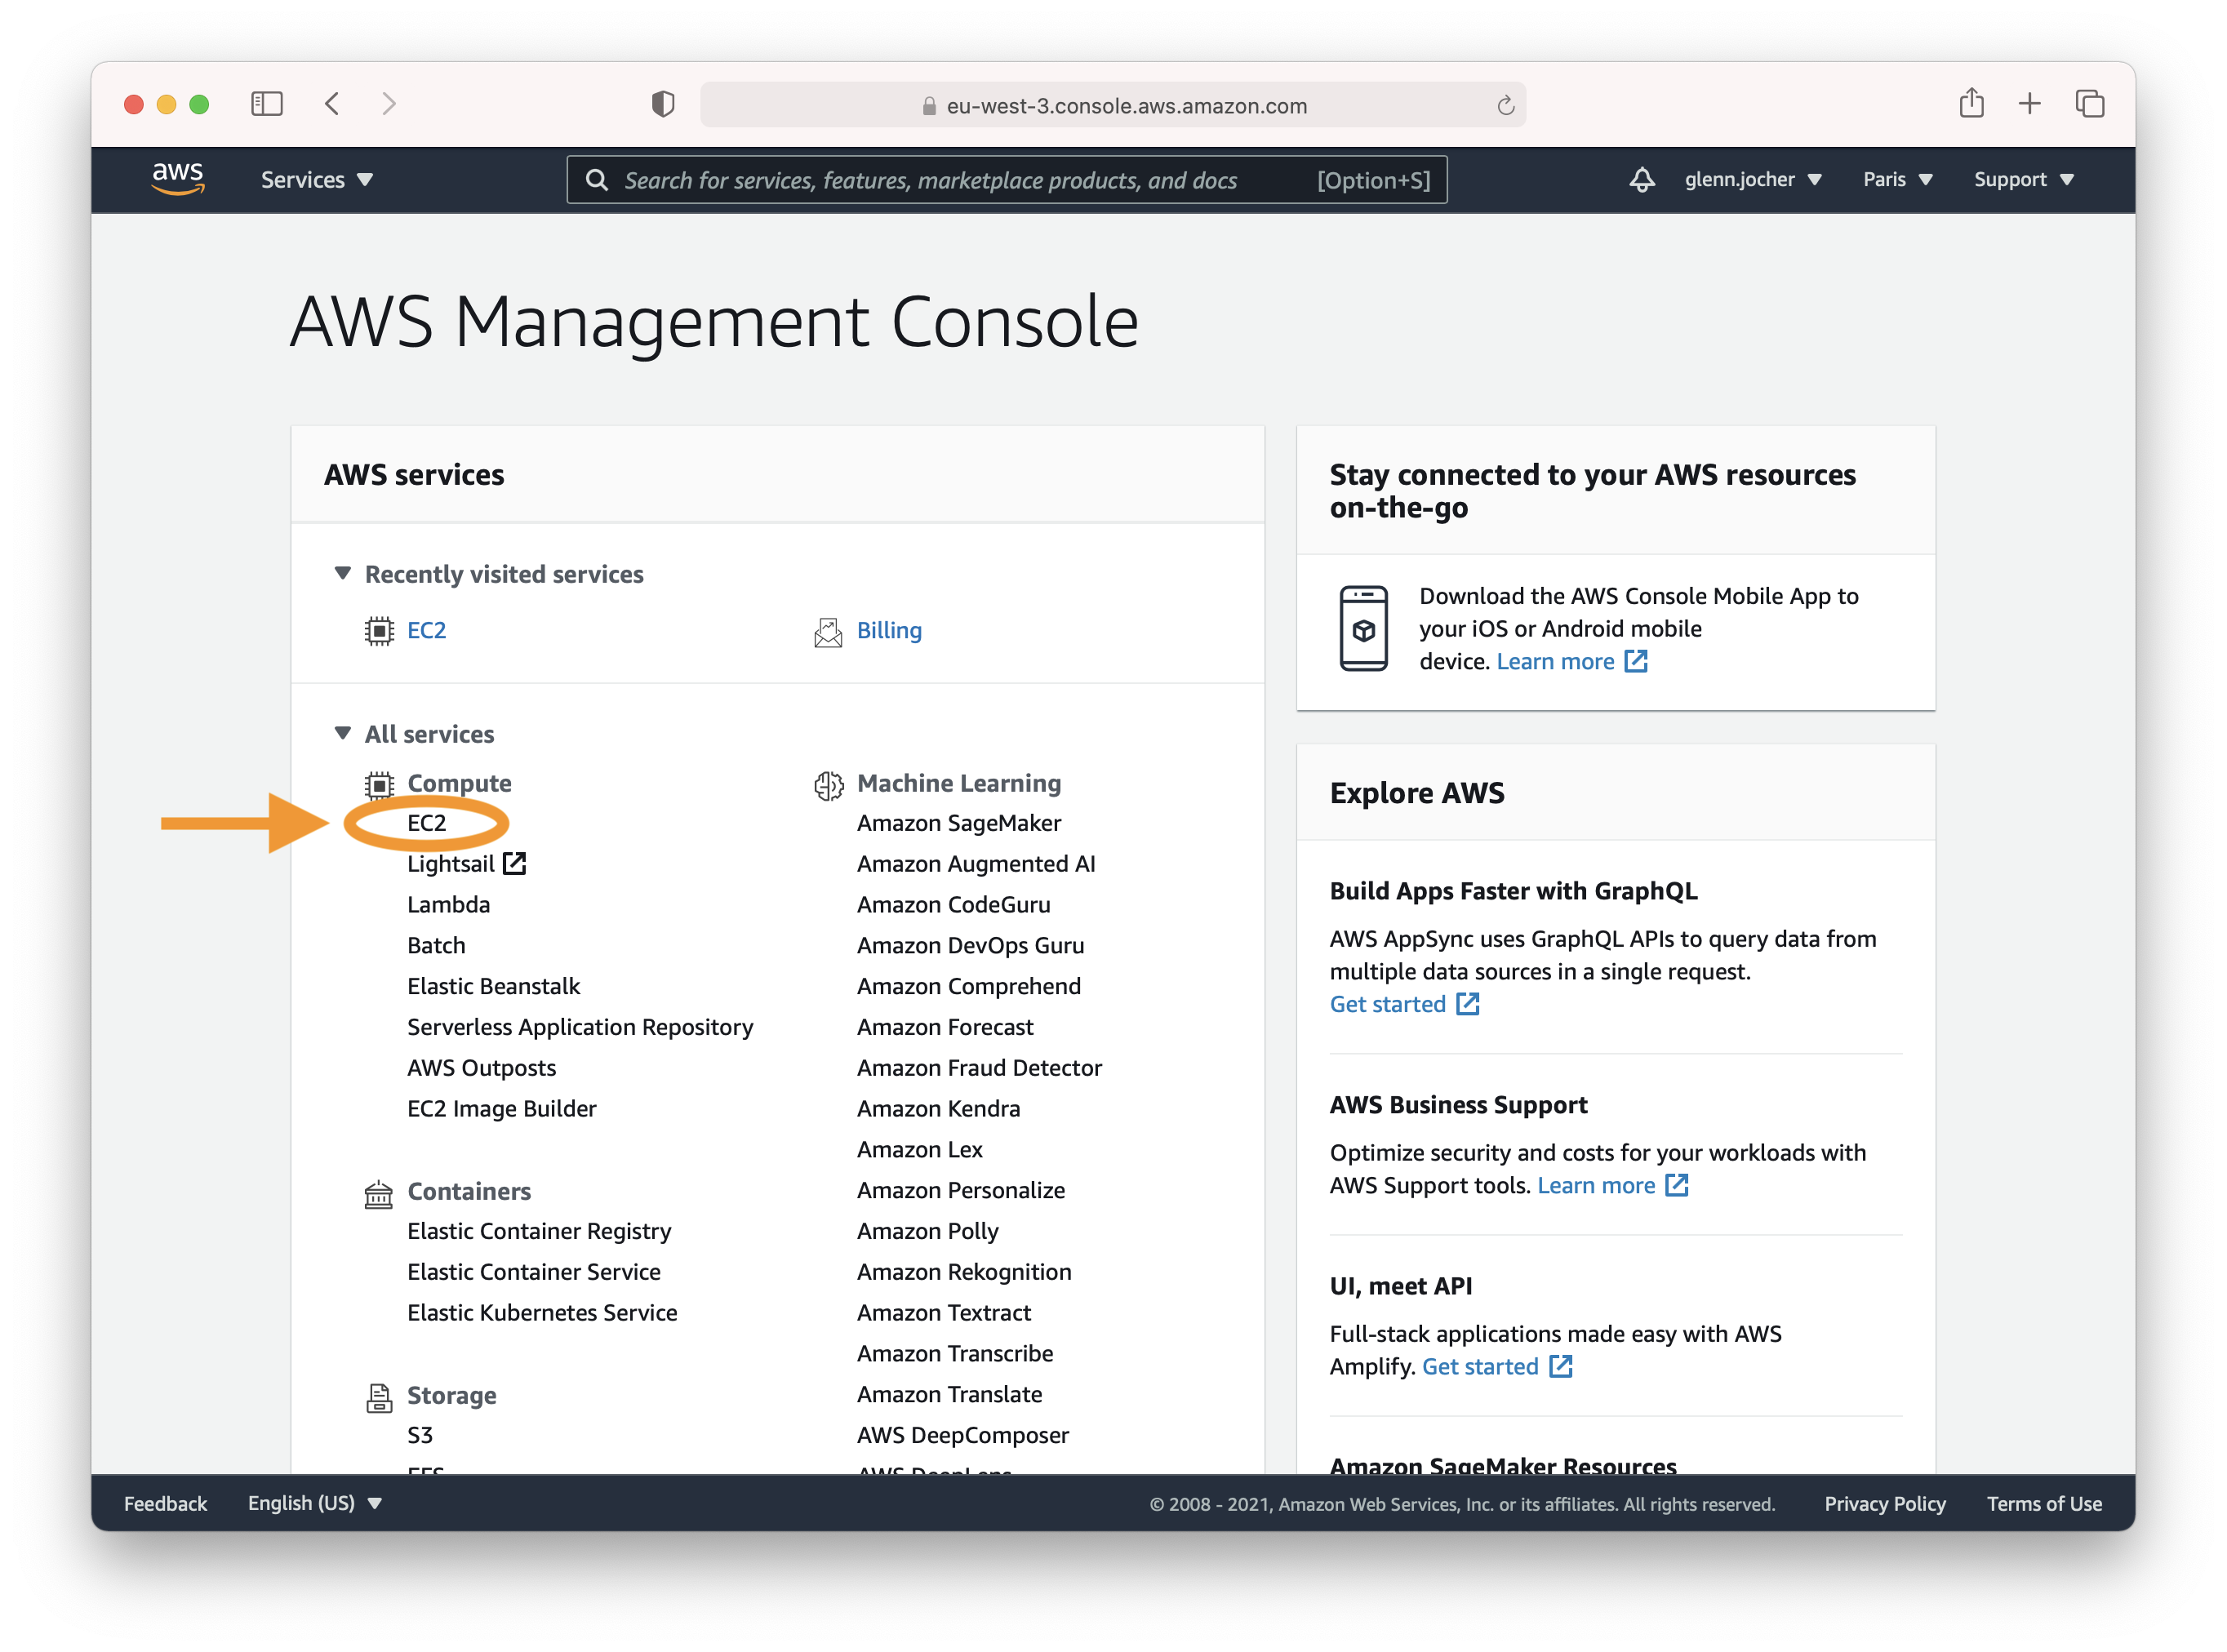
Create and account or sign-in to the AWS console at https://aws.amazon.com/console/ and then select the EC2 service.
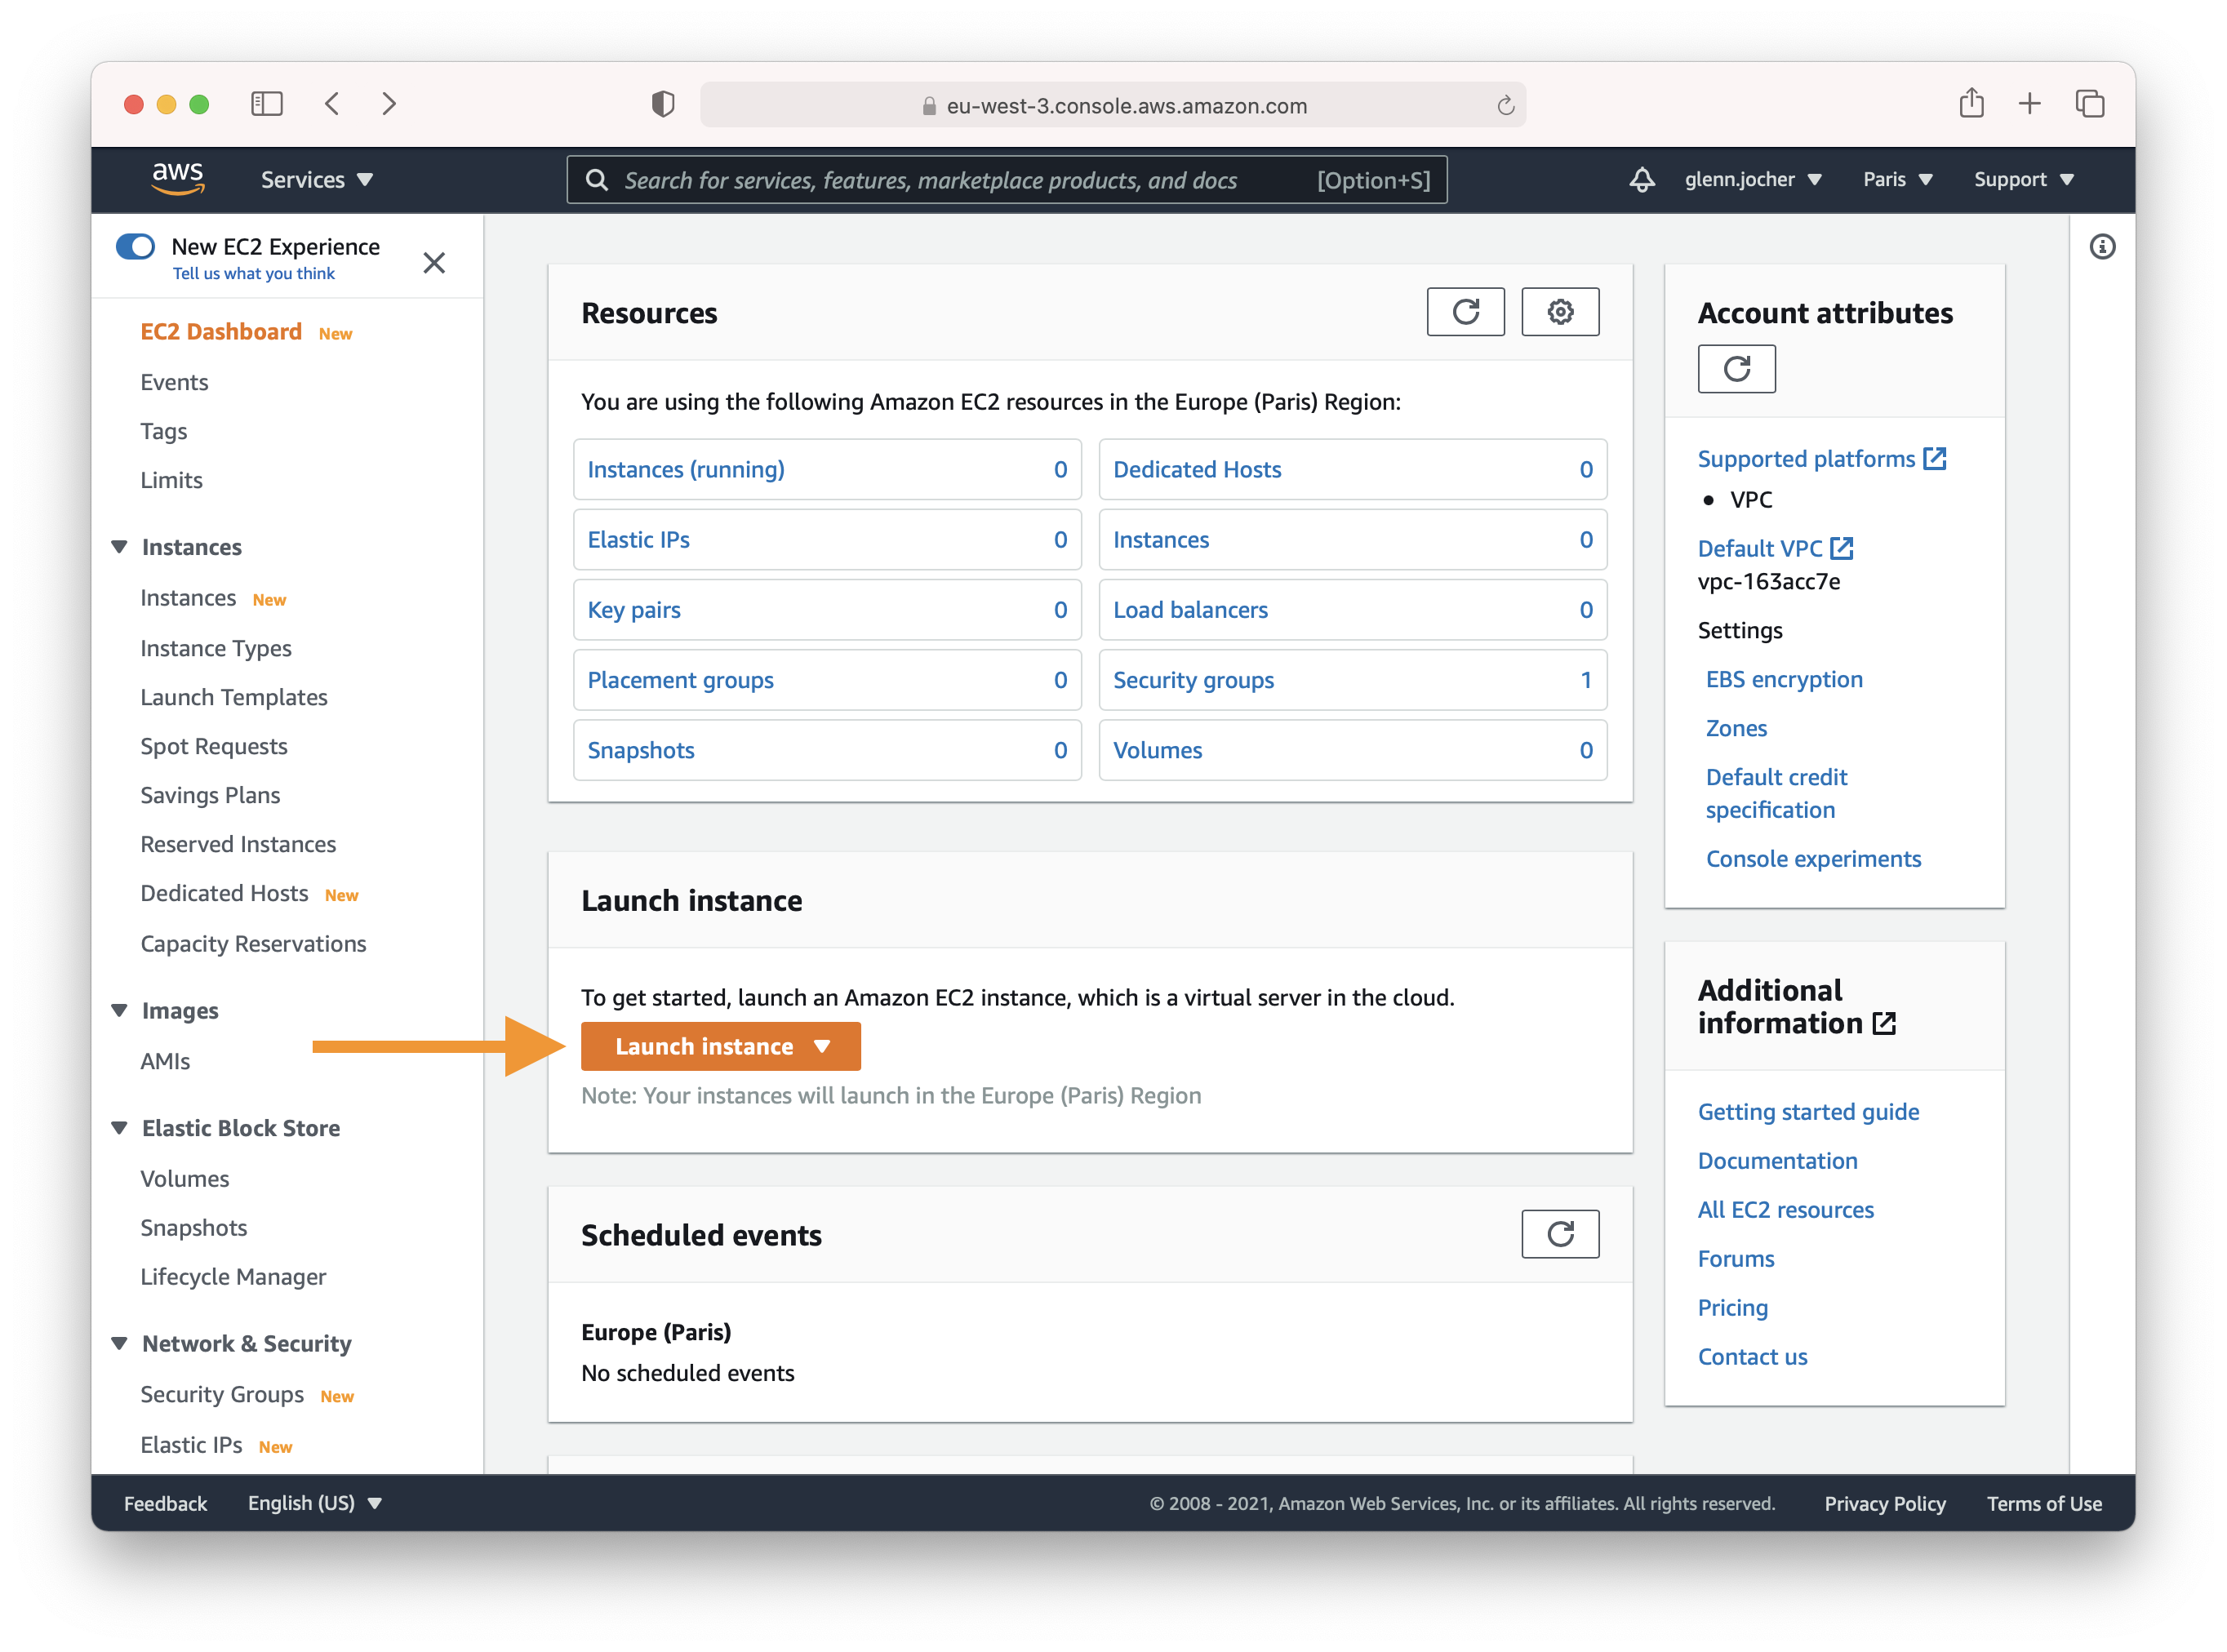
In the EC2 part of the AWS console, click the Launch instance button.
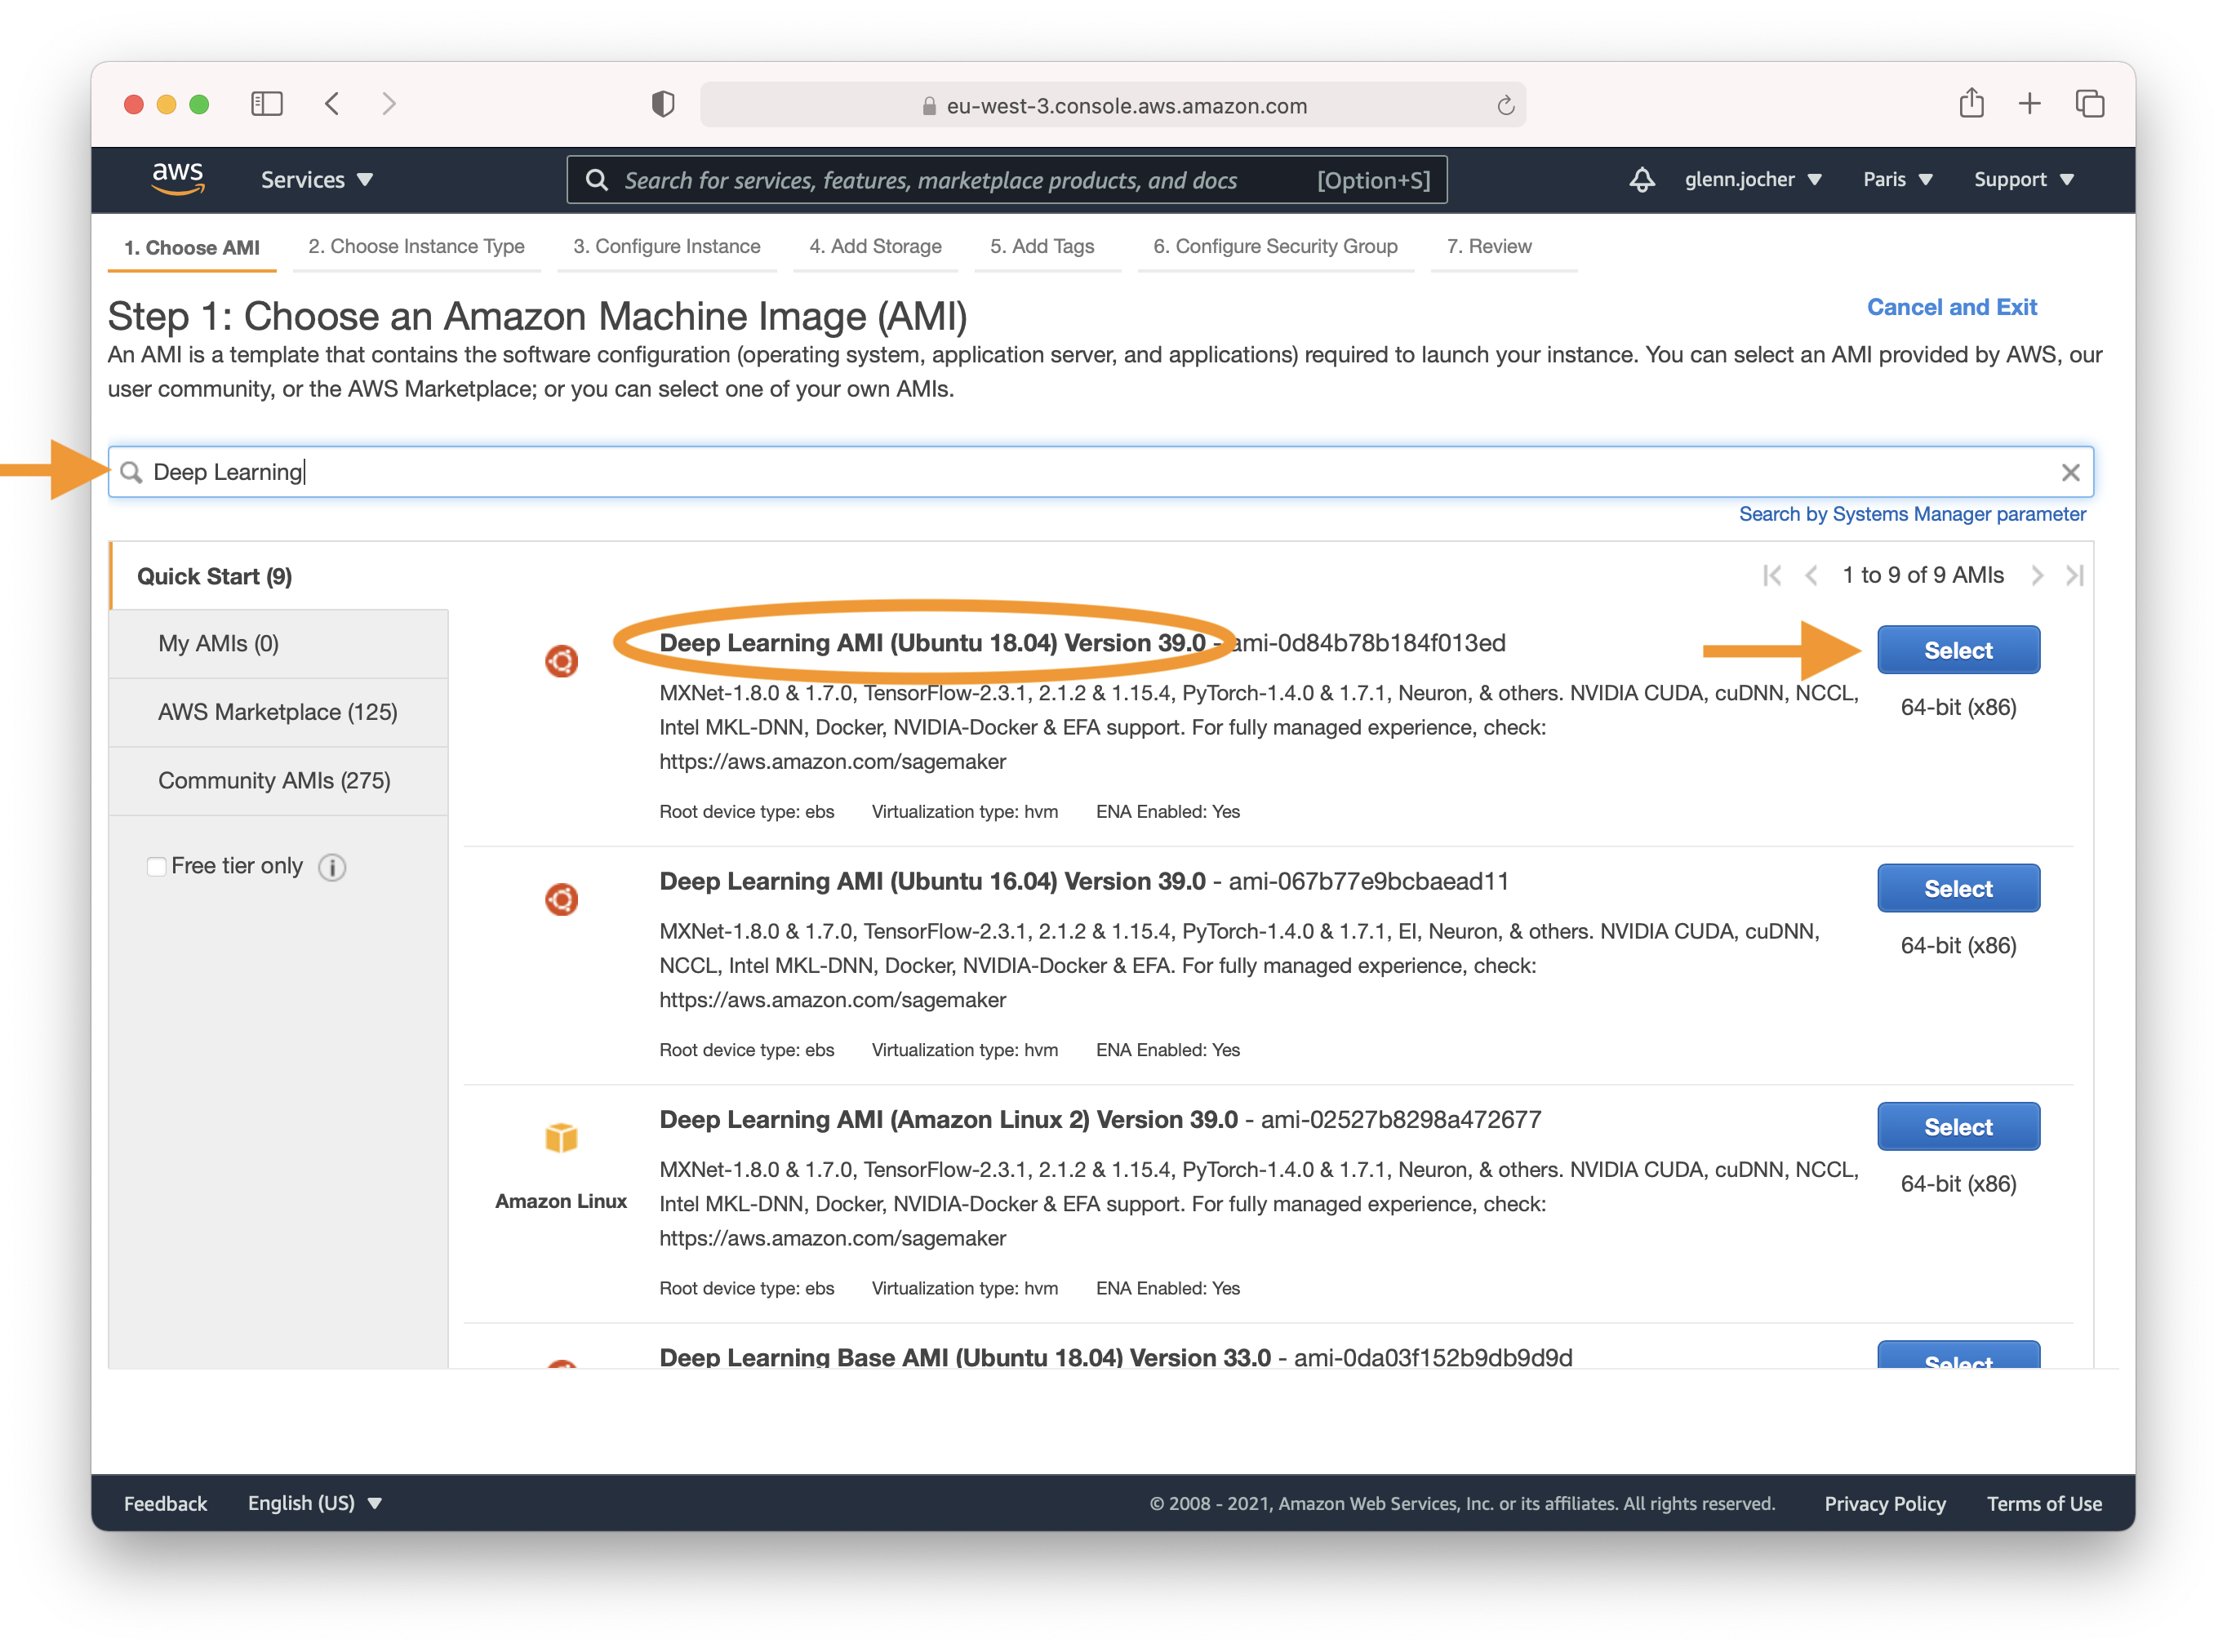
Enter 'Deep Learning' in the search field and select the most recent Ubuntu Deep Learning AMI (recommended), or select an alternative Deep Learning AMI. See Choosing Your DLAMI for more information on selecting an AMI.
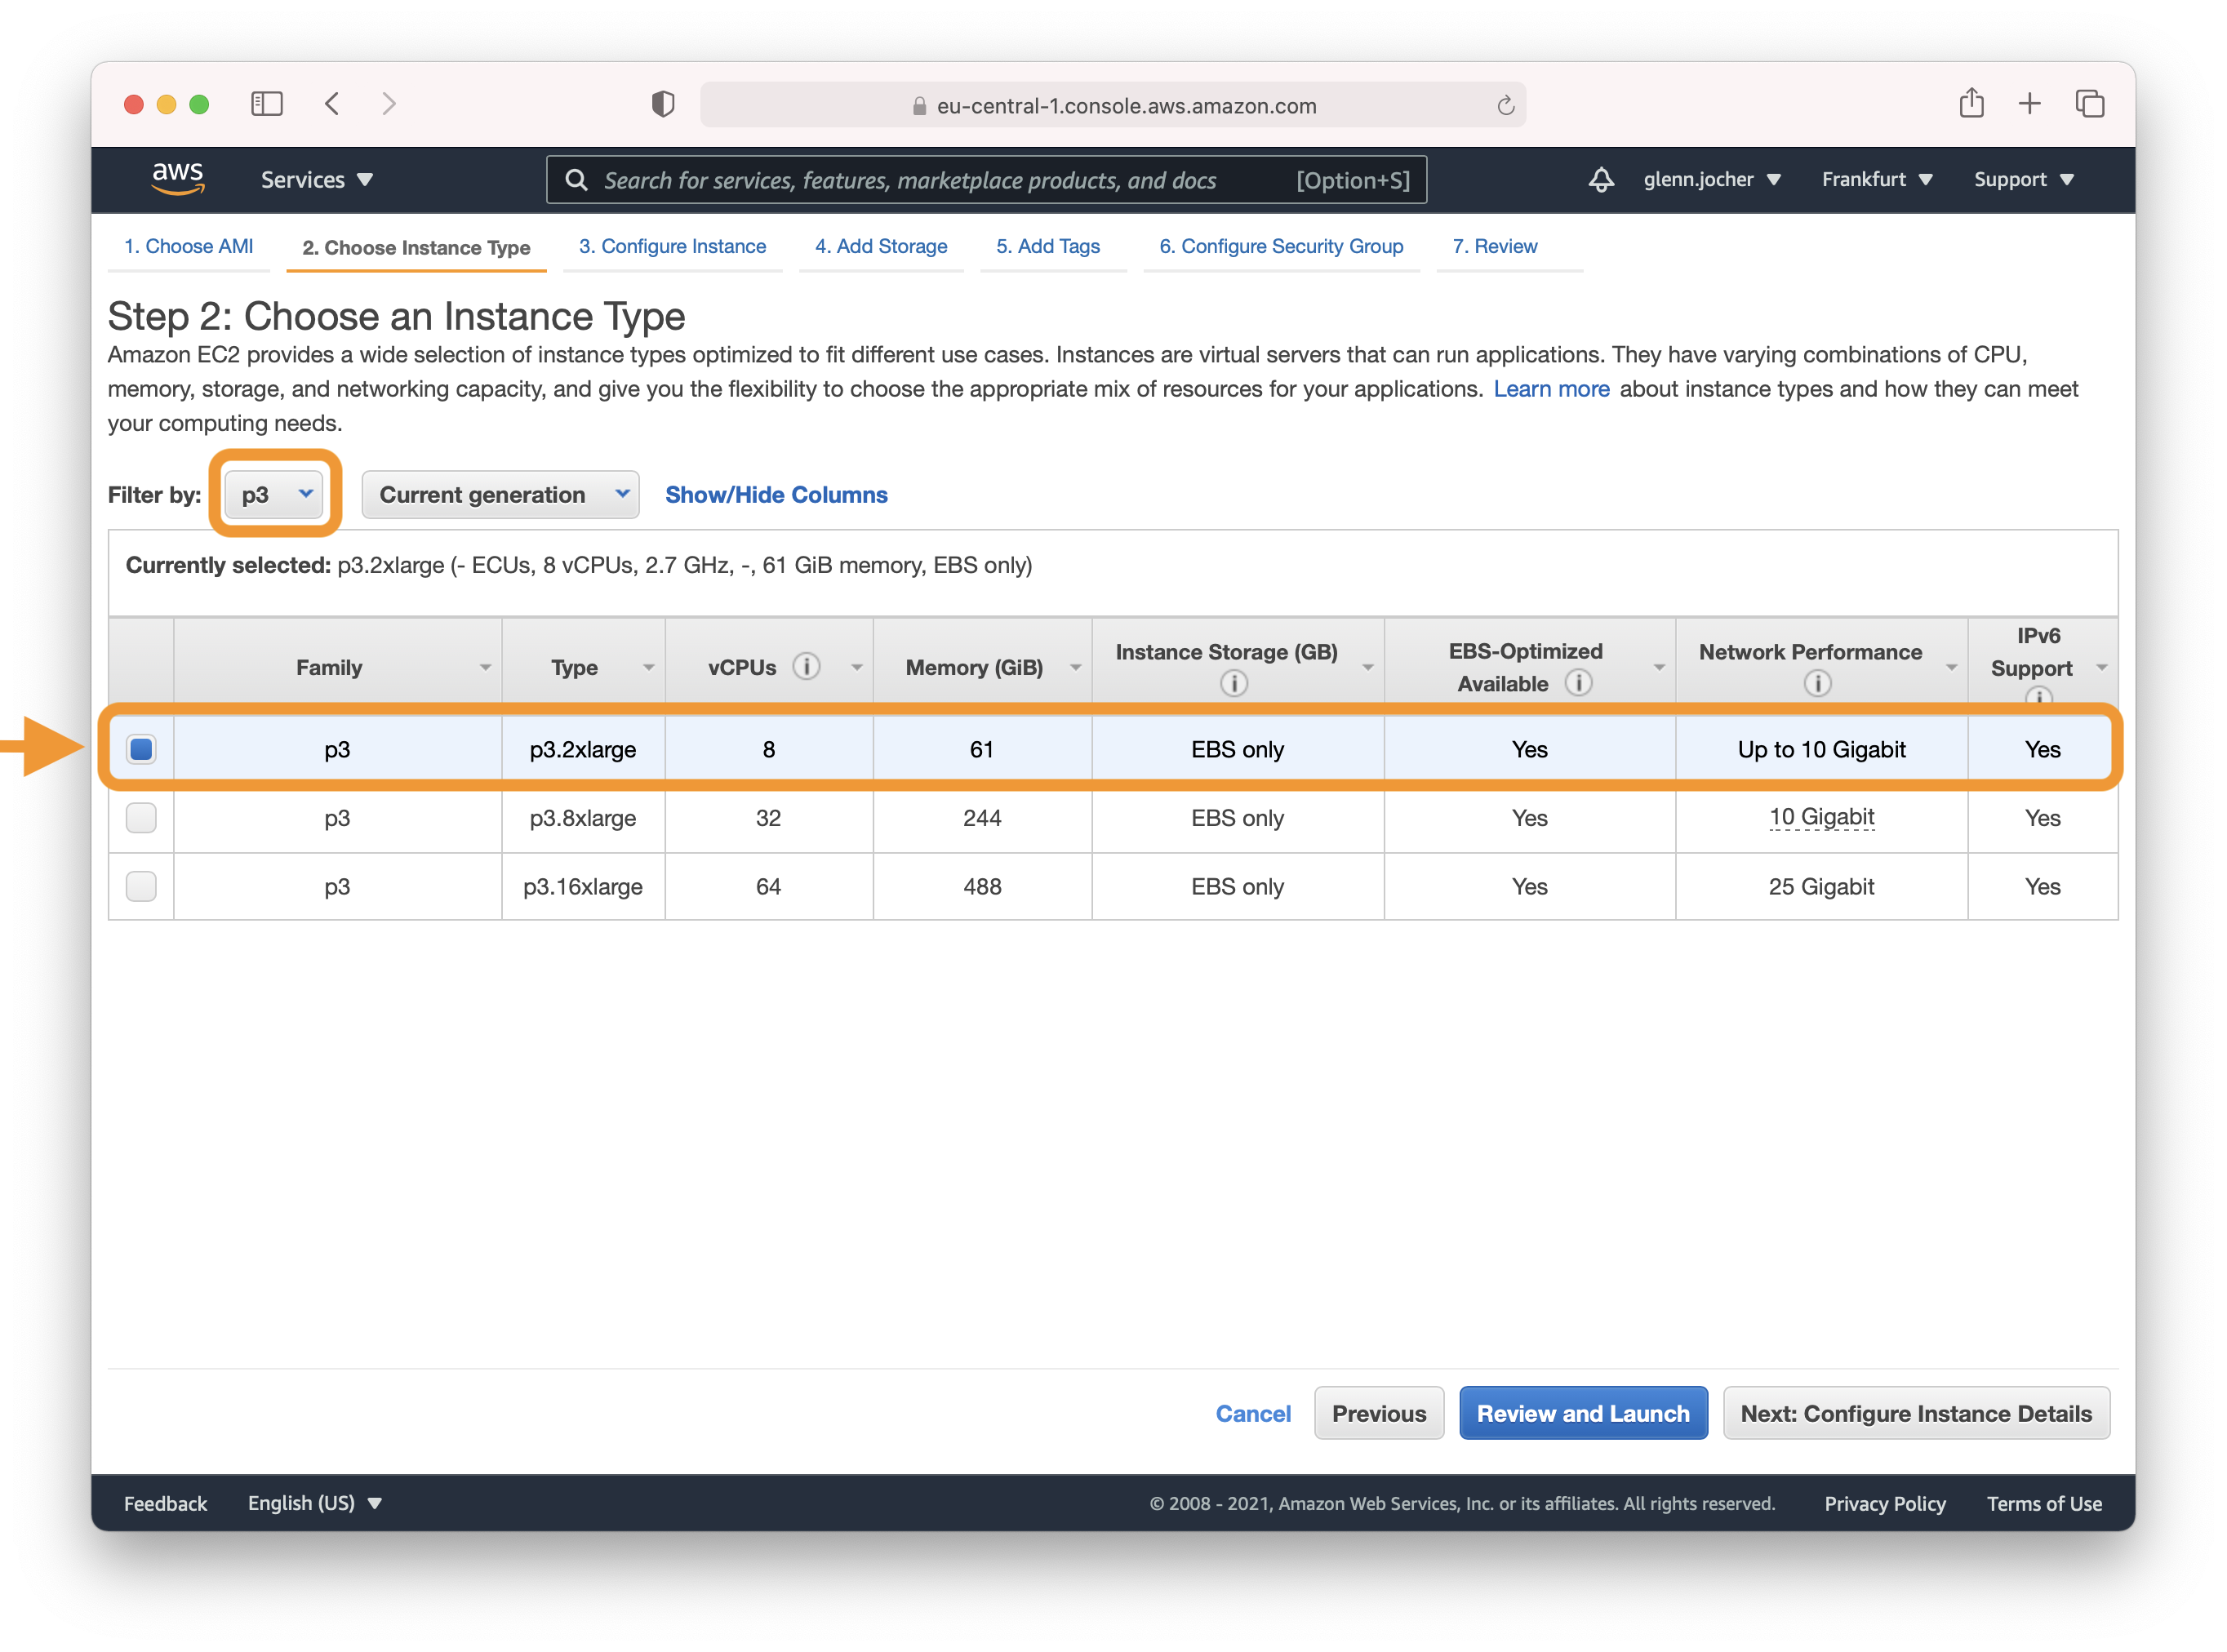
A GPU instance is recommended for most deep learning purposes. Training new models will be faster on a GPU instance than a CPU instance. You can scale sub-linearly when you have multi-GPU instances or if you use distributed training across many instances with GPUs. To set up distributed training, see Distrbuted Training.
Note: The size of your model should be a factor in selecting an instance. If your model exceeds an instance's available RAM, select a different instance type with enough memory for your application.
- Amazon EC2 P3 Instances have up to 8 NVIDIA Tesla V100 GPUs.
- Amazon EC2 P2 Instances have up to 16 NVIDIA NVIDIA K80 GPUs.
- Amazon EC2 G3 Instances have up to 4 NVIDIA Tesla M60 GPUs.
- Amazon EC2 G4 Instances have up to 4 NVIDIA T4 GPUs.
- Amazon EC2 P4 Instances have up to 8 NVIDIA Tesla A100 GPUs.
Check out EC2 Instance Types and choose Accelerated Computing to see the different GPU instance options.
DLAMI instances provide tooling to monitor and optimize your GPU processes. For more information on overseeing your GPU processes, see GPU Monitoring and Optimization. For pricing see On Demand Pricing and Spot Pricing.
Amazon EC2 Spot Instances let you take advantage of unused EC2 capacity in the AWS cloud. Spot Instances are available at up to a 70% discount compared to On-Demand prices. We recommend a persistent spot instance, which will save your data and restart automatically when spot instance availability returns after spot instance termination. For full-price On-Demand instances leave these settings to their default values.
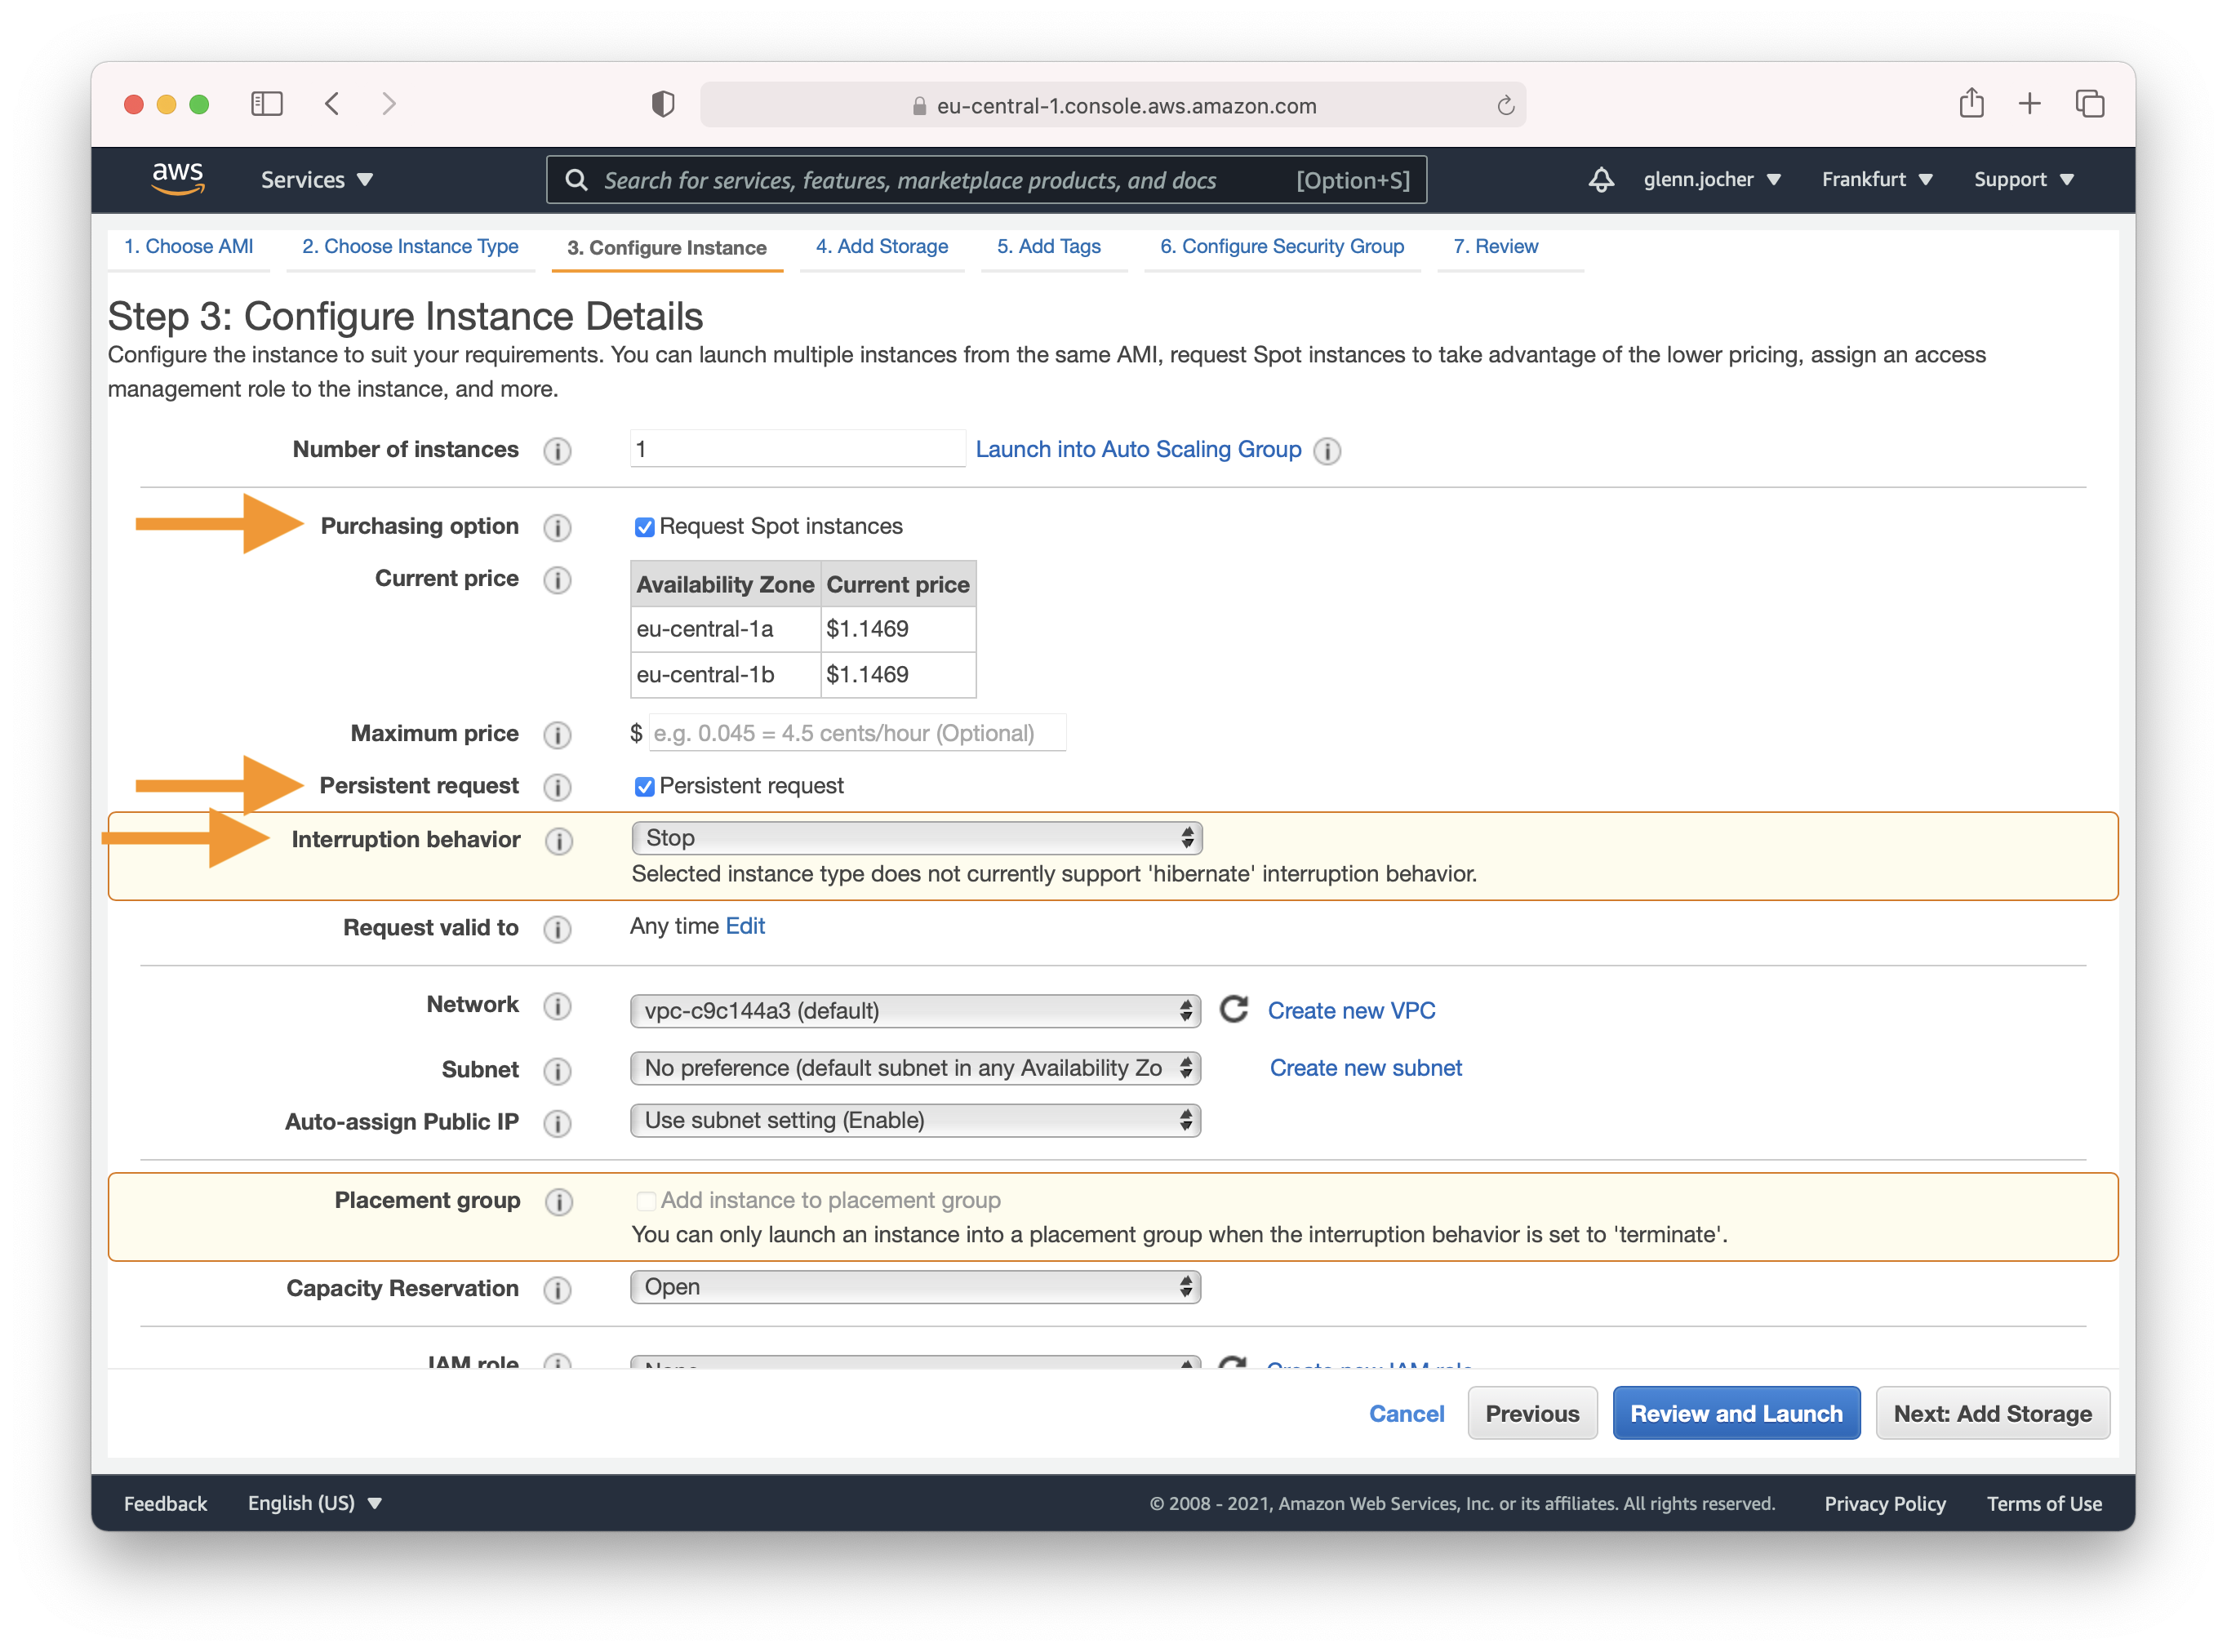
Complete Steps 4-7 to finalize your instance hardware and security settings and then launch the instance.
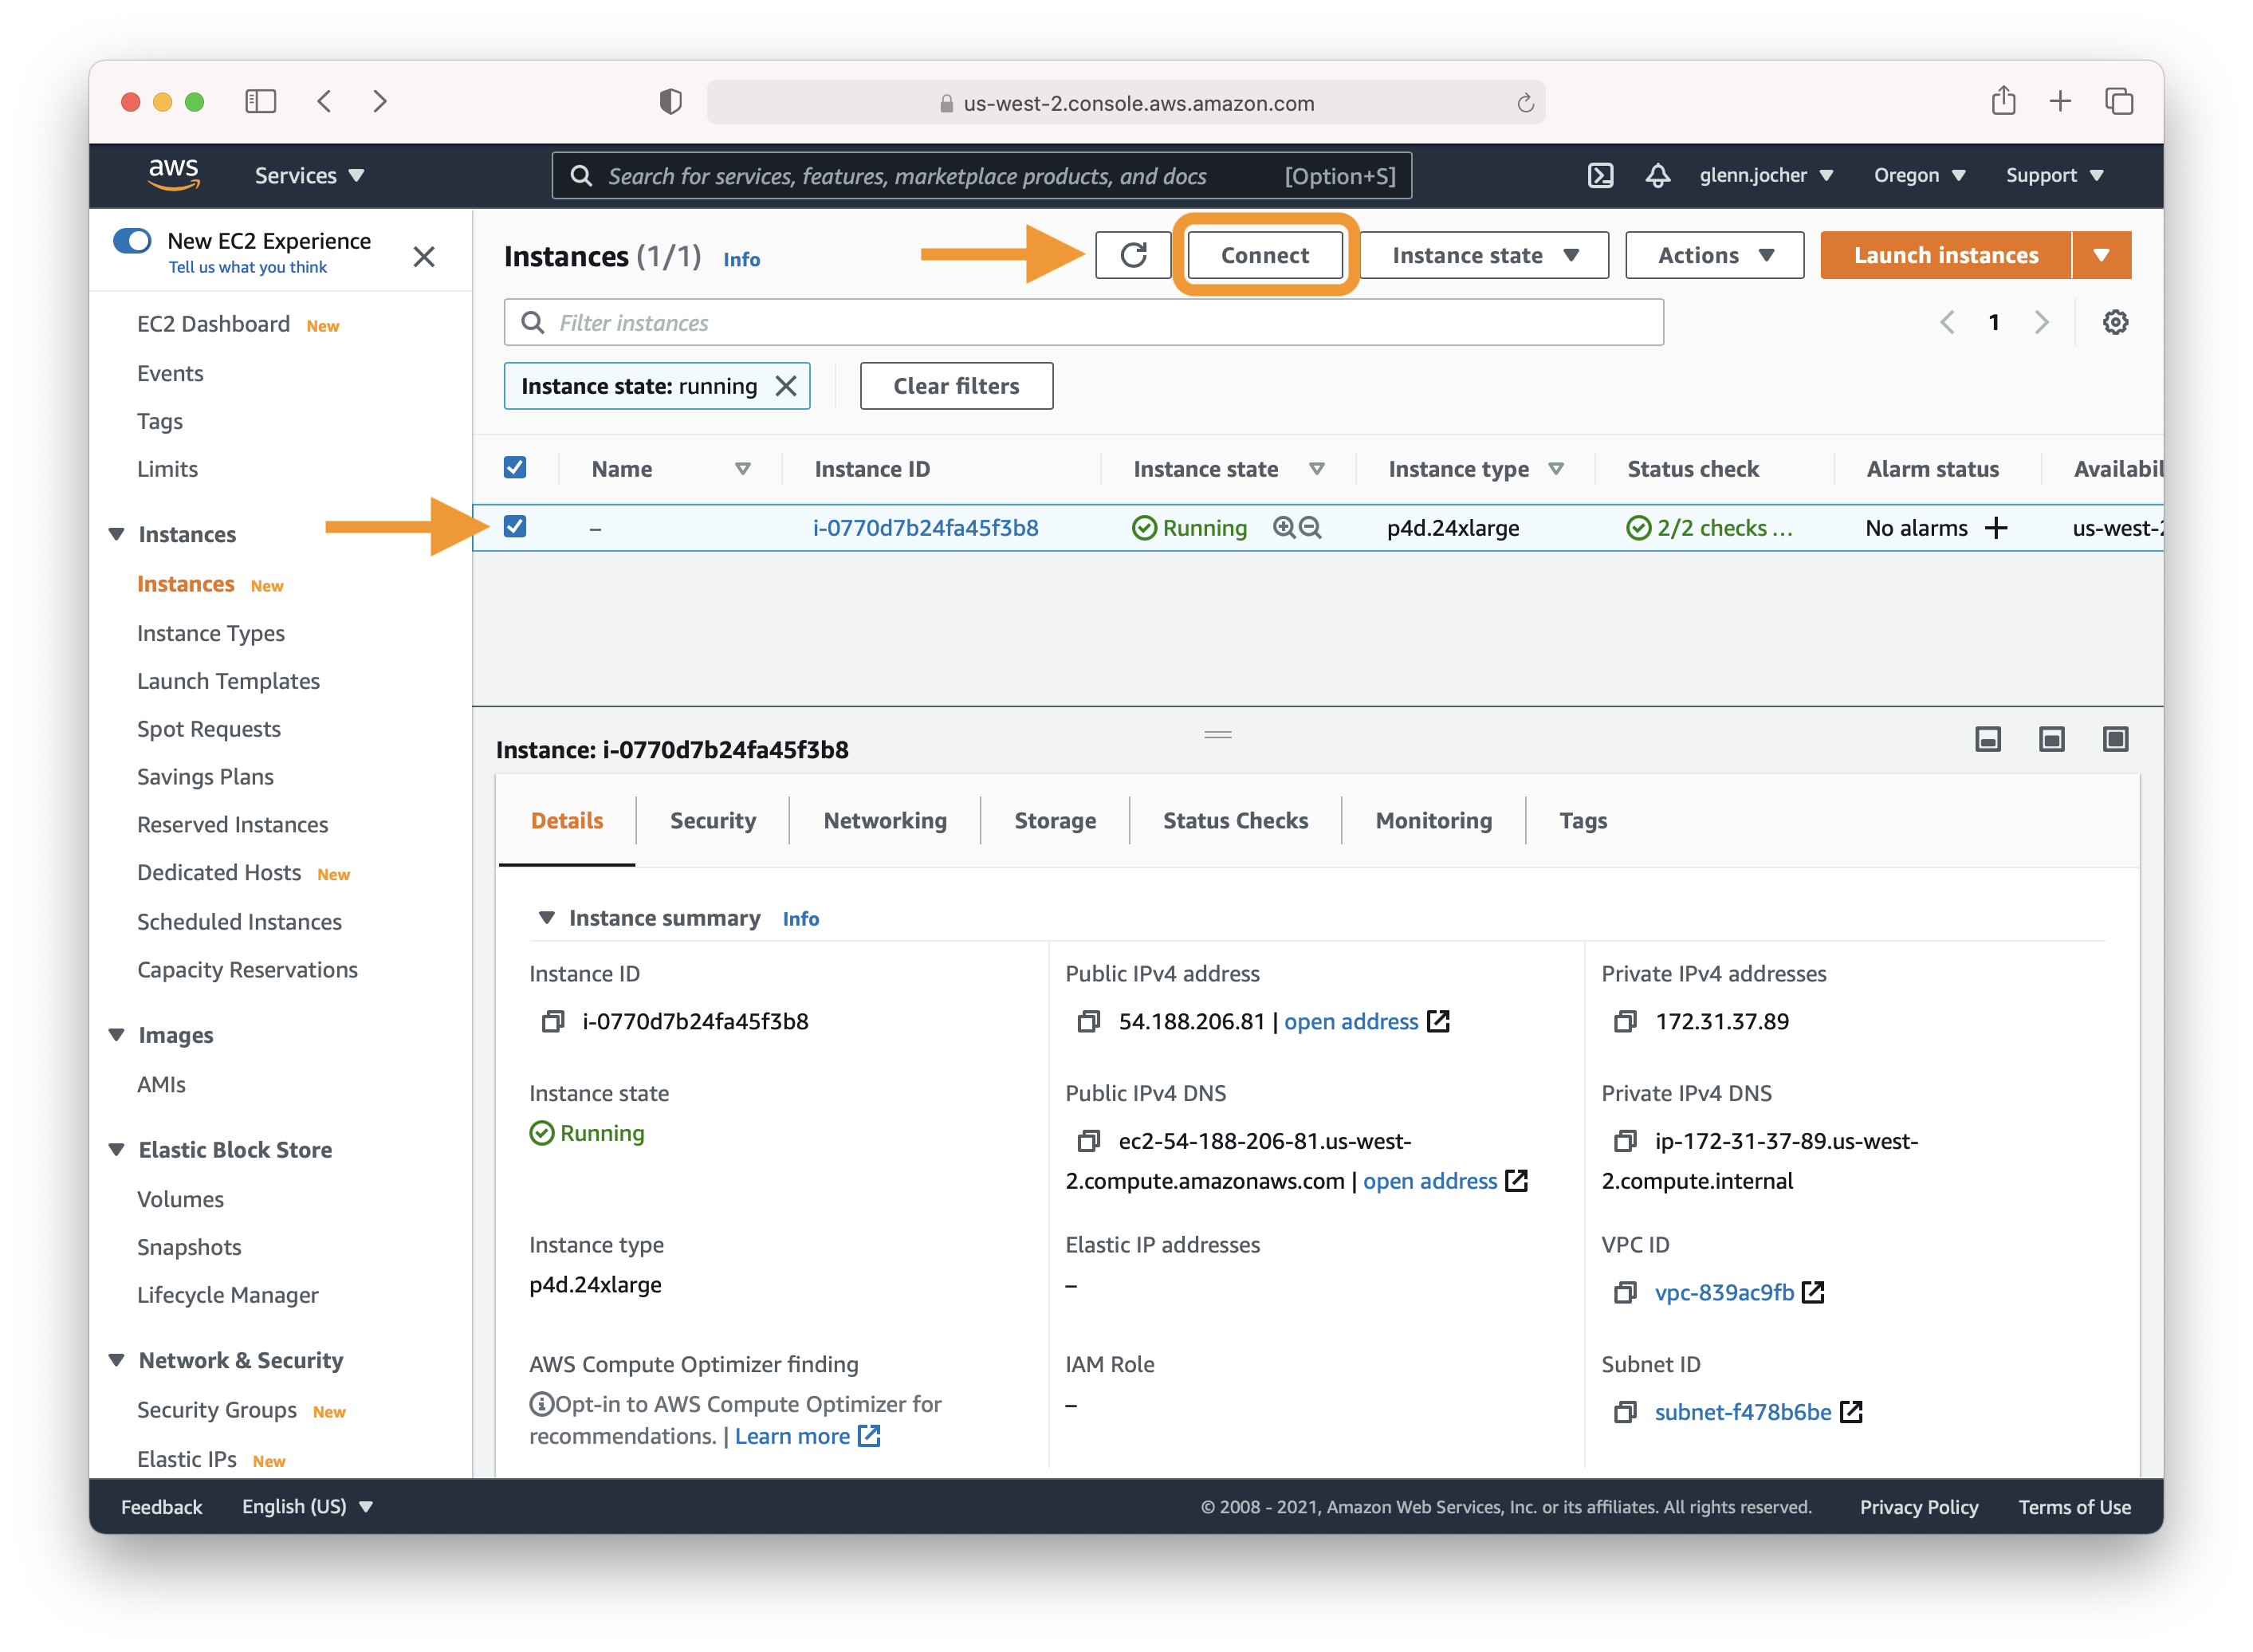
Select the check box next to your running instance, and then click connect. You can copy paste the SSH terminal command into a terminal of your choice to connect to your instance.
Once you have logged in to your instance, clone this repo and install requirements.txt dependencies, including Python>=3.8 and PyTorch>=1.7.
$ git clone https://github.com/ultralytics/yolov5  # clone repo
$ cd yolov5
$ pip install -r requirements.txt  # install dependencies
Then get started training, testing and detecting!
$ python train.py  # train a model
$ python test.py --weights yolov5s.pt  # test a model for Precision, Recall and mAP
$ python detect.py --weights yolov5s.pt --source path/to/images # run inference on images and videosAdd 64GB of swap memory (to --cache large datasets).
sudo fallocate -l 64G /swapfile
sudo chmod 600 /swapfile
sudo mkswap /swapfile
sudo swapon /swapfile
free -h  # check memory