ChiliPeppr PCB Auto Level
You can now auto-level PCBs using your TinyG inside the ChiliPeppr Hardware Fiddle app. TinyG has a new command available in later firmware revisions such as revision 435.10 or above. The command is G38.2 and it allows you to use one of TinyG's limit/homing switches as a probing method. If you send a G38.2 Z-10 F20 you will get a Z movement in the negative direction until the Z Min switch is triggered. By connecting a wire to your end mill and another wire to your blank PCB you can probe your PCB and deduce its warpage.
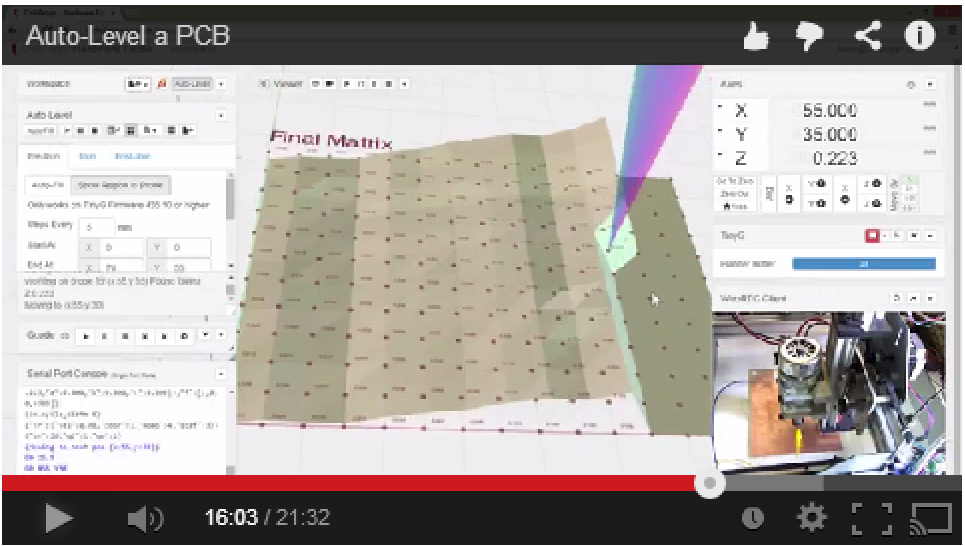
This video walks you through the entire probing process from start to finish.
-
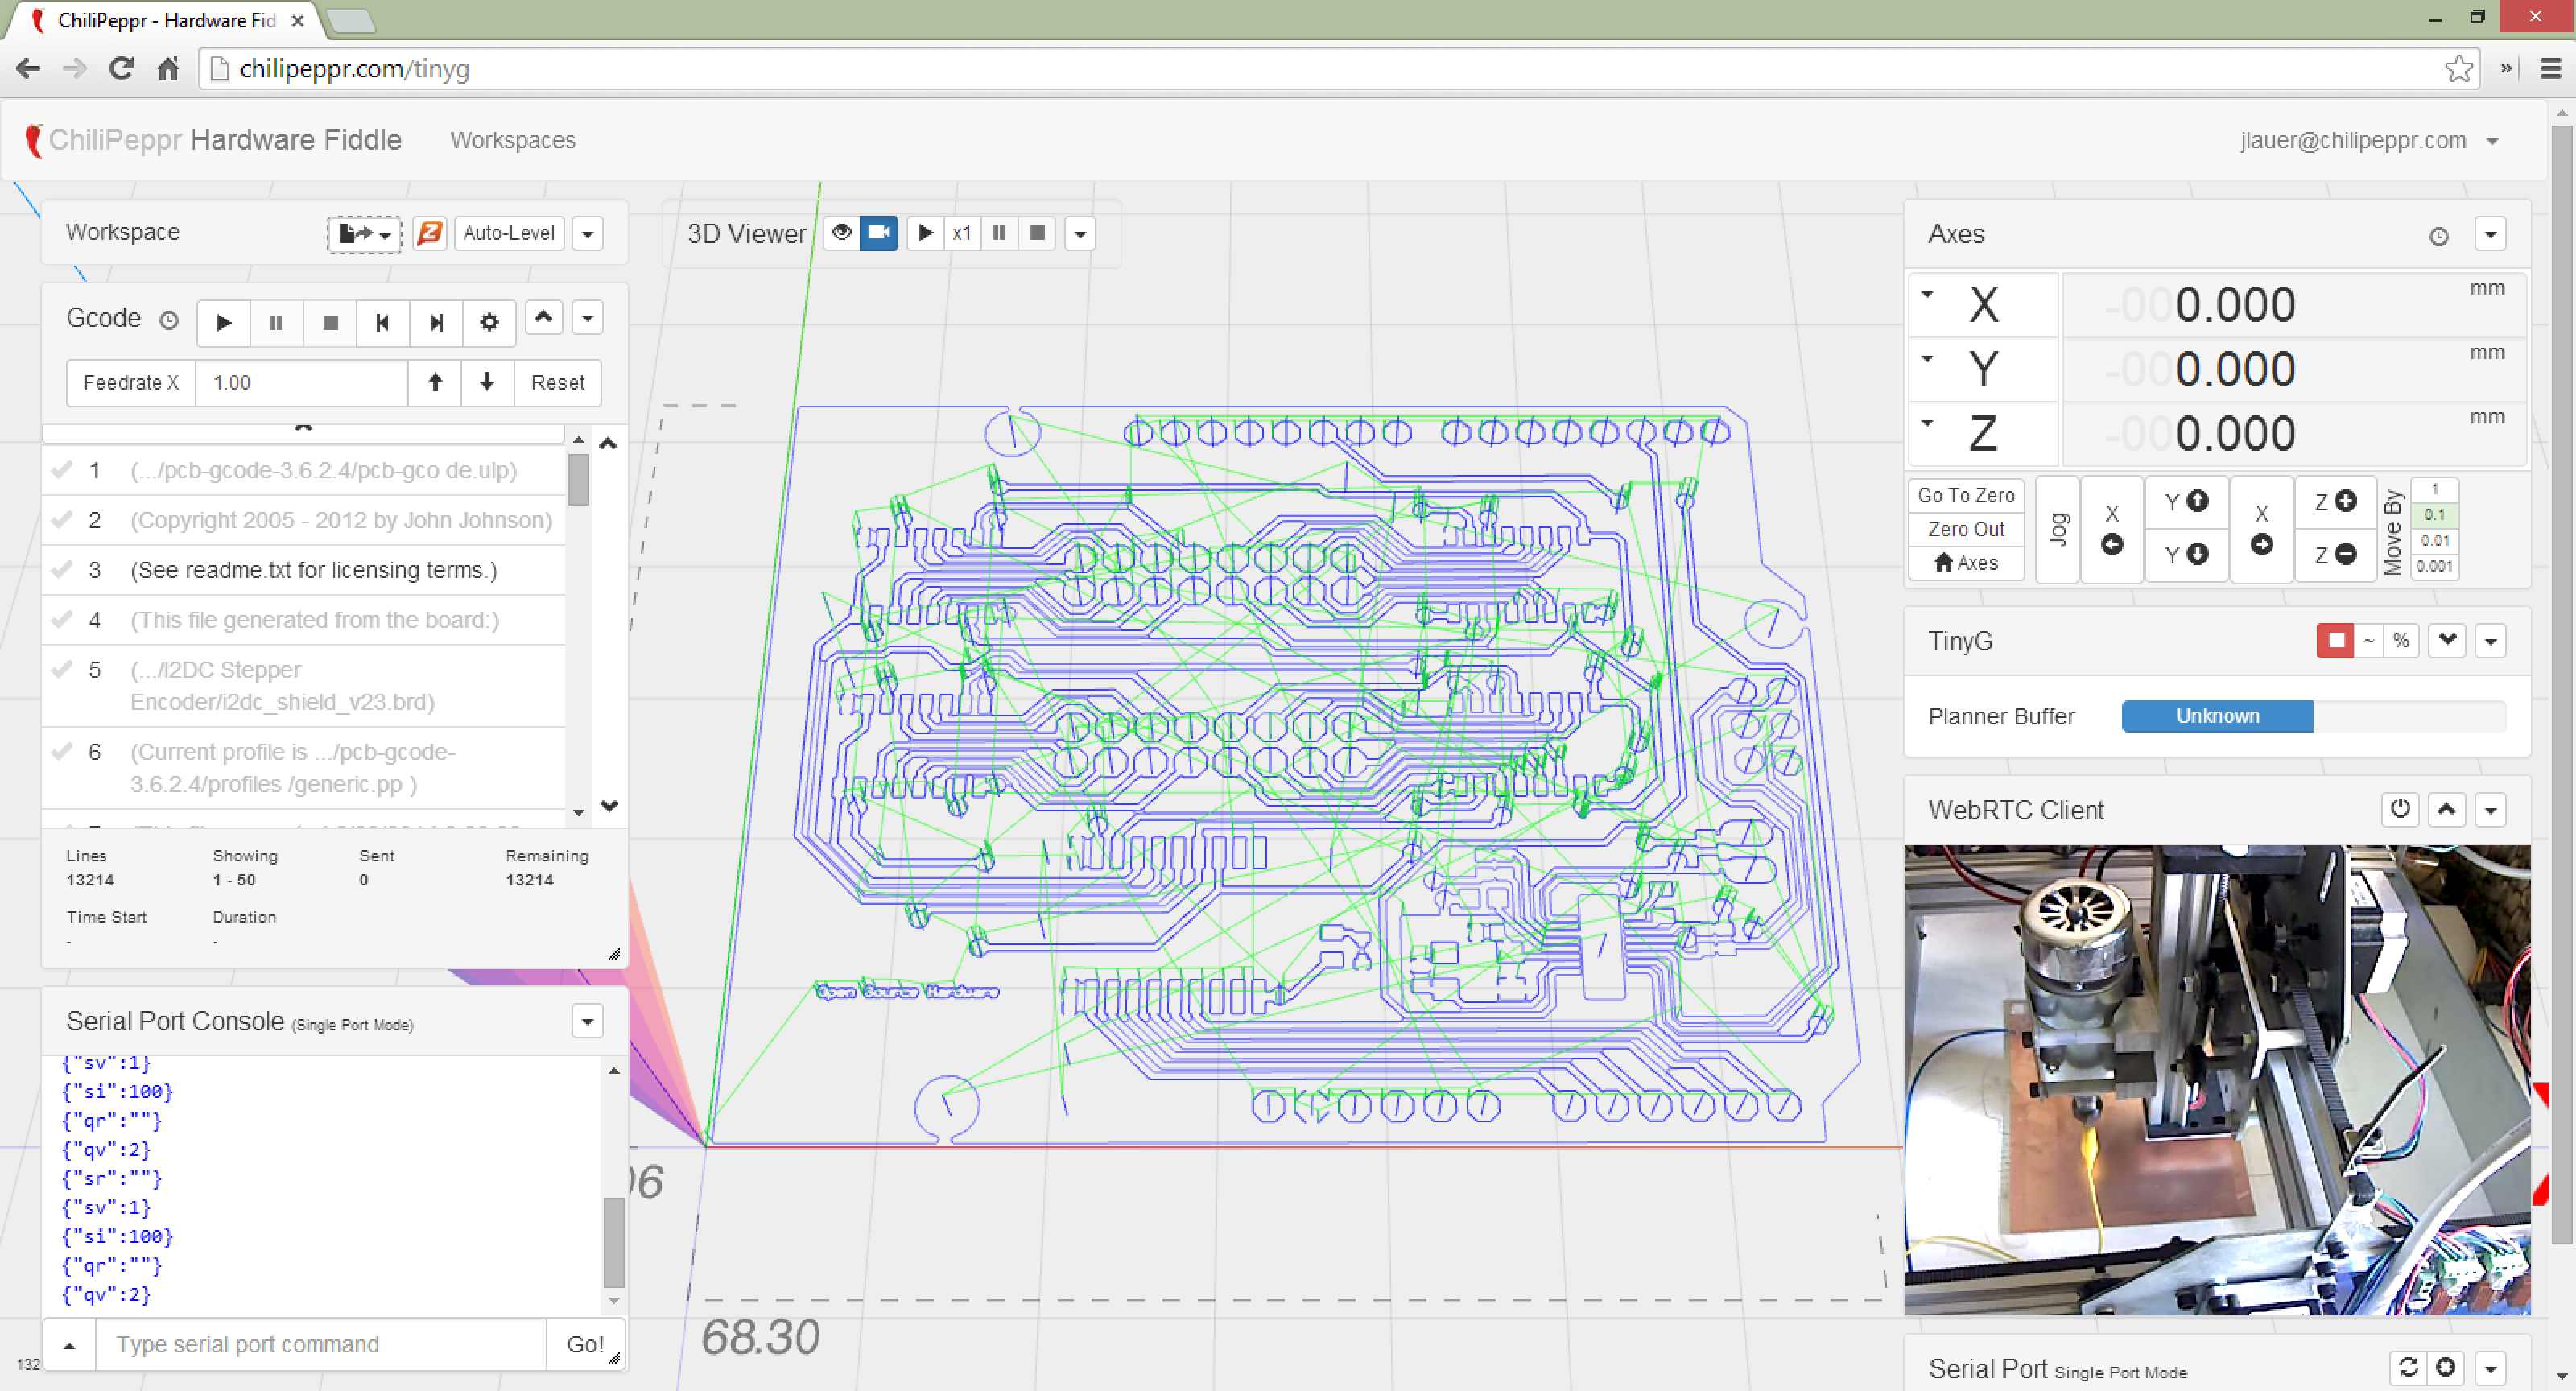
Load up http://chilipeppr.com/tinyg in your browser. This will bring up the official TinyG workspace.
-
Load up your PCB Gcode. Most people create their circuit board in Eagle CAD and then use the PCB-Gcode plugin to generate their isolation Gcode for milling.
- Click the "Auto-Level" button in the workspace toolbar. You will get an auto-filled analysis of your Gcode to find the extents to figure out the probing matrix.
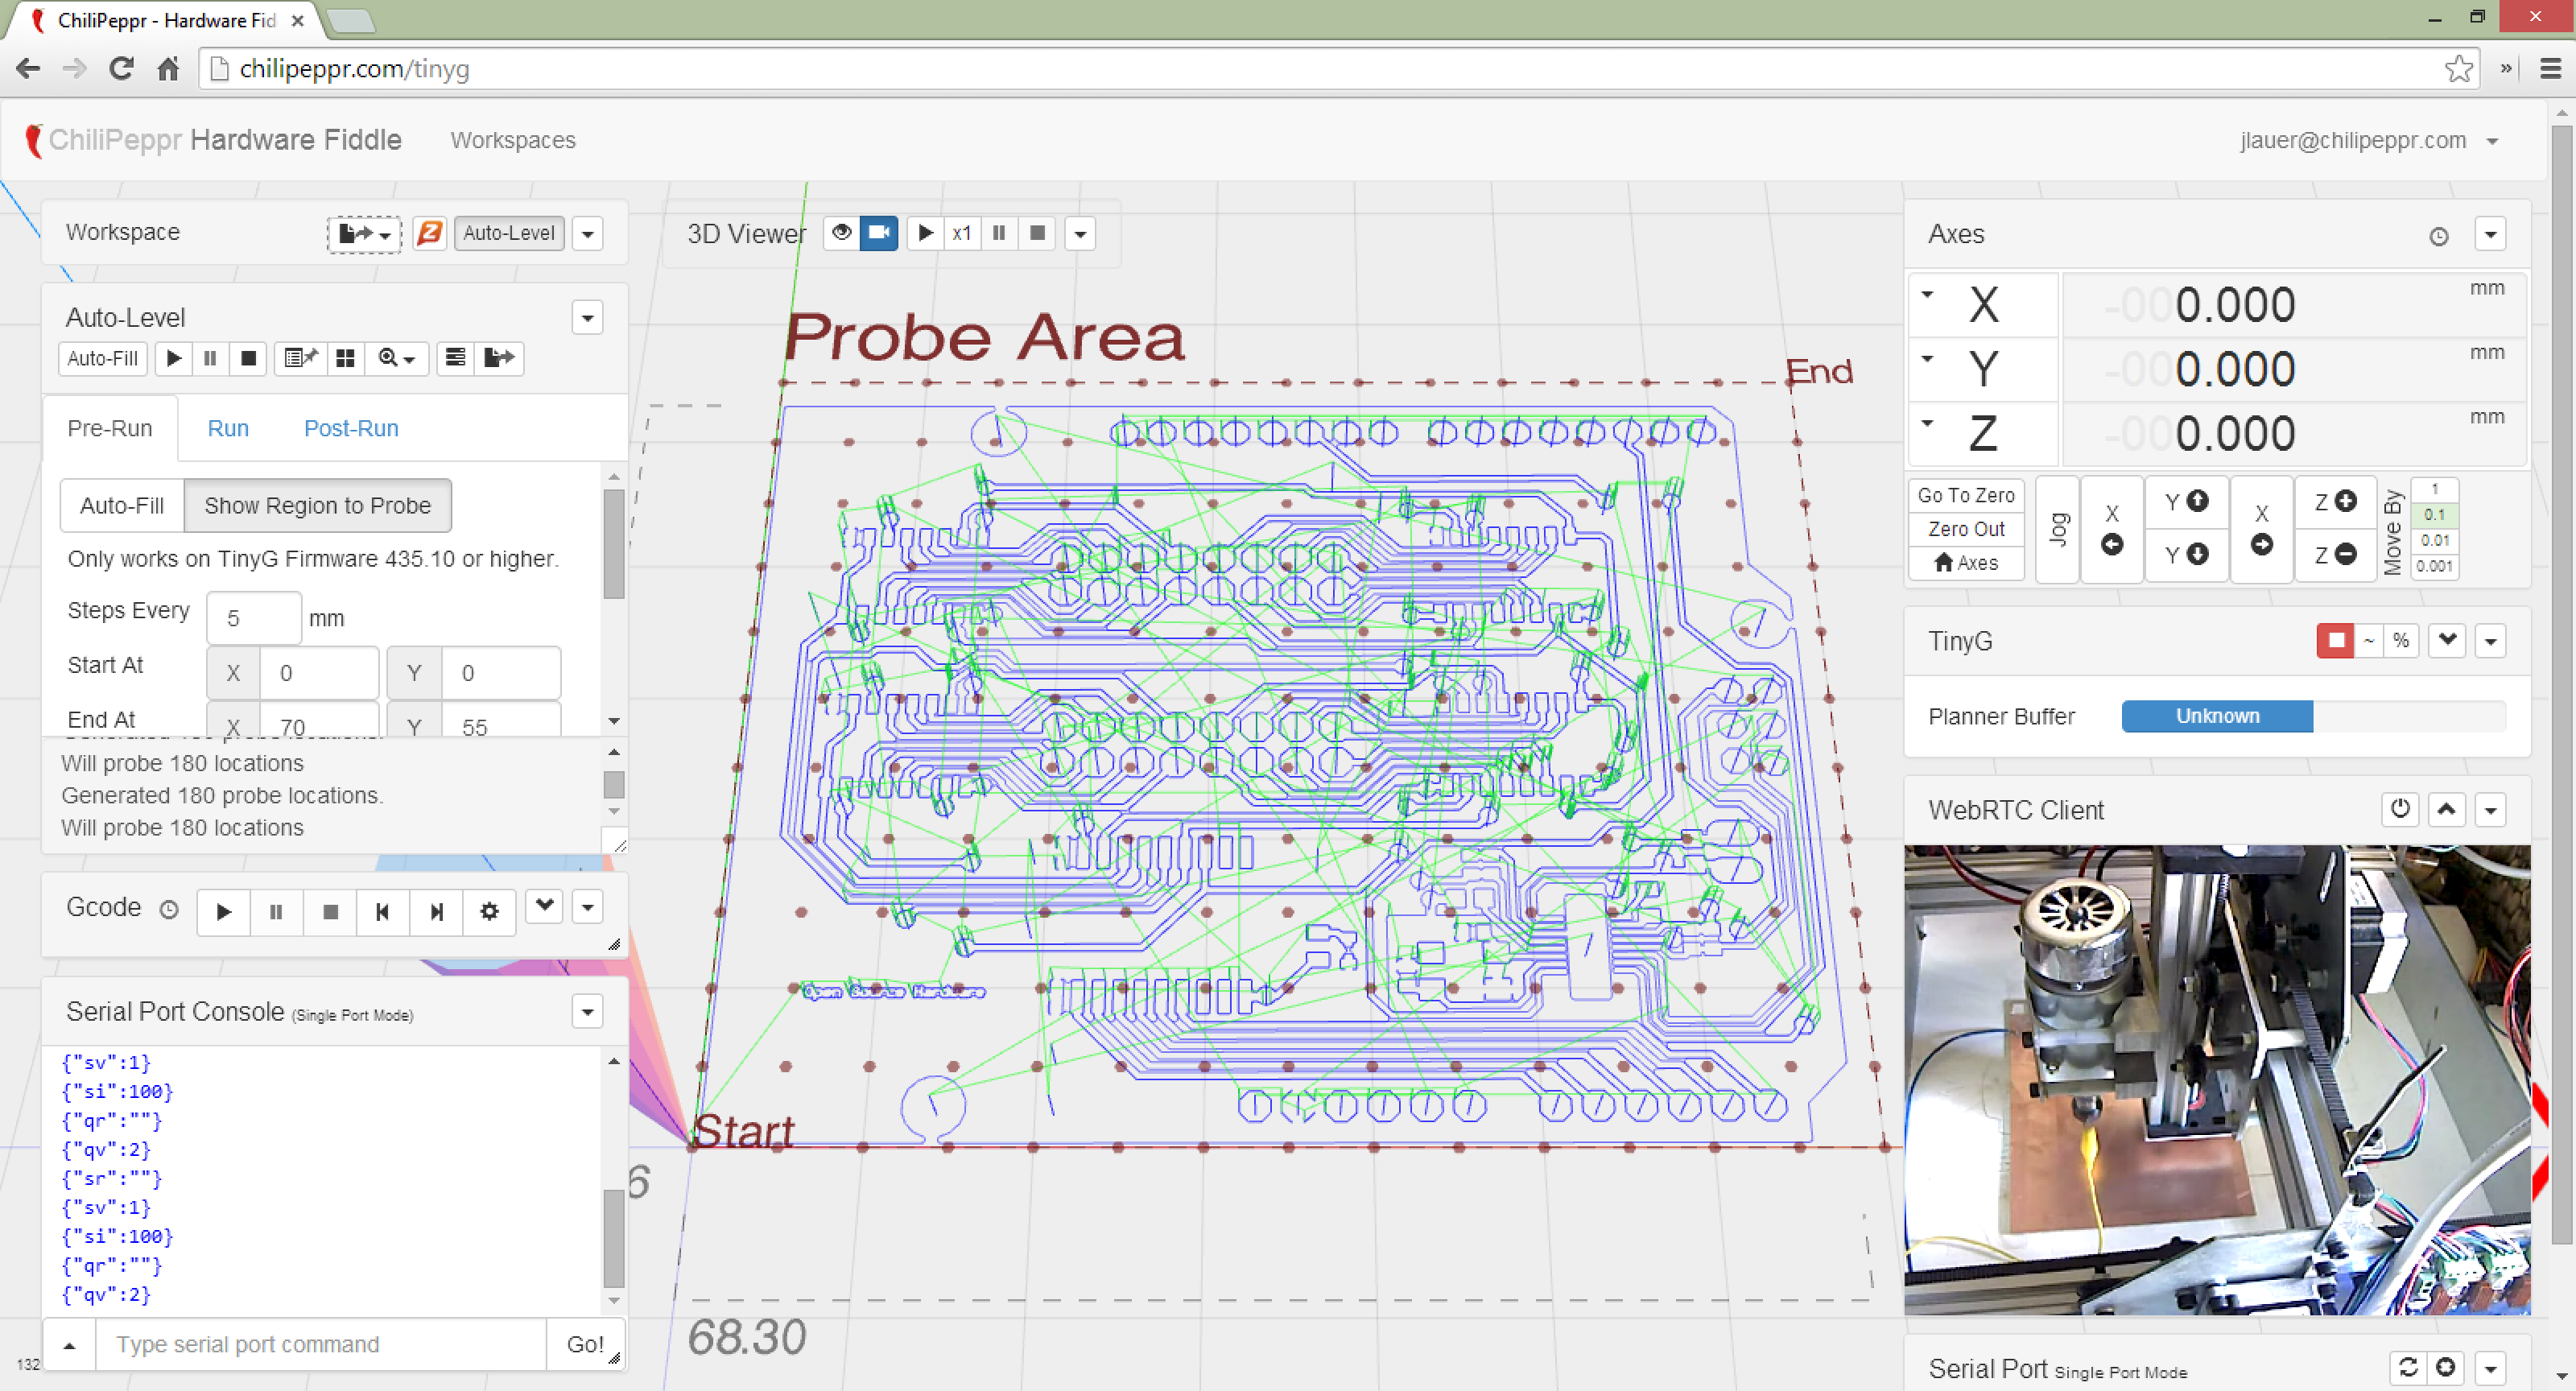
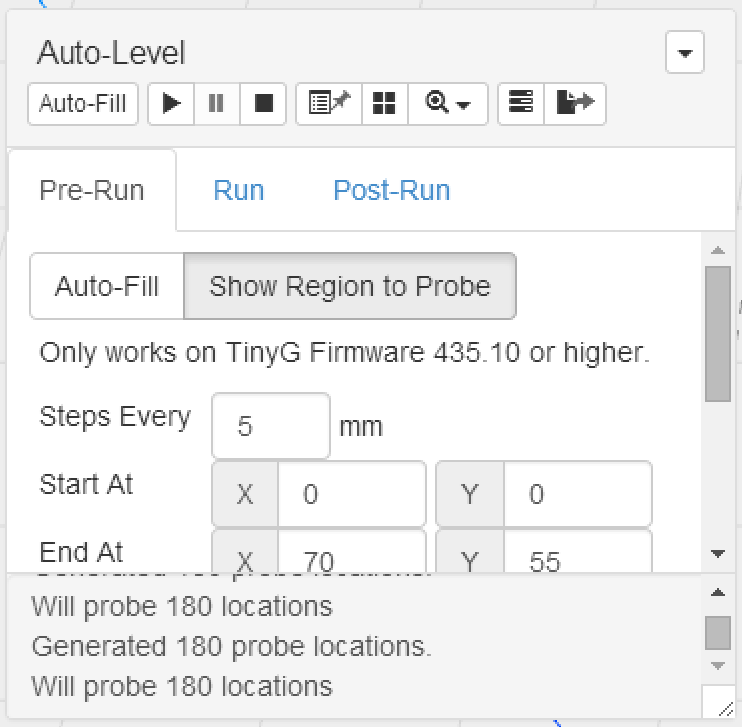
- You can tweak the settings in the Pre-Run tab to change the region of the board you'll probe, how fast the probe runs in terms of feedrate, the Z clearance height and safety depth.
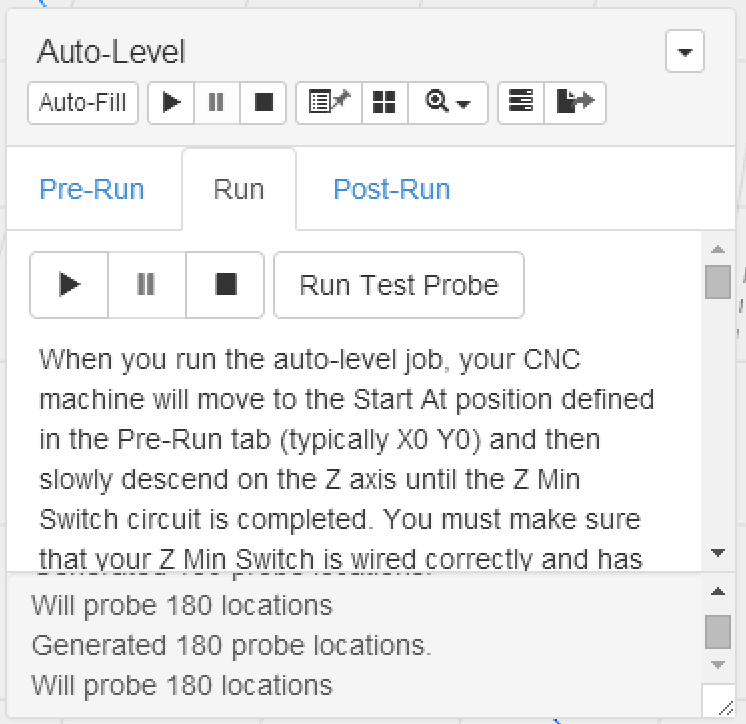
- Now run the probe job. Click the play button in the "Run" tab.
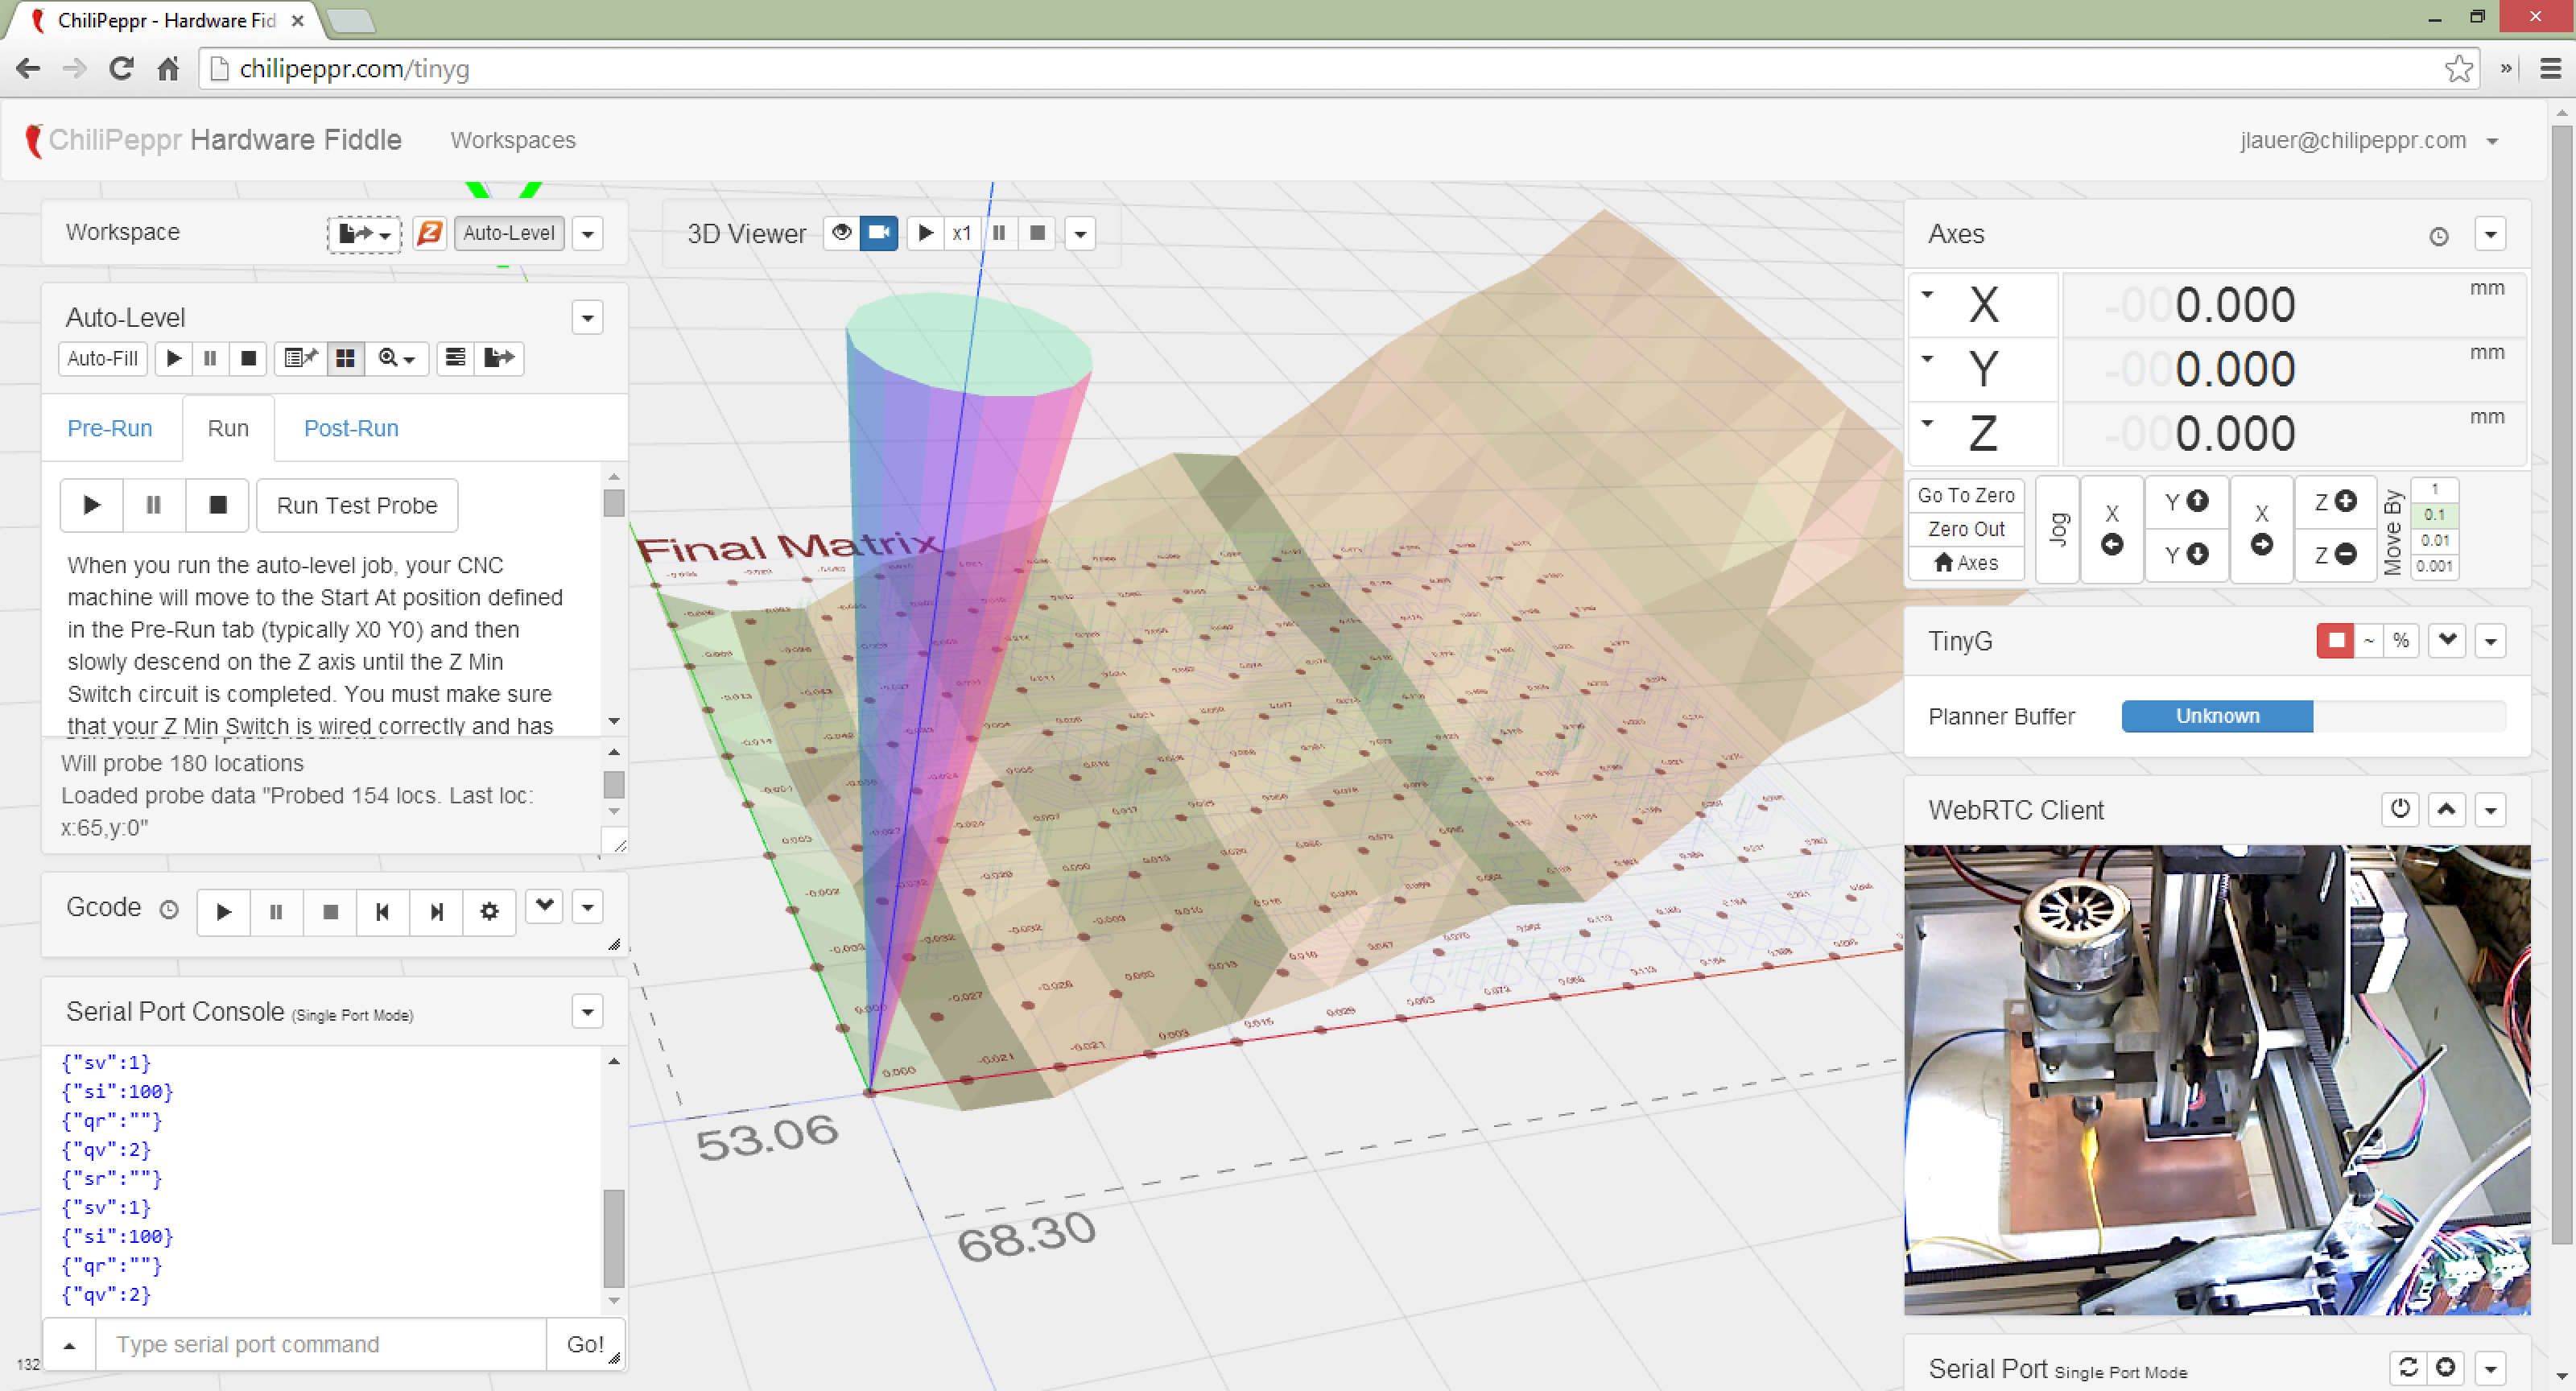
- You will see your the matrix grid updating as the probes progress. When done you'll have a final view of your offset matrix.
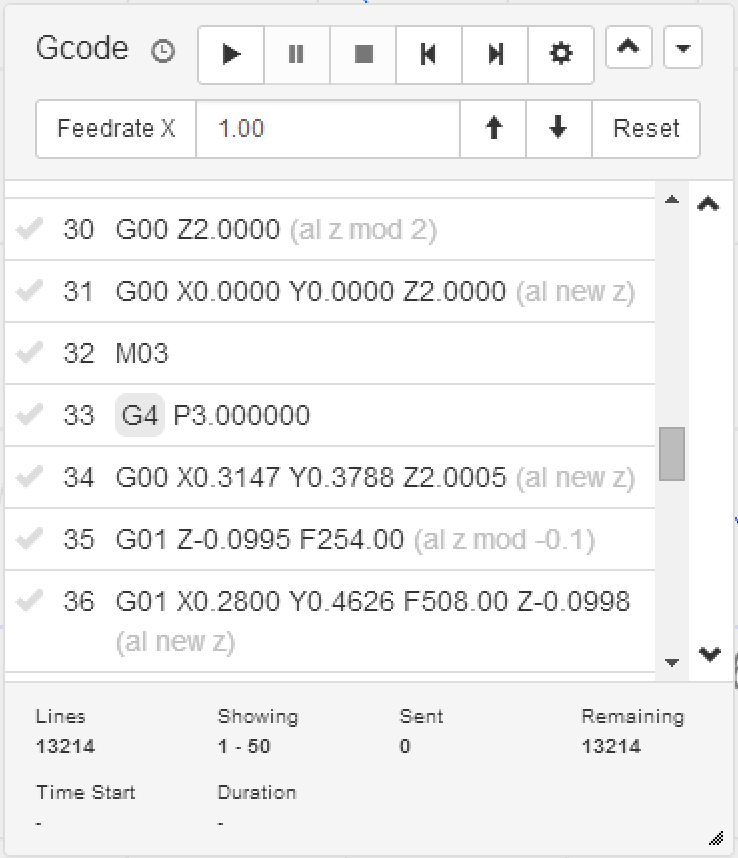
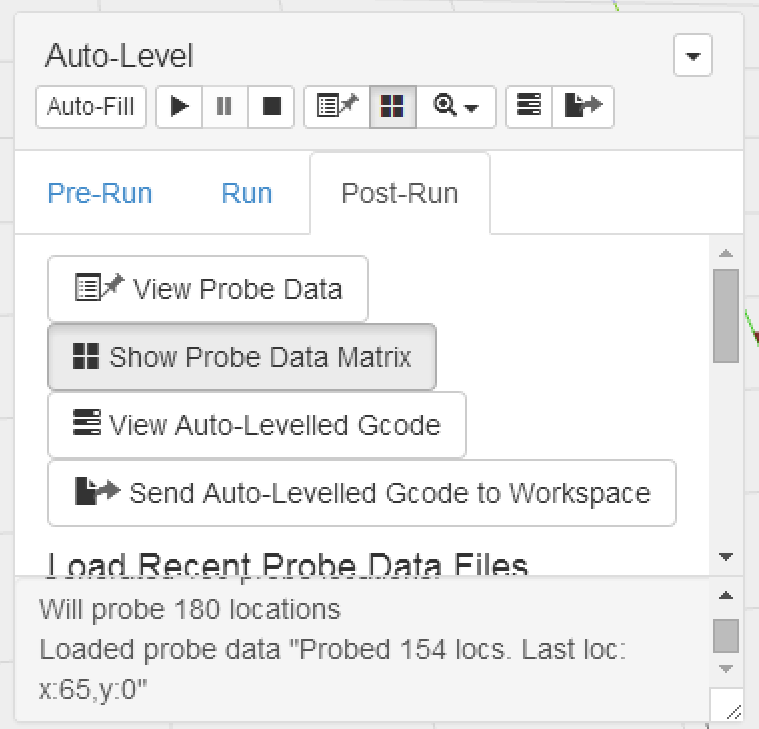
- Now click the "Post-Run" tab and send your new Auto-Levelled Gcode to the workspace.
- Run your Gcode sender job as normal, but notice that you now have modified Z positions inside your Gcode as well as new Z positions on every single G0/G1 command. Please note G2/G3 commands are not modified. Most PCB jobs don't use G2/G3 so this hopefully is not a problem. If it is, you could manually tweak those lines yourself.