Peripherals: Display LCDs, TFTs, and VGA
There is a large number of displays for Arduino on the market. The most complex part of the BASIC interpreters hardware layer deals with accessing displays. A unified display driver handles display access. It has an optional display buffer to enable software scrolling and a VT52 terminal emulation.
Graphics displays can be used with a set of graphics calls. Color support includes VGA and RGB colors.
On ESP32 a VGA option using FabGL is available.
The following display types are currently supported by BASIC
- Text LCD based LCD shields
- Text LCDs from 2x16 and 4x20 with parallel and I2C interfaces
- ILI9486 480x320 parallel TFTs with the MCUFRIEND graph library
- ILI9488 480x320 SPI based displays with the ug2 library
- SD1963 TFTs with up to 800x600 pixels. This display uses utft.
- Nokia 5110 displays with SPI.
- OLEDS like 1306.
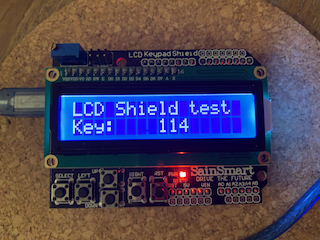
LCD modules come in various shapes. The 16 character, 2 lines shield is found frequently (16x2 LCD shield ). The definition LCDSHIELD activates the code for shields. The buttons of the standard LCD shields are accessed reading analog input 14. This corresponds to A0 in the Arduino IDE. This shield works nicely with BASIC as an device for displaying data and for code that is autorun from the EEPROM.
The shield code can also be used for 20x40 parallel port displays by modifying the dimension variables in the code.
Well suited for the use with BASIC as a standalone computer are the 20x4 modules (LCD tutorial). I used one of these modules to build a AIM 65 clone computer (http://www.obsoletecomputermuseum.org/aim65/). Both serial I2C display and a directly connected model are supported. The definition ARDUINOLCDI2C activates the I2C code while LCDSHIELD can be used for the parallel version..
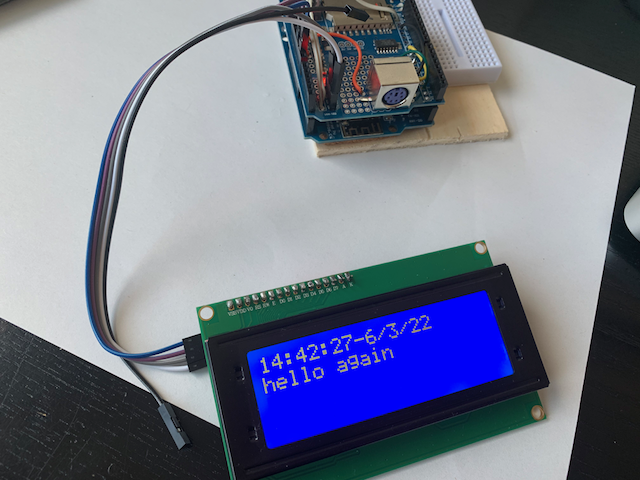
Libraries used here are the standard Arduino LiquidCrystal.h for directly attached displays like the shield and Wire.h with LiquidCrystal_I2C.h for the I2C modules.

The two most common TFTs on the market are ILI9486 or ILI9488 based. They have either a parallel port or an SPI serial port. Many come with an SD card interface, some can process touch input. Unlike the small LCDs they support graphics and color.

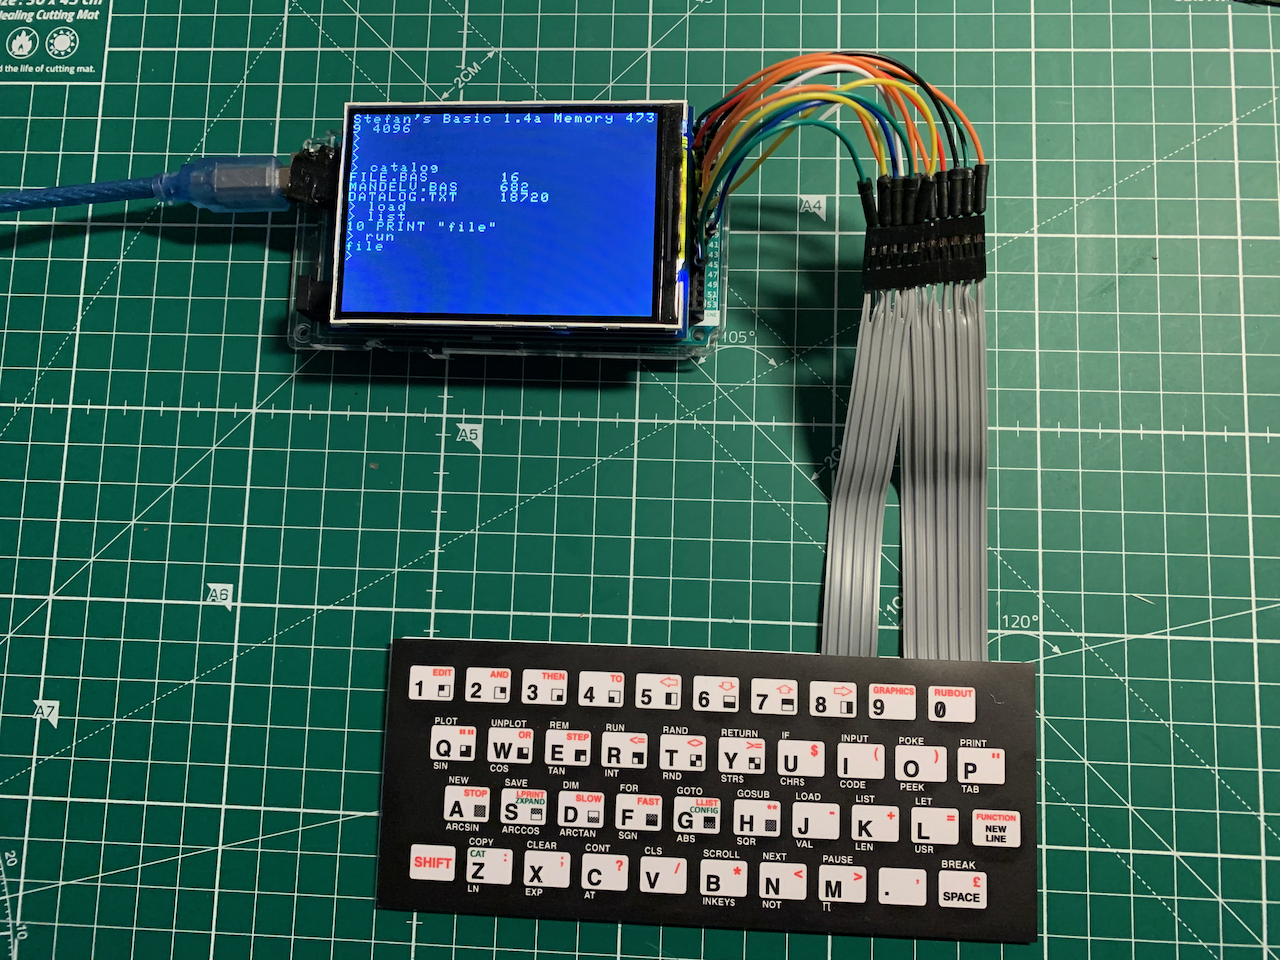
A full features computer with an ILI9486 parallel port and ZX81 keyboard.
For both display types, the Adafruit_GFX library is needed. In addition to it an ILI9488 library is needed for the SPI version. The parallel version works with MCUFRIEND.
These displays are also connected via I2C and fully supported including graphics.

Unlike the other display they have a dspupdate() method implemented. Redraw of the display character by character can be slow as the low level driver keeps the entire OLED content in memory to be written to the OLED with the relatively slow I2C protocol.
A simple update function can be activated by setting the display either to line or block mode. Use the command
SET 9, 1
to switch to line mode or
SET 9, 2
to switch to block mode.
Once this is done characters will show on the display only if ASCII 10 = LF (line mode) or ASCII 3 = ETX (block mode) is sent. Graphics output is also stopped until the update character is sent.
SET 9, 0
switches the display back to character mode.
TFT code is included and tested for a 7 inch SSD1963 display with a TFT shield on an Arduino Mega and DUE. The UTFT library is used for this.

Standalone computers with graphics capabilities can be build with it
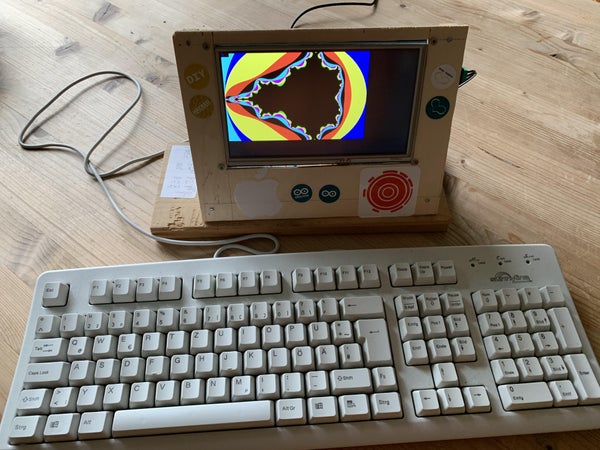
These systems use the UTFT graphics library.
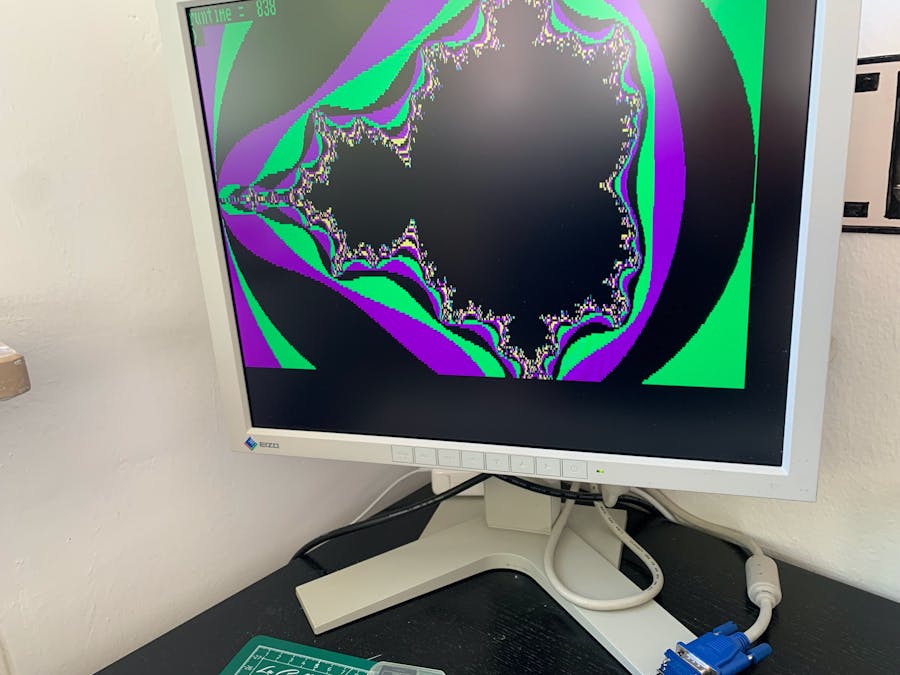
VGA output is currently supported with the FabGL library with ESP32 hardware. Read here for more: VGA BASIC Computer
All display modules use a generic display driver code. It handles scrolling and buffering. It needs some functions and variables defined for the specific hardware. As an example the code for a TFT is used. There is a hardware depended part of the code between #ifdef ARDUINOTFT and
#endif. This part of the code has to define all low level objects, include the header and set the definition DISPLAYDRIVER. The display driver code is hardware independent and needs a set of functions and variables. The display driver generates a buffer of rows*columns bytes to track all activities. Implementing a display with the display driver is easy but needs careful work. This will be explained an a tutorial.
The definition DISPLAYCANSCROLL activates the compilation of the full display driver. If this is undefined, a minimal driver is compiled for low memory systems.
After upload and start of the program the Arduino communicates on the serial device. set 2, 1 activates display output, set 2, 0 switches back to serial. When a program is going back to interactive mode, the display is disabled and serial is used again. If the flag STANDALONE is set, output goes directly to the display and input is taken from a keyboard. Alternative ways of addressing the display is to use &2 in PRINT, INPUT, PUT and GET. Example: PRINT &2; "hello world" writes to the display.
The display driver code in the BASIC code emulates a simple terminal. It handles scrolling down and cursor control. The the most important control characters are:
- Control J = 10: line feed and carriage return. This is the standard new line character in the code.
- Control L = 12: form feed - clears the entire display, the buffer and positions the cursor top-left.
- Control M = 13: positions the cursor at the beginning of the actual line.
- Delete = 127: deletes one character and sets the cursor one position back.
PRINT, INPUT and program editing work well with this minimal terminal. PUT can be used to send any on the commands and create clean display output.
If the code is compiled with VT52 support by setting HASVT52, currently the following escape sequences can be uses
- ESC A = 27 65: cursor up
- ESC B = 27 66: cursor down
- ESC C = 27 67: cursor right
- ESC D = 27 68: cursor left
- ESC E = 27 69: clear screen and cursor home (same as 12)
- ESC H = 27 72: cursor home
- ESC Y x y = 27 80: set cursor to position x-31, y-31. The two values are encoded to be printable and the upper left is 1,1.
These codes work for buffered and unbuffered displays. Please look at https://github.com/slviajero/tinybasic/blob/main/TinyVT52/README.md for the full list of control characters and escape sequences.
The display output vector is &2. Typical commands going to the display are
PRINT &2, "Hello world"
PUT &2, 12
Compiling the BASIC interpreter with the option #define STANDALONE makes the display the standard output device.
If the interpreter is compiled with #DISPLAYCANSCROLL a display buffer is generated. This display buffer can be accessed through the special array @D(). This array starts at 1 in the top left corner of the display and addressed the character buffer line by line. Typical code could be
IF @D(1)=65 then print "character is A"
@D(1)="B"
The two special variables are @X, @Y. They address the cursor position. Like @D() these variable are read/write and can be used to get or set the position of the cursor on the screen.
Some part of the UTFT library are implemented as BASIC commands and tested for the SSD1963. Supported commands are
COLOR R, G, B
COLOR V
PLOT X, Y
LINE X0, Y0, X1, Y1
RECT X0, Y0, X1, Y1
FRECT X0, Y0, X1, Y1
CIRCLE X0, Y0, R
FCIRCLE X0, Y0, R
The commands hand through the parameters directly to the respective low level graphics functions. FRECT and FCIRCLE are filled shapes while RECT and CIRCLE are empty shapes. The UTFT library addresses RGB 24 bit color values with the display I use (SD1963). Color values R, G, B are between 0-255. Color with one arguments tries to set VGA colors. X and Y values are in the range of 0 to 799 and 0 to 479.