Humix is an open source robot connectivity and design framework that make it easy to
bridge cloud API with hardware sensors and devices. Combining with Watson APIs,
the framework help everyone to build their own cloud-brained robot with a few minimal steps.
Humix leverages NodeRed as the flow-editor for designing how the robot behaves. On top of NodeRed, a few new nodes are added to support Humix’s module programming model, and make it relatively easy for the cloud brain to interact with modules deployed on the robot.
Before you start configuring your humix sense, make sure you have a humix think instance running (local or on bluemix). Steps Here
We have simplified the steps required to setup Humix Sense by providing a base image. You can download the image here
Image location :humix-sense.img
To save disk space, the image is compressed. So to copy the image into your SD card ( at least 16G ), run ( you need to replace the path and your sd disk number)
gzip -dc /path/to/image.gz | dd of=/dev/sdx
If you are curious whats inside the base humix sense image, here are you go
- build on jessie-lite
- install dependent packages (bison libasound2-dev swig python-dev mplayer flac libsndfile1-dev libflac++-dev)
- set USB soundcard as default audio device ( see ~/.asoundrc)
- preload humix-sense
- preload humix-dialog-module. Prebuild and put it under humix-sense/modules/core/ ( any modules under this dir will be launched automatically when humix sense starts)
Assuming you have the base image, here are the following steps:
Configure network setting of raspberry pi as you normally do. For more information, check here.
The next step is to tell humix sense where the humix think located. Assuming you have deployed humix think at http:/humix-demo.mybluemix.net.
    cd humix-sense/sense
    vi config.js
*** example config ***
    module.exports = {
        thinkURL : 'http://humix-demo.mybluemix.net/',
        senseId  : 'humix-demo'
    }
Next, you need to provide the credential of the Speech-Recognition and Text-To-Speech. Depending on your language of preference, you can choose default langage as 'en', 'cht' (traditional chinese) or 'chs' (simplified chinese)
    cd ~/humix-sense/sense/modules/core/humix-dialog-module/
    vi config.js
After configured the default language, choose the preferred stt and tts engine, and provide associated credentails. Here I use English as default language and use watson stt and tts services.
...
lang: 'en', // 'en', 'cht' or 'chs'
  'stt-engine': 'watson', // 'watson' or 'google',
  'tts-engine': 'watson', // 'watson' or 'itri' or 'iflytek'
  stt: {
    watson: {
      username: '<your_username>',
      passwd: '<your_password>'
    }
  },
  tts: {
    watson: {
      username: '<your_username>',
      passwd: '<your_password>'
    },
  }
...

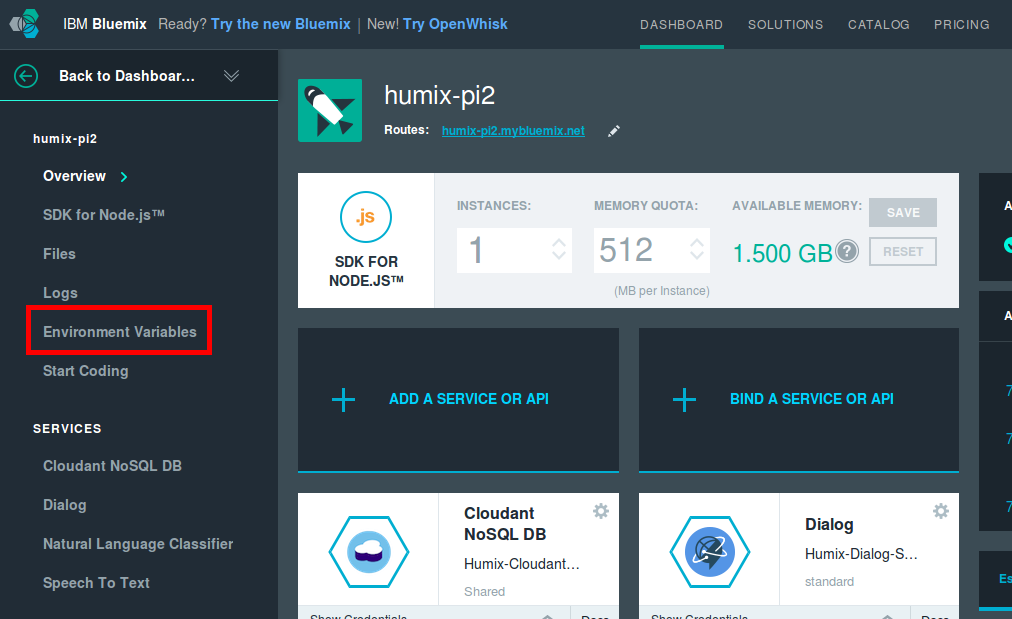
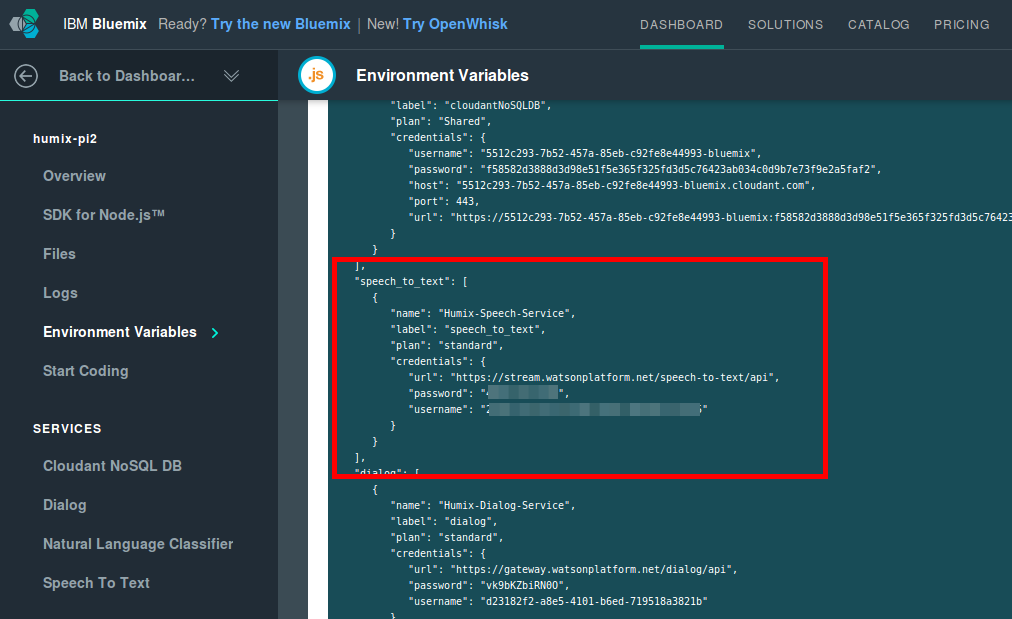
**< Note > get the credential of Watson STT on bluemix


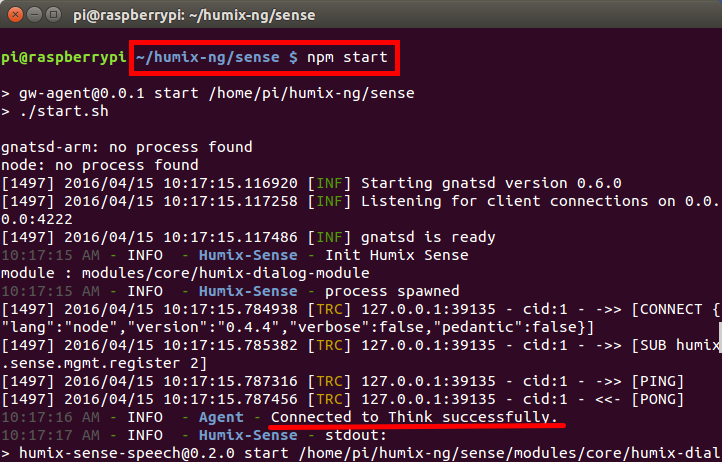
To run humix sense, simply run
cd ~/humix-sense/sense
npm start
When you see the follow result, then your humix sense has been successfully connected to humix think
You can now config the basic flow on humix think
Copyright 2016 IBM Corp. Under the Apache 2.0 license.