NINscope software
Hardware - Firmware - Software
We recommend using Processing version 3.5.4, which has been tested with NINscope. We have reports from users that encounter errors after installation of Processing 4. You can download Processing version 3.5.4 through the following links: Mac OS X | Linux 64-bit | Windows 64-bit | Windows 32-bit
Acquisition software - Data logging
- Download Processing from the website https://processing.org/download/.
- Install the G4P library. (Processing Menu: Sketch > Import Library... > Add Library...)
- Download the video library for NINscope here or alternatively here.
- Extract this to the processing libraries folder. (Location: /home/<username>/sketchbook/libraries)
- Connect the DAQ to your computer using the USB cable.
- Run the following command to load the driver for the serial port:
sudo modprobe usbserial vendor=0x04b4 product=0xf139
- Run the following command to grant processing permission to connect to the serial port. ( <username> = your linux username)
sudo chown <username> /dev/ttyUSB0
- Clone or download the NINscope folder from Github (https://github.com/ninscope/Software) and start the NINScope.pde sketch inside the folder.
Big Sur has introduced security measures to block third party apps and libraries that are needed to run the acquisition software. We are currently looking into a way to allow access to the required gstreamer libraries, but for now the latest version of MacOs is not supported.
Note that cameras have to be selected from a numbered list instead of by name as in Linux or under Windows since all video devices (including internal webcams) are detected as an enumerated list.
- Download Processing from the website https://processing.org/download/.
- Download the video library for NINscope here or alternatively here.
- Extract this to the Processing library folder. This folder will be generated after running Processing once. ( Location: /Users/<username>/Documents/Processing/libraries )
- Restart Processing.
- Install the G4P library. (Processing Menu: Sketch > Import Library... > Add Library...)
- Connect the DAQ to your computer using the USB cable.
- Clone or download the NINscope folder from Github (https://github.com/ninscope/Software) and start the NINScope.pde sketch inside the folder.
- Connect the DAQ to your computer using the USB cable.
- Open Windows Device Manager.
- A USB device with the name NINscope will appear in the tree under "Other devices".
- Right click NINscope and select "Update Driver Software...".

- Select "Browse my computer for driver software" in the next window.

- Then select "Let me pick from a......".

- Select "Show All Devices" and click on the "Next" button.

- Click on "Have Disk..". Browse to the folder containing the driver files. You can download these here: https://github.com/ninscope/Software/blob/master/WinDriver.zip and extract them to a local folder.

- Select the "CypressSerial.inf" file and select "USB to UART Adapter". Click Next.

- Click Yes to install even if Windows is not recommending it.

- A second Device will appear in the tree under "Other devices" named "Virtual Serial Port Device 00".

- This time install the driver the same but don't select "USB to UART Adapter" but "USB Serial Port".

- A new device will appear under "Ports" with the name "USB Serial Port (COM##).

- Remember the COM port # because you have to select it in the drop down menu of the application.
Once driver installation is complete on Windows 7 proceed with the following steps. If you use Windows 10 start below:
- Download Processing from the website https://processing.org/download/ and install.
- Download the video library for NINscope here or alternatively here.
- Extract this to the Processing library folder. Note that a Video folder will be generated in the Processing folder located in 'My Documents' the first time Processing is run. This folder needs to be overwritten with the downloaded Video library folder.
- Restart Processing.
- Install the G4P library. (Processing Menu: Sketch > Import Library... > Add Library...)
- Clone or download the NINscope folder from Github (https://github.com/ninscope/Software) and start the NINScope.pde sketch inside the folder after connecting NINscope to the DAQ box and the DAQ box to your computer.
We recommend turning off Windows 10 Real-Time protection as it causes a slow loading of the GUI
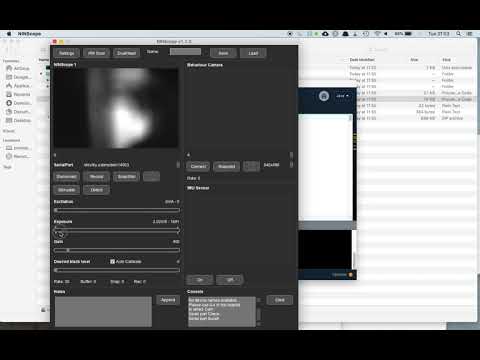
The software is written in the Processing language and you can open and run a Processing "sketch" to operate NINscope after you have followed the instruction for software installation. You can also compile the sketch in Processing to create a standalone executable. The video below shows the opening of the sketch, a connection being made with a connected miniscope and the camera controls that can be set.
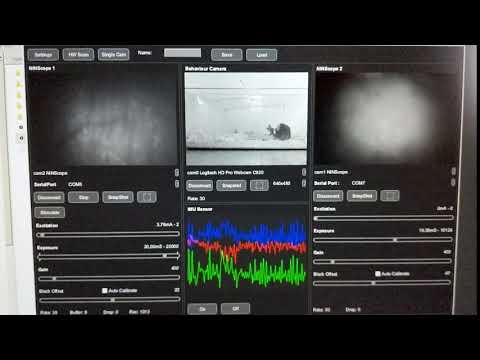
The accelerometer is turned on or off in the software and the x,y,z channels are displayed 'realtime' in the GUI. The accelerometer data is logged to disk in a file named LogData.csv.

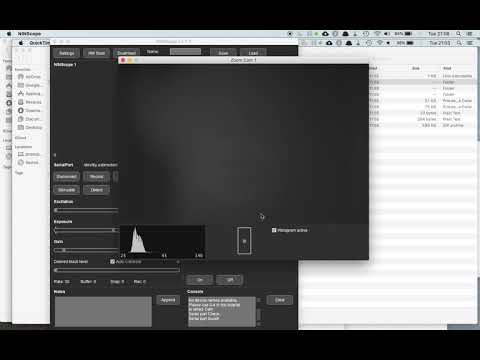
In the main control panel of NINscope acquisition software one can choose to display the connected miniscope in an expanded window. Once this window opens a cursor in a box at the bottom center of the window can be moved around to shift the field-of-view. This feature is useful if one wants to move away from blood vessels or shift the field to a region with more activity. There is also a check box to display a 'real-time' histogram of pixel intensity values.
The settings panel is used to set the optogenetic stimulation parameters, let the NINscope wait for an active high trigger to record a set number of frames, or have NINscope collect a predefined number of frames without waiting for a trigger. If the trigger input is checked, NINscope will be waiting for an incoming 3.3V active high trigger that starts the acquisition (the manual acquisition button will disappear from the main GUI). Check the auto button for automatic stimulus. The stimulus will start after every recording with a delay set at "start delay".

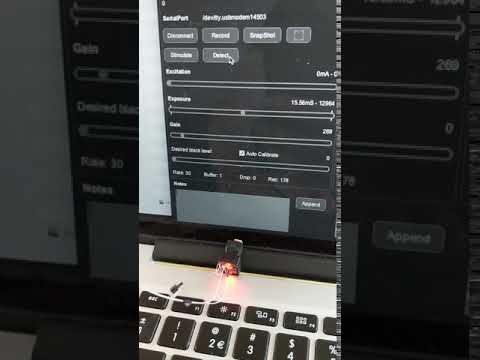
In the main window there is a 'Detect' button. This button serves to determine which NINscope is connected to which serial port. Hitting the button will let the indicator/tracking LED on top of the NINscope blink a number of times. This is useful when two scopes are connected and one has to determine which scope is connected to which serial port.
Below an example of a recording in which 2 NINscopes were mounted, the accelerometer was switched on and the webcam connected.
Acquisition software - Installation
When one starts data acquisition, a root folder is created with the current date. In this root folder, a subfolder is created for every subsequent acquisition. The name of the subfolder is Rec_hh_mm_ss (where hh: hours, mm: minutes, ss: seconds). Inside this subfolder, for each connected scope another subfolder is created (listed as Scope1, or Scope2, or Behaviour (the USB webcam data)). The scope folder contains 8-bit grayscale numbered tiffs with minimal headers. The file LogData.csv is also stored and contains 6 columns (frame #, sample # collected from accelerometer, x acceleration, y acceleration, z acceleration, presence (1) or absence (0) of optogenetic stimulation). There is also a TimeStamp.csv file that contains 3 columns (name of device, frame #, timestamp (ms)). Finally, a Notes.txt file exists to which comments can be appended during acquisition. An additional file with settings can be saved from within the NINscope acquisition software to load previously used settings. Snapshots will be saved in a dedicated 'Snapshots' folder.
