MITI - Interaction Technology Innovation. Project on the well-being of facilities staff at UU, more specifically security staff. Note: due to the coronavirus outbreak the original plan is no longer relevant, project now focuses on well-being of people near us.
Team members: Katrine Nordeide Kuiper, George Harja, Kelvin Koenders, Luke Elshout and Stephanie Verkleij.
- Arduino board
- Breadboard
- Green LED
- Button
- LCD Screen
- Lots of wires
I recommend connecting a 5V pin and GND pin to the + (plus) and - (minus) "lines" on the breadboard. This will make conencting the ground and 5V much easier to the components on the breadboard. Ideally use black wires for any GND connections and red wires for 5V connections on the board.
The connection is pretty straightforward, as seen in this image:
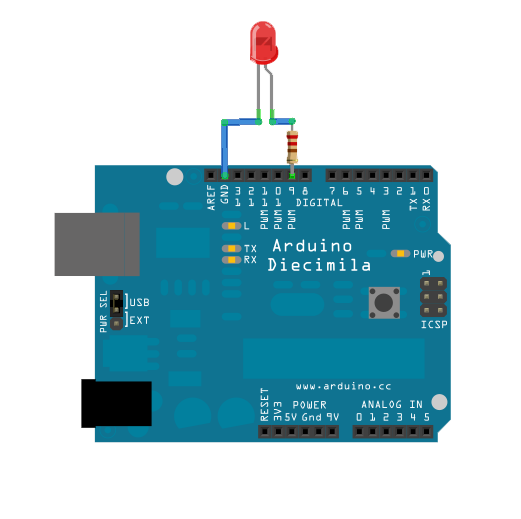
In order to be able to make the LED fade or not be as bright, it has to be connected to a PWM pin, with a 220hm resistor between the pin and the longer leg of the LED. The shorter leg must be connected to the GND.
Connecting the button is a bit more complicated, but still pretty straightforward, as seen in the image:
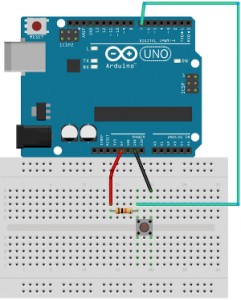
One pin of the button must be connected to the GND. The other one must:
- be connected to 5V through a 10K Ohm resistors
- be connected to the input pin of your choice, which will be used in the code
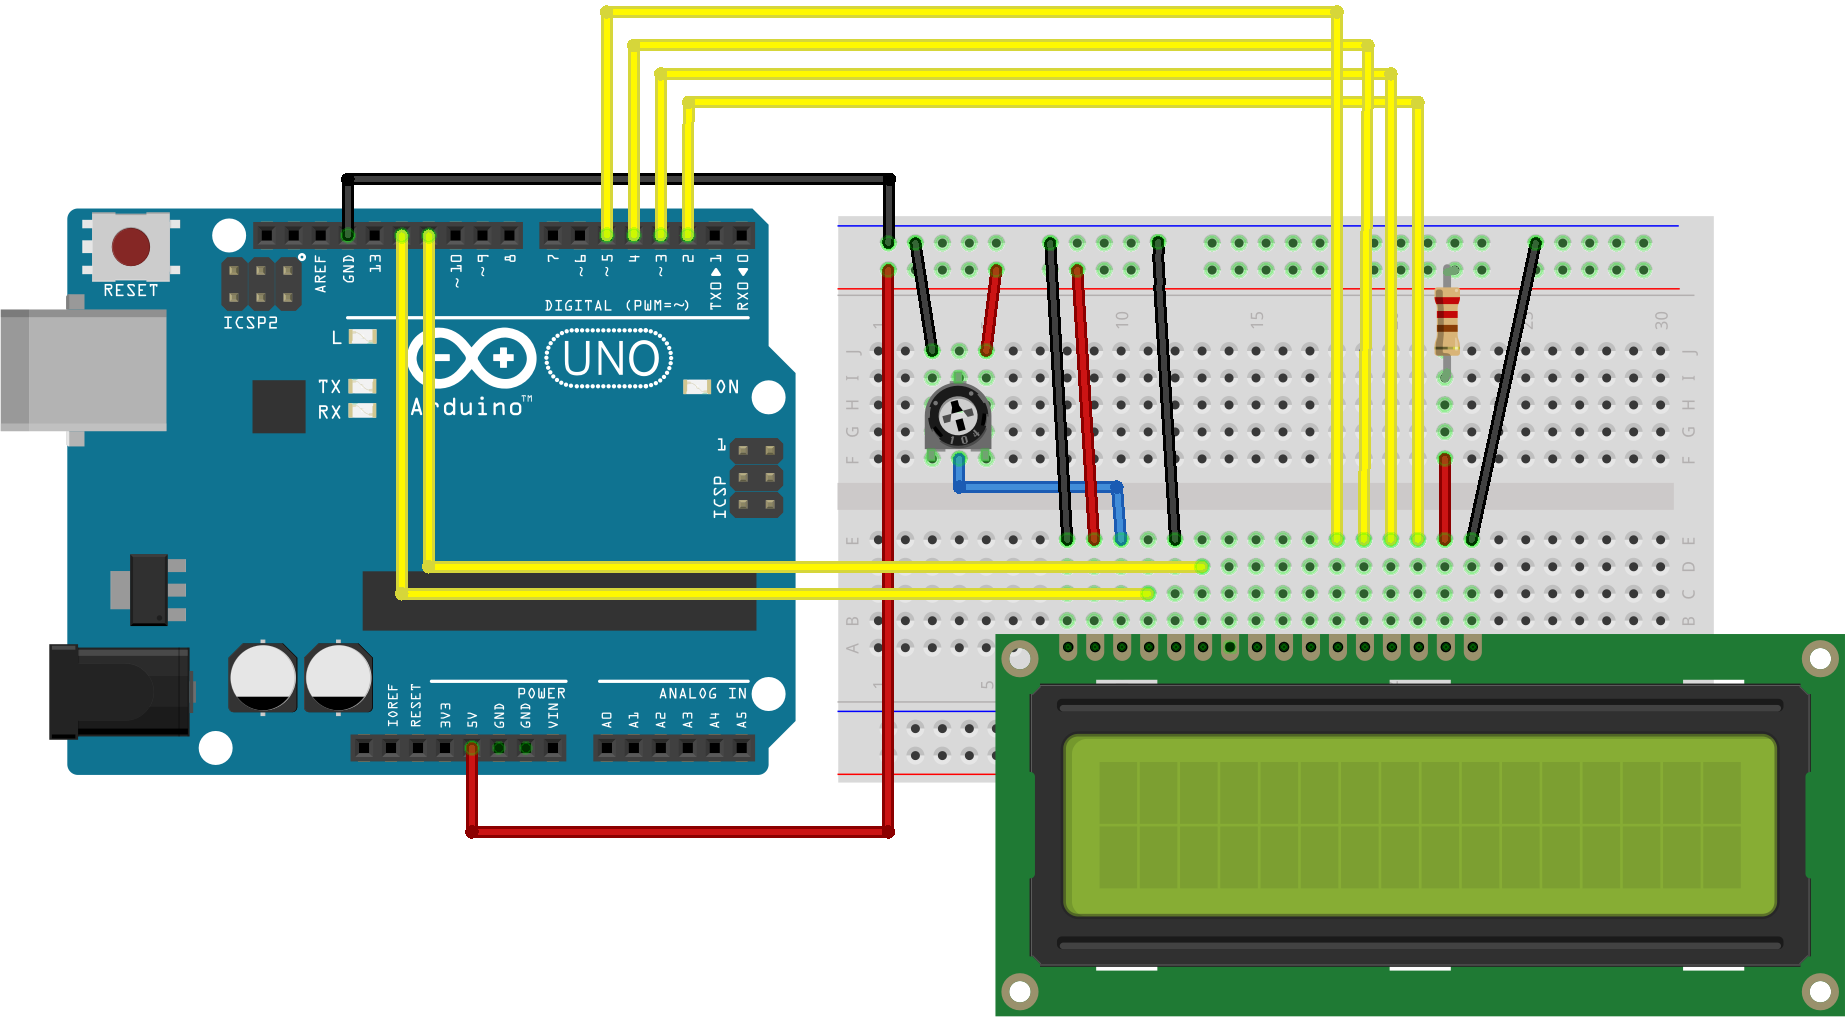
This is the trickiest part, but on the other hand the code to use the LCD is extremely simple through the use of the LiquidCrystal.h library.
What you'll need:
- 10k ohm potentiometer (the variable resistor)
- 220 ohm resistor
- hook-up wires
The schematic is shown in the picture below, with more information found here :