Author(s): Daniel Timko (https://github.com/botzu)
This class will be using Git and Github for assignments. Git is a popular distributed version control system that allows us to track changes in our projects over time. This is great for projects where there are multiple people working on a project at once. This way you can make sure that everyone has the latest version of the project code and that your changes do not conflict. Github, on the other hand, works as our remote repository service to host the version of your project. With Github, we can upload our committed versions to our own personal project page and allow others to join in to access it. In the future, whether for personal or professional projects, it will be important to learn the features that Git and Github has to offer.
In this exercise, we will be setting up Git and Github and learning the fundamental features of both. First we will be learning the general method to use git through command-line interface(CLI) and then we will look at the way to use the git integration in android studio. If you have not already installed Git onto your computer, the location to download Git can be found at the Git downloads page. Select the version that is appropriate for your computer. Additionally, after you have installed Git, you can update to the latest version at any time using the following command:
git clone https://github.com/git/git
When installed, Git comes with several applications that can help you to more effectively use Git. Among these, are Git Bash, Git CMD and Git Gui. Git Bash is particularly useful as it allows you to right click and open a Bash command line in whichever folder you are currently located so you can quickly move to folders with your project files.
When new versions of your applications are committed, Git will keep a record of the user that commits the files and allow the user to provide a comment for the commit. This helps to make changes easier to understand and to provide a more detailed history of your project. When you first install git on a new computer, you can set this up through a git profile using the following commands:
git config --global user.name = "<first-name> <last-name>"
git config --global user.email = <github-registered-email>
This configures your username and email for all projects using Git, so its only necessary to set this configuration up once. When set, your pushed files will be tagged with your user information.
In order to initialize a new repository, the tradional approach is to just use the git init command inside of the root level of your new project directory. Initializing a repository can be done on either an empty folder or one with files already created. To start making a new project, make a new directory and then initialize the repository in the new directory.
mkdir project-name
cd project-name/
Now we are in the new directory that we just made. We can initialize our repository with the following command:
git init
This associates the current directory and all of its future subdirectories as part of our git project. On a technical level, this creates a new hidden folder in your project directory named .git.
We can view the files in the folder using the list command. Since our file is hidden, we will have to use the -a option to include hidden files that start with a . in the name.
ls -a
Inside of this .git folder are files with the information related to your git project and your projects commit history.
There are many approaches to initializing a new local repository, and many modern IDEs have an integration that will initialize your project as a git repository for you. Since we are using Android Studio for our applications, let's now look at how to initialize an existing Android application as a new git repository.
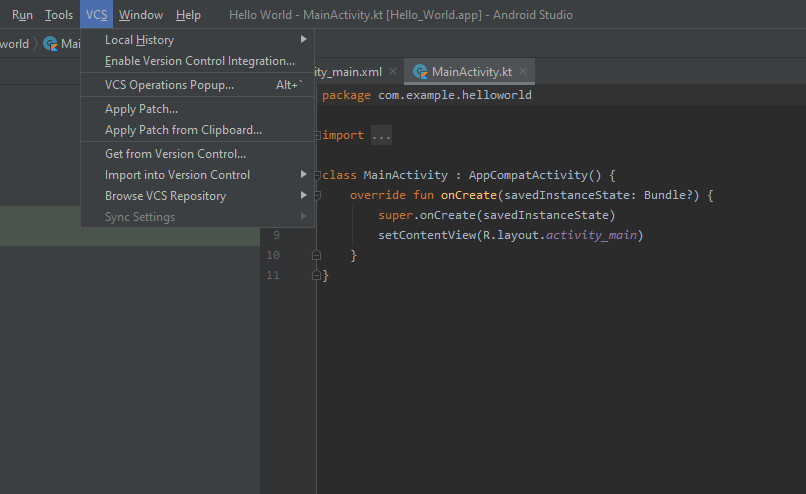
This can be done simply by starting a new application or opening an existing application and then selecting VCS(or Git depending on your version) and then selecting 'Enable Version Control Integration...'.
This opens up a new menu with options to set a version control system to associate with your project. Git is selected by default, but there are some other version control systems available. Selecting Git here is similar to using git init in the root directory of this project. By initializing our git in an already existing android project, an additional file will be created in the project's root folder called .gitignore with some default settings depending on the project type we have made.
The purpose of the .gitignore file is to ensure that certain files in your git repository will not be tracked. This is typically used so that local files, such as the "local.properties" file, and files that are sensitive or unnecessary for building the application don't get unintentionally downloaded onto other systems. Some files are specific to the system that they are running on and will cause problems for others trying to run your application.
A .gitignore file can also be manually created within the root direction of your project and git will associate it with the project it is located within.
If you want to use a git for a repository that has already been created, you can simply clone a local copy of the repository onto your computer. This is done with the command:
git clone <repository url>
For example, the git clone command to clone this respository will be:
git clone https://github.com/cs481csusm/github-starter-course-<username>.git
Github classroom will tag on your username to the last part of the git clone url.
This creates a new folder with the github repository title in the location where this command is used. The contents of the folder are the contents of the repository with git already set up and ready for modification.
If this is your first time cloning a repository from git, then you will be asked to sign in to your github account.
Another approach to cloning a repository is through IDE integration. Let's look at cloning a repo in android studio. First, you must select VCS from the menu bar at the top of Android studio and then select "Get from Version Control". This will present you with the following screen:

From here, you can either paste the github https url for the repository that you want to clone or sign in to github to clone a repository that your github account has access to. This approach creates a new android project in the selected directory with the name of the repository on github.
Lets clone this repository and then make some changes to the main.kt file in andriod studio:
fun main() {
    println("hello git");
}
Lets compile and run this code, it will print out hello git in the run tab.
Now that we have created our project, lets initialize the project as a git and start keeping track of the project's files. Navigate to the projects directory in the command line and then type git status after we have initialized our repository.
git init
git status
Since our project is new, this will just return a list of untracked files of our project.
Notice that there are a number of files that are not included in this list, this is due to the .gitignore file that is automatically created when we initialize an Android Studio project, as mentioned before. We can view these files in the project tree in Android Studio, and identify the status of files now by their color coding. What each file color means can be viewed under file->Settings->Version Control->File Status Color.
If we were working on a project that did not automatically create a .gitignore file, we could create our own with the command:
echo "filter" > .gitignore
Where filter is the file or folder filter that we wanted to exclude. This will create a new file from scratch if one does not exist and overwrite the current .gitignore file. If we want to individually add or remove file types from this list, we can edit the file with an editor and it will reflect these changes back in Android Studio and git.
The next step in our workflow is to start adding files to be tracked. We can add files individuall with the command:
git add <filename>
Lets add the main.kt file we just created.
We can also add all the files in the the project using the . option like this:
git add .
If you unintentionally add a file to the staging area you can remove it individually with the git rm command or remove all files from staging with git reset. An example of each would be:
git rm --cached local.properties
git reset
Lets go back and add just main.kt to the staging area again using git add main.kt.
Once we have added all the correct files we want to our staging area, we can commit them using the command git commit:
git commit -m "committing our first version"
This created a new change in our local repo. Its important to specify a clear commit message when working with others to let them know what changes have been made.
After the commit is done, we can edit our last commit by using the --amend option on git commit like this
git commit --amend
This opens an editor with the last commit made for the project. Inside this file you can edit the comment, add and remove files from your most recent commit. When opened, this file will look something like this:
Project first commit

# Please enter the commit message for your changes. Lines starting
# with '#' will be ignored, and an empty message aborts the commit.
#
# Date:      Sun Jan 30 09:47:46 2022 -0800
#
# On branch dtimko/github-starter-course
#
# Initial commit
#
# Changes to be committed:
#   new file:   .gitignore
#   new file:   main.kt
#
# Untracked files:
#
This can also be edited without launching an editor.
In order to do this we can add a new commit text as follows:
git commit --amend -m 'changing the commit text'
This changes the commit text of our last commit to 'changing the commit text' Or we can stage or remove cached files and then amend those changes into the last commit like this:
git add <filename>
git commit --amend --no-edit
This would add the file to our last commit.
git rm --cached <filename>
git commit --amend --no-edit
And this would remove it.
To summarize, when we edit trackable files in our project, we can view that they have been edited with the git status command. Then we stage those edited files by adding them with git add. When we are ready to commit a new version of our project, we use git commit. If we need to amend our last commit we can use --amend.
To accomplish the same task in Android Studio, select commit from the VCS menu. From here you can check the files to commit, add a comment and then submit or ammend your last commit.
Now that we've discussed how to commit new versions of our project, let's talk about how to work effectively with multiple collaborators. One issue that you might consider is how you manage multiple developers that are all coding independently. This can be done by creating a new branch of your project for the developers and then later merging the code back into the original branch when they are finished.
First lets look at the current branches in our project using the following command
git branch
This lists the branches that are available for our projects. It should only list our main branch right now. This main branch was created when our project was initialized.
We can add new branches to our projects by declaring them like this:
git branch <branch-name>
Where the branch name can be specified however you prefer. It is good practice to name your branch based on the feature that you are working on and the developer or team that is working on it. Lets make a branch with our <github-username>/read-name.
Now when we use git branch it will show the new branch that we just created.
git branch
Lets switch to our new branch that we just created. The command to do this is through git checkout.
git checkout <github-username>/read-name
This will cause future commits to affect our new branch instead of the main one. We should also note that when we type the git branch command
git branch
It will specify the active branch that we are working on with an asterisk.
Now, lets go back to our project and make an edit to our main.kt so that it prints out our name from user input.
fun main() {
    println("hello git");

    val name = readLine()!!
    println("This is: $name")
}
Now that we have made some edits, we can view the changes that we have made in this file since our last commit using the git diff command. In order to more easily find the location for our file, we can use git status to grab the location of our changed file:
git status
Followed by:
git diff app/src/main/java/csusm/example/main.kt
This should show you a screen similar to:
fun main() {
     println("hello git");
+
+    val name = readLine()!!
+    println("This is: $name")
 }
We should be able to see the changes that were made to our project. The - sign shows the original line that was changed and + shows new lines. Lets move back to our master git branch and see what happened to our files. Lets commit these new changes and then look at what happens in our other branches.
git add app/src/main/java/csusm/example/main.kt
git commit -m "added user-name input"
Now lets move back to the master branch.
git checkout master
From Android Studio, we can see that our original commit is still safely intact here, without any changes that we have made on the other branch.
Branches can also be changed directly through Android Studio by going to VCS->Git->Branches and then selecting the branch that you want to change to and then clicking checkout.
Lets also fix a small issue of a redundent semicolon that we left in our first branch. First, lets move back to our master branch and create a new branch.
git checkout master
git branch <github-username>/semicolon-hotfix
git checkout <github-username>/semicolon-hotfix
Then we can remove the redundent semi colon from our main.kt:
fun main() {
    println("hello git")
}
git add the file to staging and finally git commit your file to your new branch. Now that we have made several commits, lets take a moment to look at a log of what we have done so far. Each project will have its own log available for all its commits, along with with an author, date and commit text.
If we want to view a log of the commits on our project so far, we can view them by typing:
git log
Notice that it lists our newest change under our separate branches. In order for our changes to be made to the main branch, we will need to merge them in.
Since we have finished our work with our branches, we will want to merge our work back into the master branch. First, we should go back to working on our master branch.
git checkout master
Now we can merge our latest hotfix back into the master branch. This is done with git merge followed by the name of our branch
git merge <github-username>/semicolon-hotfix
This should merge without any issues. Git recognizes that we are merging in a newer version of the files from the merged branch. Now it is time to merge in our <github-username>/read-name branch.
git merge <github-username>/read-name
This time, git will notify us that there is a merge conflict between our two branches. This occurs when git cannot discern which version of our files is most up to date for the merged branch. Git is looking at our main.kt and it sees two different commits to choose from. In order to solve this conflict, we will need to inspect the code and choose what code to continue with. If android studio is open, a merge menu will open, and we can manually solve this conflict by selecting the lines of code to keep.
Lets set our code to:
fun main() {
    println("hello git")

    val name = readLine()!!
    println("This is: $name")
}
We solve the merge conflict by committing this change after we are done.
When we are done with a branch, or if we create an unneccesary branch, we can delete the branch using the -d option like this:
git branch -d <branch-name>
This can safely remove branches that have no unmerged content from our repository. Additionally, this can be done from the branch menu in Android Studio.
Now that we have made prorgess on our project, its time for us to push our files from our local repository to a remote one. If you start from a cloned github repository, the remote location for the repository is already set. If you start locally with a fresh project, you will need to add the remote github link for your new project. This can be done with the command:
git remote add <repository-name> <your-github-project-url>
When you add a remote url for your project, you can choose to specify a name to refer to your repository. If you don't specify a repository name then the default name is origin. This can be then used to make specific push, pull and fetch commands on our project files. Here is the command to push a git project to our github repository.
git push
This pushes committed changes only for the current branch which you are connected to. If our projects have multiple branches we can specify the branch that we want to push to using the branch name and referencing the repository name like this:
git push <repository-name> <branch-name>
If a project has work that is not stored locally, we will first need to do a pull request before we can push new files to our repository. When we pull files from a remote repository, git will fetch the latest version and then try to merge those files with our current repository files. We can separate the fetch and merge files using Git Fetch and then Git Merge or we can combine them into one pull request. A pull request is done through the command
git pull
Similarly to push, this command pulls only from the current branch that we are using. If we want to specify a different branch to pull from we can use a similar command format
git pull <repository-name> <branch-name>
In Android Studio, a push and pull request can also been done through VCS -> Git -> Push/Pull. When you do a pull request on Android studio, you can select select one or more branches to merge into your current project.