5 Printing
For printing with the pen based colorization activated you need to make sure that you:
- Select the correct printer
- Select the correct print profile
- Activate the PenColorizer PostProcessing Script
Configuring the printed object is the same as with a real dual extrusion printer. You can watch this Video for a short introduction.
In sort you do the following:
Import some multi color model into Cura. This would be a suitable test model. Multi color models consists of multiple STL files.
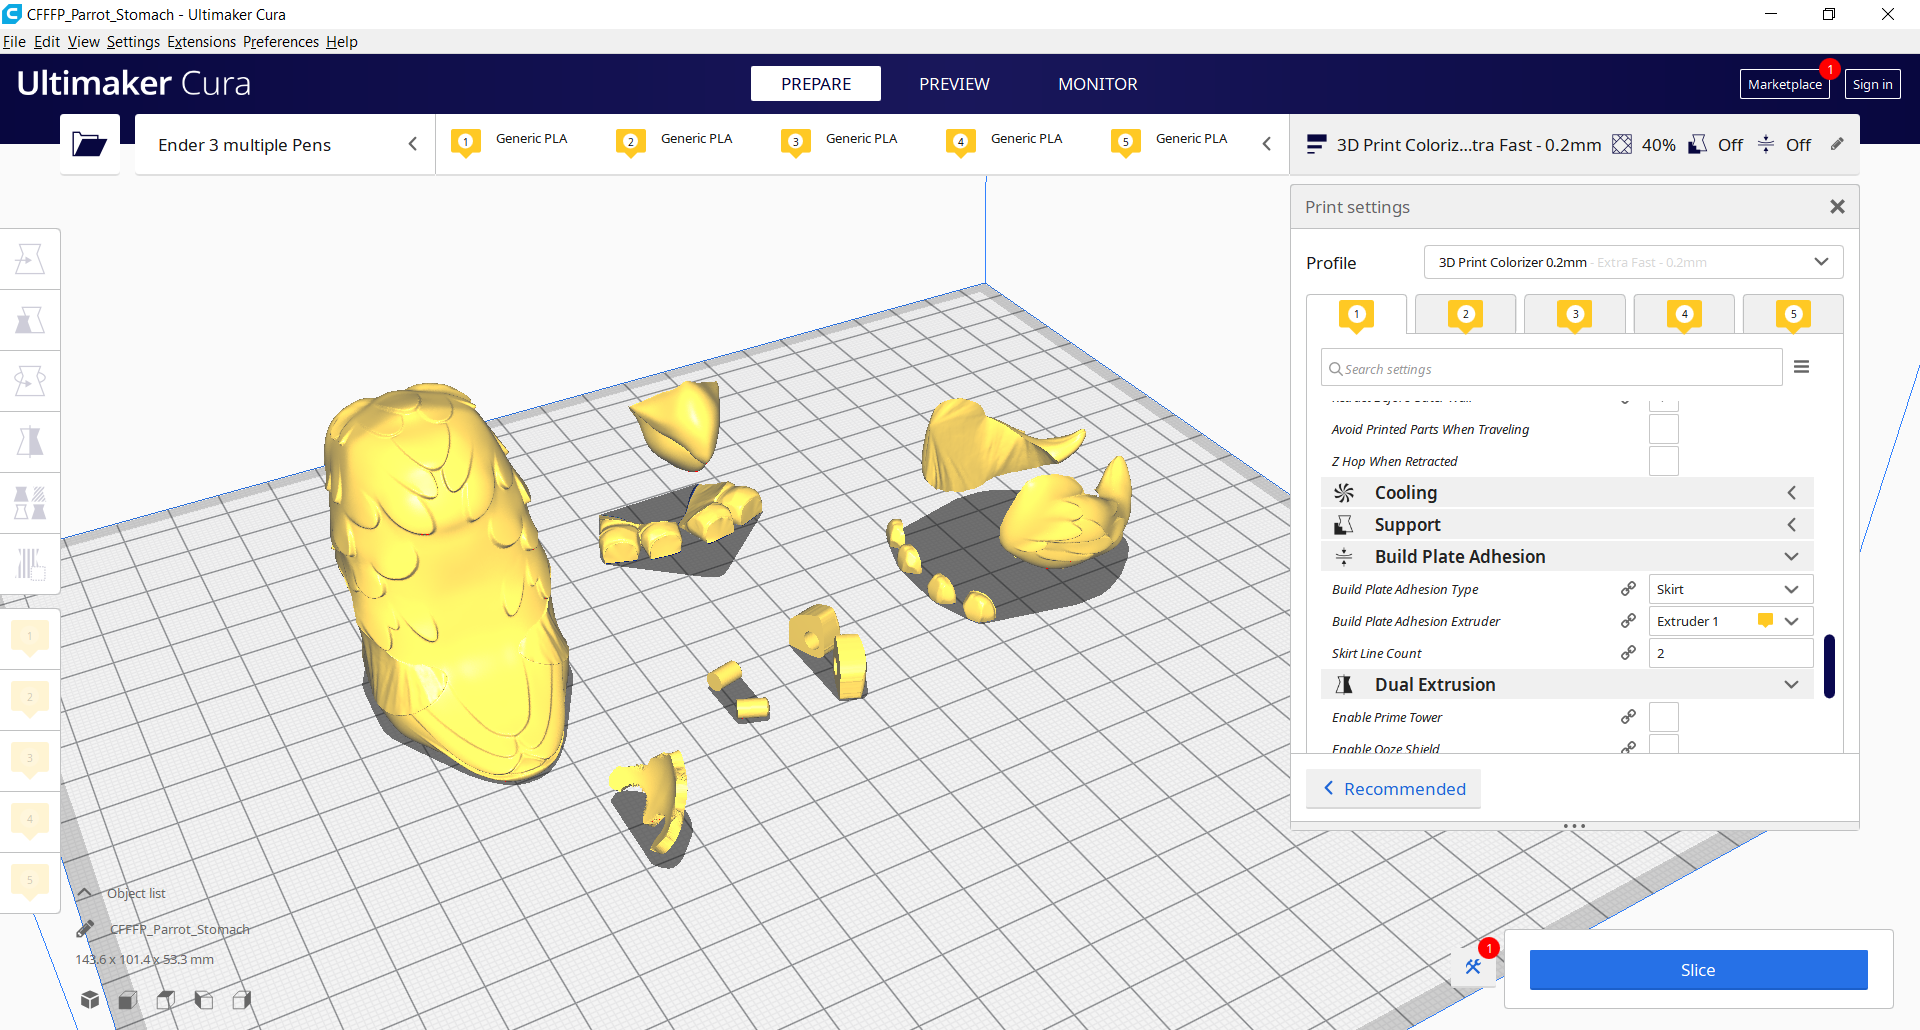
multi color model imported into Cura
Right click on each STL and assign an extruder for it. The extruder numbers correspond to the numbers printed on the pen rack. Extruder 1 means: don´t paint this part. Use this one for white parts. Put the printed end cap on the pens which correspond to your selected extruders and put them on the pen rack.
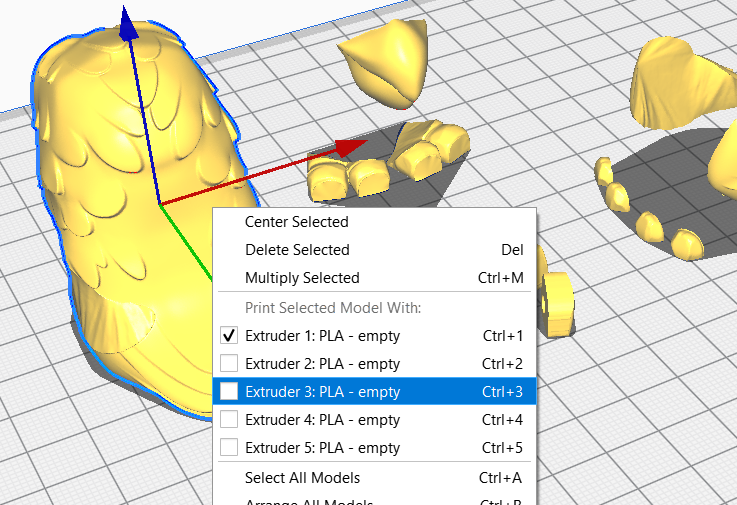
selecting an extruder/pen for the model part
After you have done this for all parts select all part, right click and select merge models. This will combine all models to one big model but keep your extruder selections intact.
After slicing you can recheck your extruder assignments in the preview mode by toggling the visible extruder checkboxes.
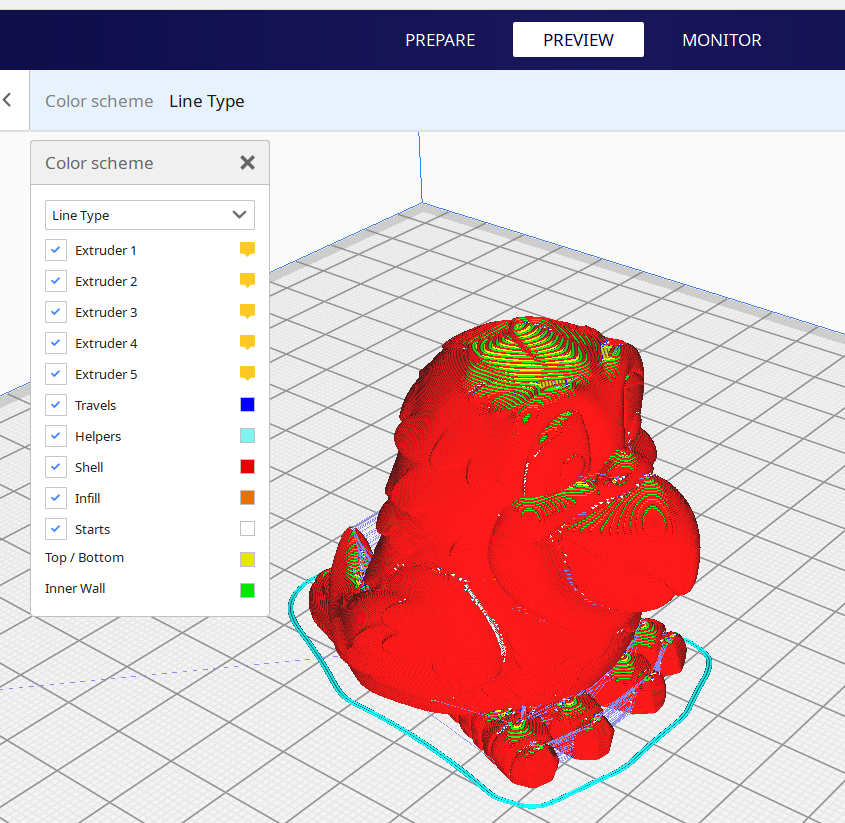
checking the extruder assignments
After slicing and checking you can print your g-code file as you would normally do.
If you want you can: