Building an OutSystems pipeline with Jenkins
This guide provides a step-by-step description of how to implement a recommended continuous delivery pipeline for OutSystems applications by leveraging the LifeTime Deployment API along with Jenkins, an open-source automation server.
Please confirm that you have the following prerequisites before following the steps described in this guide:
Ensure that you have the following Jenkins plugins installed:
| Plugin Name | Version used for this guide |
|---|---|
| Blue Ocean | 1.17.0 |
| JUnit | 1.28 |
| Lockable Resources | 2.7 |
| Pyenv Pipeline | 2.1.1 |
| Pipeline Utility Steps | 2.15.2 |
| Workspace Cleanup Plugin | 0.45 |
You can install these plugins through the Jenkins Plugin Manager.
In addition to the Jenkins plugins, you must also meet the following requirements:
Make sure that LifeTime is able to make calls to the Jenkins Remote Access API.
You should have at least one Jenkins agent with:
-
Python 3 installed
-
Access to PyPI.org
-
HTTPS connectivity with LifeTime
-
HTTPS connectivity with the front-end servers that are going to run test suites
Note:
Ensure that you also install the
pippackage installer in your agent.
Additionally, for Windows OS agents, make sure to activate the option "Add Python to PATH" in the installation wizard.
You need to create a LifeTime service account and generate an authentication token to authenticate all requests to the Deployment API.
This token can then be configured as a Jenkins credential, allowing it to be reused throughout your pipelines via the corresponding credential ID, while keeping it secure and accessible only by authorized users.
From the Jenkins Dashboard, go to Credentials, select System and Global credentials (unrestricted) (or you can opt to store the credential in a different domain).
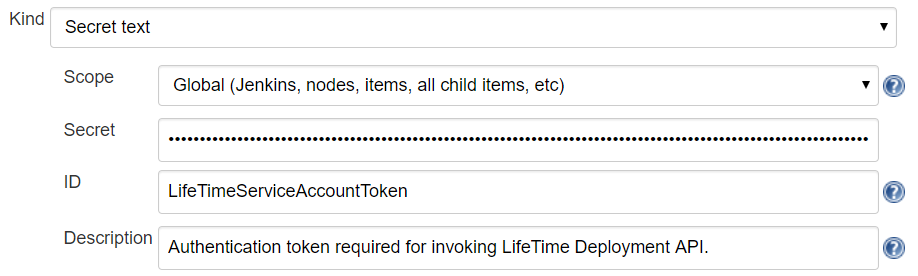
Select Add Credentials and provide the following configuration values:
- Kind: Secret text
- Scope: Global
- Secret: <your LifeTime authentication token>
- ID: LifeTimeServiceAccountToken
- Description: Authentication token required for invoking LifeTime Deployment API.
Properties Services allows you to get and set Site Properties, Timers, REST References, and SOAP Reverences from the pipelines.
To install the Properties Services, download the Properties Services and publish it on every environment that you'd like to have this functionality using Service Center. Alternatively, you can install the component directly from the Service Studio interface.

Properties Management provides the APIs to externally use the Properties Services component.
To install the Properties Management, download the Properties Management and publish it on the LifeTime environment using Service Center. Alternatively, you can install the component directly from the Service Studio interface.

To retrieve environment-specific information that is required when running the continuous delivery pipeline, the CI/CD Probe Forge component must be installed on the Regression environment of your deployment pipeline.
To install the CI/CD probe, download the CI/CD Probe matching your Platform Server version and publish it on the Regression environment using Service Center. Alternatively, you can install the component directly from the Service Studio interface.

Note
For the time being, the CI/CD Probe is only used for discovering the endpoints of existing BDD test scenarios in the target environment. Additional functionality may be added to the CI/CD Probe in future iterations.
To orchestrate the flow of activities for the continuous delivery pipeline you’ll need to create a Jenkins pipeline. The easiest way to do this is by providing a Jenkinsfile text file containing the pipeline definition.
A template Jenkinsfile for the OutSystems continuous delivery pipeline is provided here.
Create your own copy of the supplied Jenkinsfile template and make sure that the following pipeline environment variables are properly set inside the newly created Jenkinsfile:
| Name | Value | Example value |
|---|---|---|
| LifeTimeHostname | <Hostname of LifeTime environment> | lifetime.example.com |
| LifeTimeAPIVersion | <Version of LifeTime Deployment API to use> | 2 |
| DevelopmentEnvironmentLabel | <Name of Development environment as defined on LifeTime> | Development |
| RegressionEnvironmentLabel | <Name of Regression environment as defined on LifeTime> | Regression |
| AcceptanceEnvironmentLabel | <Name of Acceptance environment as defined on LifeTime> | Acceptance |
| PreProductionEnvironmentLabel | <Name of Pre-Production environment as defined on LifeTime> | Pre-Production |
| ProductionEnvironmentLabel | <Name of Production environment as defined on LifeTime> | Production |
| AuthorizationToken | <ID of Jenkins credential that stores the LifeTime authentication token> | - |
| CICDProbeEnvironmentURL | <URL of environment where CI/CD probe is deployed> | https://regression-env.acmecorp.com/ |
| BDDFrameworkEnvironmentURL | <URL of environment where BDD tests will run automatically> | https://regression-env.acmecorp.com/ |
It is highly advisable to store your custom Jenkinsfile using a version control system such as Git, as this ensures that you are able to keep track of any changes made to your pipeline definition going forward. Additionally, any other supporting artifacts that you may need to run your continuous delivery pipeline can also be stored in a single location alongside the Jenkinsfile, and synced to the pipeline workspace folder on every run.
From the Jenkins Dashboard, go to New Item, select Pipeline and name it <YourApp>-CD-Pipeline.

Note
To better organize your Jenkins dashboard you can opt to create the Jenkins pipeline inside an existing Folder.
In the Pipeline section, select option Pipeline script from SCM in the Definition field and provide the following configuration values:
- SCM: <Source control management system that hosts the Jenkinsfile pipeline definition>
- Repository URL: <URL of the Jenkinsfile in the source control management system>
- Credentials: <Credentials used by Jenkins to fetch content from the source control management system>
The Jenkins pipeline created using the provided pipeline definition file contains 6 sequential stages, each one performing one or more actions as described in the following table:
| Stage | Actions performed |
|---|---|
| Install Python Dependencies | Install required Python dependencies for running pipeline activities. |
| Get and Deploy Latest Tags | Fetch the latest versions (tags) in DEV for the configured Applications and deploy them to REG environment. |
| Run Regression | Generate Python script for running BDD test scenarios using unittest module. Run unit test suite and publish test results report. |
| Accept Changes | Deploy the latest versions (tags) for the configured applications (excluding test apps) from REG to ACC environment. Wait for input from an authorized user to accept changes and proceed until production. |
| Deploy Dry-Run | Deploy the latest versions (tags) for the configured applications from ACC to PRE environment. |
| Deploy Production | If the dry-run is successful, immediately trigger the deployment to PRD of the latest versions (tags) for the configured applications. |
Note
Most of the workload throughout the pipeline is performed by calling a set of functions from the outsystems-pipeline Python package, distributed by OutSystems on the Python Package Index (PyPI) repository.
The following picture shows a successful pipeline run using the Blue Ocean plugin:

By leveraging the test-execution REST API, the Jenkins pipeline is able to run tests written with the BDD Framework in the list of configured test applications. The outcome of this action is presented as a JUnit test report that seamlessly integrates with the Jenkins UI, as shown in the following picture:
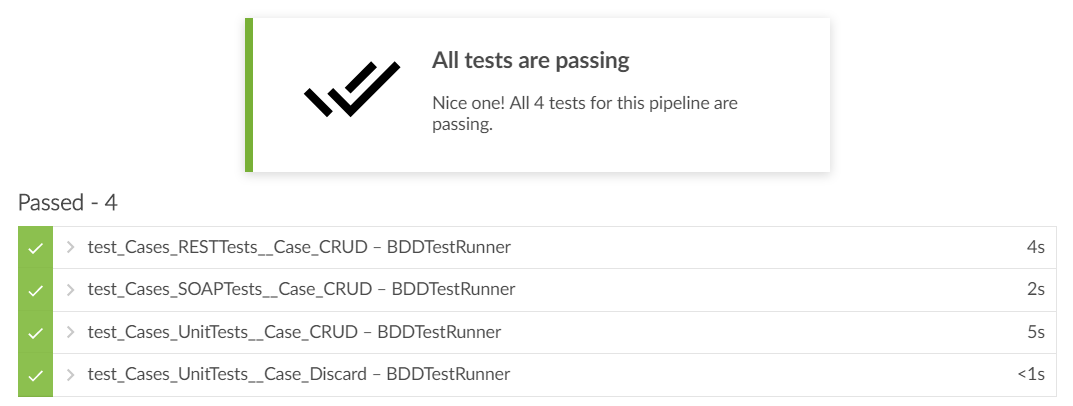
Whenever the Run Regression fails, the ongoing pipeline run is marked as unstable and all subsequent stages are skipped, thus preventing a release candidate version to proceed further down the pipeline. The pipeline test report displays which tests failed and why, for easier troubleshooting of the regression errors.


Whenever the pipeline reaches the Accept Changes stage, Jenkins halts the pipeline execution until an authorized user makes the decision to either accept or reject the release candidate version and proceed until production without further human intervention.


This step in the pipeline definition serves as the "push-button" device mentioned in the Introduction section, where all the necessary actions for successfully deploying to production a release candidate that has gone through the deployment pipeline are carried out by pushing a button.
Triggering subsequent pipeline runs can be made directly from the Jenkins UI, as needed. This approach, however, is not desirable as it would require provisioning a Jenkins user account for each person that is allowed to trigger the pipeline - in the worst-case scenario, a Jenkins account per developer.
On the other hand, the purpose of the deployment pipeline is to reduce the amount of manual work required throughout the pipeline’s flow of activities.
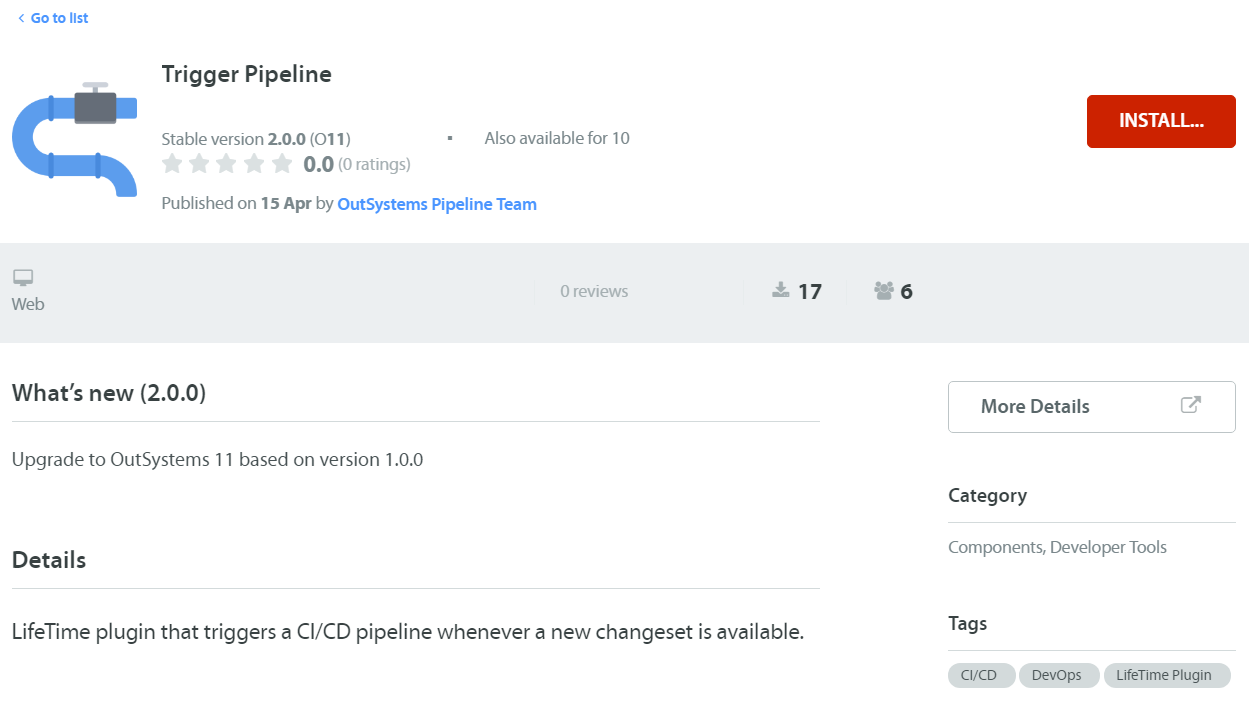
To address this issue, the Trigger Pipeline LifeTime plugin available on the OutSystems Forge automatically detects when new versions (tags) are available for a configured subset of LifeTime applications and triggers an associated Jenkins pipeline by leveraging the Jenkins REST API.
To install the Trigger Pipeline plugin, download the Trigger Pipeline plugin matching your Platform Server version and publish it to your LifeTime environment using Service Center. Alternatively, you can install the component directly from the Service Studio interface.
Configure the Trigger plugin module in your Lifetime Service Center using the following steps.
Access the integrations tab and configure the following REST APIs:
-
LifeTimeAPI:
https://your-lifetime-example.com/lifetimeapi/rest/v2 -
PropertiesAPI:
https://your-lifetime-example.com/PropertiesAPI/rest/v1
Access the Site Properties tab and configure the following properties:
- Feature_UseTriggerManifest: True
- ServiceAccountToken: <your LifeTime authentication token>
Note:
If you wish to tag changes on the fly when triggering the pipeline, the Service Account must have at least Change & Deploy permissions on the target environment.
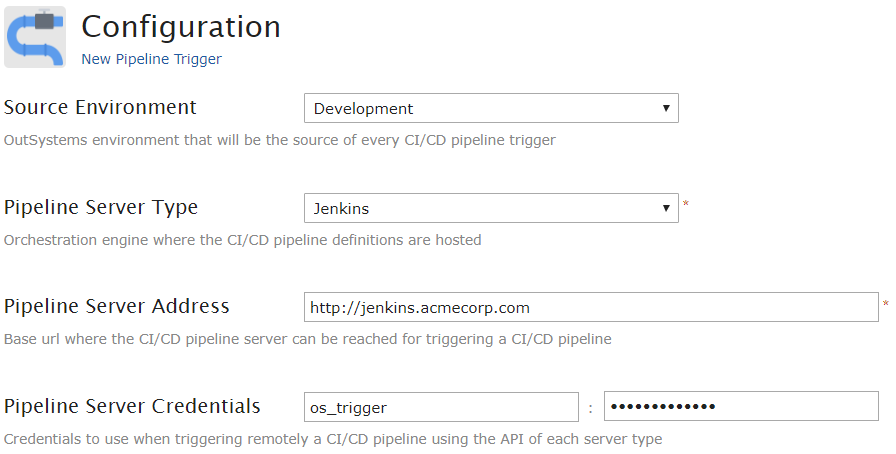
After the plugin is successfully published in the LifeTime environment, select Configure Triggers from the plugin landing page in LifeTime and configure the following parameters:
- Source Environment: <Select your OutSystems Development environment>
- Pipeline Server Type: Jenkins
- Pipeline Server Address: <Your Jenkins instance base URL>
- Pipeline Server Credentials: <Username and API token for Jenkins user account with enough permissions for running pipeline jobs>
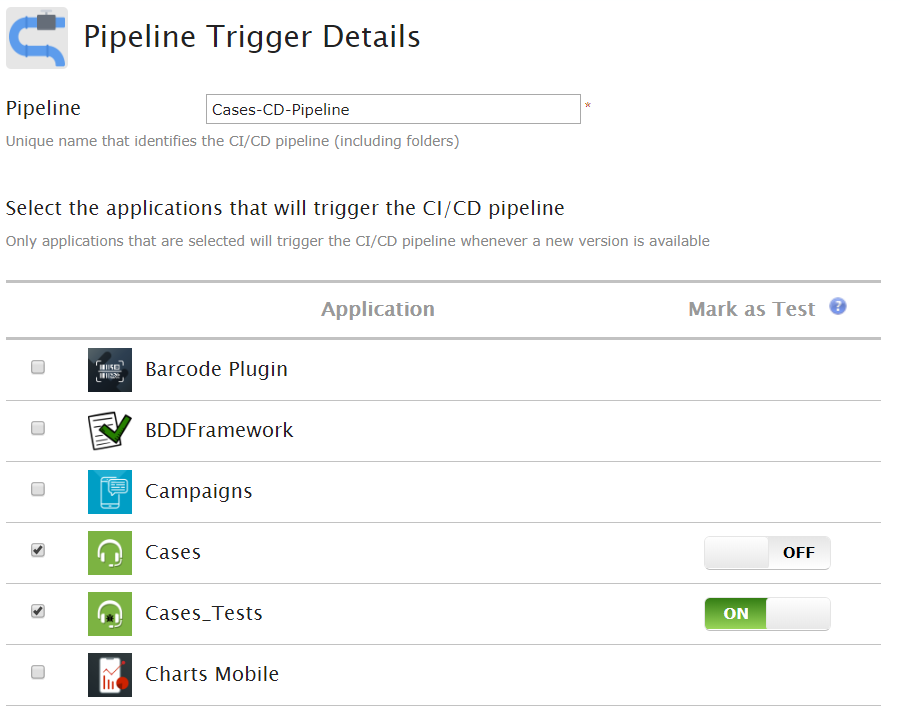
One or more pipeline triggers can be configured by providing the following data:
- Pipeline: <Unique name that identifies the pipeline in Jenkins (including folders)>
- Applications: <List of LifeTime applications that will trigger the CI/CD pipeline, identifying which ones are Test applications>
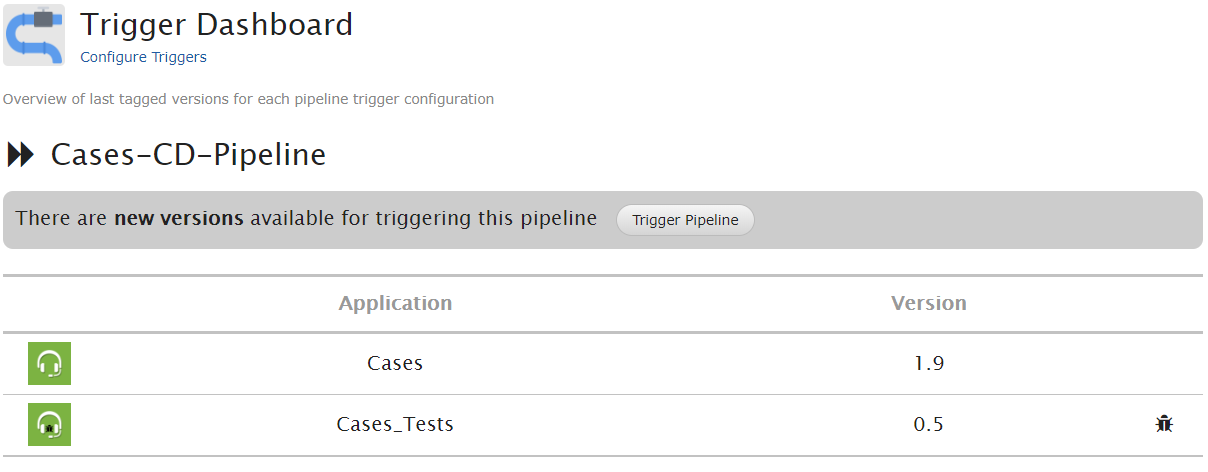
After the Trigger Pipeline plugin is properly configured, the dashboard screen will show the list of pipeline triggers, along with the current versions in Development of the LifeTime applications defined for each pipeline scope.
Once there are new application versions available for triggering a pipeline, a button is shown that allows running the pipeline on-demand without the need to log in to Jenkins.
Alternatively, pipelines can be triggered automatically through the CheckNewVersionsForPipeline timer that periodically checks if there are new application versions in Development within the scope of each configured pipeline.
To enable this timer, go to the Service Center console of your LifeTime environment and configure a desirable schedule. The minimum configurable interval is 5 minutes.

Note
A pipeline cannot be triggered while there are still pending changes (within the pipeline scope) that have not yet been tagged in LifeTime. The reason for this is to avoid running the pipeline while the changeset is still open and the commit stage has not yet been finalized.