这个文章更新可能不及时,可以直接看: https://anthony-dong.github.io/2022/03/17/093375c998745d381f00dcaac184ef81/ 这里!!
分享一下个人博客搭建,本人是有一个个人的私有仓库,然后呢私有仓库内有些问题会分享到自己的博客上,但是用Hexo发现哇使用起来比较麻烦,还需要copy来copy去的,所以自己写了一些脚本方便使用和操作!主要是为了傻瓜式的使用! 本文更新可能会有延时,可以看这篇文章使用Hexo+Next搭建个人博客
- 环境: Linux or Mac (后期会增加Windows环境,主要是不会写windows的脚本!)
- 创建一个账号:GitHub 个人账号,例如我的个人账号是
Anthony-Dong - 创建一个仓库:GitHub仓库,例如我的仓库名是
anthony-dong.github.io,格式就是{个人账号名称}.github.io,注意都要小写,仓库地址 https://github.com/Anthony-Dong/anthony-dong.github.io - 下载我的博客模版到本地,项目地址: https://github.com/Anthony-Dong/blog_template
wget https://github.com/Anthony-Dong/blog_template/archive/refs/heads/master.zip
unzip master.zip- 启动项目
- 配置参数( 如果你本地有docker且已经启动起来了,直接
make init run起来了,下面可以不看了!)
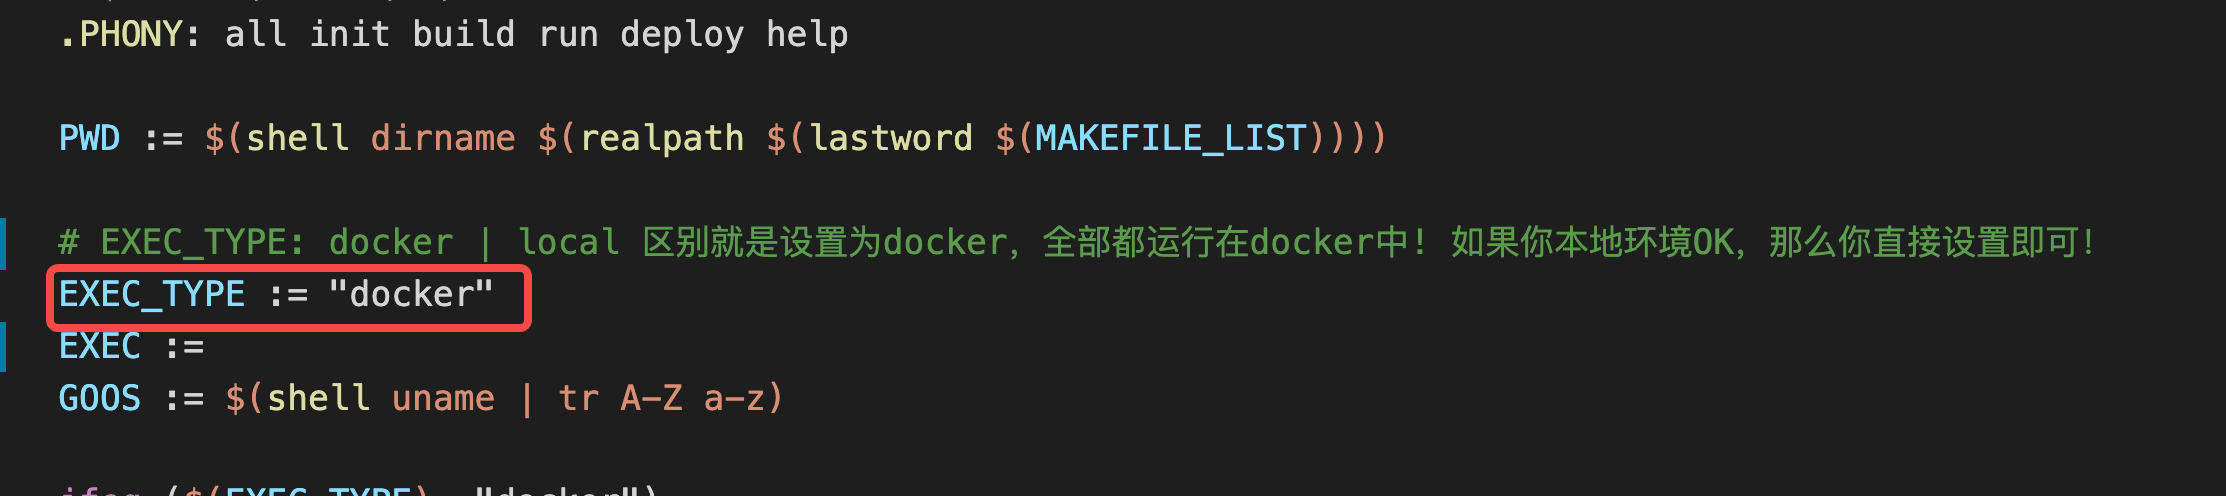
如果你的环境依赖本地都有,只需要把 EXEC_TYPE := docker 改成 EXEC_TYPE := 即可
注意: 如果你用环境依赖指的是 node+hexo环境,需要注意的是你需要安装 node.js 16.3 版本 + hexo 4.3.0 版本,可以参考下面的安装方式!
# 安装 node.js,如果你是mac环境完全可以下面这样安装
brew install node@16
# 其他环境,需要下载 https://nodejs.org/dist/v16.3.0/ 源码进行安装!
# 更加推荐大家使用: https://github.com/nvm-sh/nvm  进行管理Node版本!

# 安装 hexo, 这里配置taobao的源,比较快!
npm config set registry https://registry.npm.taobao.org
npm install hexo-cli@4.3.0 -g
npm install gulp-cli@2.3.0 -g- 初始化环境: 执行
make init run即可! - 具体帮助命令
➜  note-master git:(master) ✗ make
 push                  push项目到远程
 info                  项目信息
 create                创建博客文件的头部信息
 init                  初始化整个项目[第一次执行会比较慢]
 build                 构建
 run                   启动
 deploy                发布
help 帮助- 修改配置文件
hexo-home/_config.yml, 只需要修改我下面标注的!
# Site
title: 技术小白  # 网站标题
subtitle: '技术小白的技术博客' # 网站介绍
keywords: # 网站关键词
  - Hexo
  - Node.js
  - Flink
description: '每天进步一点点!' # 个性签名
author: xiao-bai # 作者名称

# URL
## Set your site url here. For example, if you use GitHub Page, set url as 'https://username.github.io/project'
url: https://xiao-bai.github.io/ # 你的博客地址,一般你部署在github的话

## Docs: https://hexo.io/docs/one-command-deployment
deploy:
  type: git
  repo: git@github.com:xiao-bai/xiao-bai.github.io.git # 你仓库的地址
branch: master- 修改配置文件
hexo-home/themes/next/_config.yml, 简单使用只需要替换以下的配置文件,高级使用请看官方文档: https://github.com/iissnan/hexo-theme-next
# 下面的联系地址可以改成你的!你也可以根据配置文件添加
social:
  GitHub: https://github.com/anthony-dong || fab fa-github
  E-Mail: mailto:fanhaodong516@gmail.com || fa fa-envelope
  掘金: https://juejin.cn/user/4248168663101320 || fas fa-book
  国内邮箱: mailto:fanhaodong516@163.com || fa fa-envelope

# 这个替换成的话术就行了,不需要的话可以 enable: false 关闭
reward_settings:
  # If true, reward will be displayed in every article by default.
  enable: true
  animation: false
  comment: 本人坚持原创技术分享,如果你觉得文章对您有用,请随意打赏! 如果有需要咨询的请发送到我的邮箱!

# 你的收款码,不需要的话可以注释掉!
reward:
  wechatpay: /images/wechatpay.png
  alipay: /images/alipay.png

# 这个替换成你的github就行了,不需要的话可以  enable: false 关闭
github_banner:
  enable: true
  permalink: https://github.com/Anthony-Dong
title: Follow me on GitHub- 修改以下路径的图片,替换成你的图片
hexo-home/themes/next/source/images/alipay.png   你的支付宝收款码
hexo-home/themes/next/source/images/wechatpay.png  你的微信收款码
hexo-home/themes/next/source/images/avatar.png  你的头像
hexo-home/themes/next/source/images/favicon.ico 你网站的icon- 修改个人简介,可以修改此文件:
hexo-home/source/about/index.md即可!
- 执行下面命令
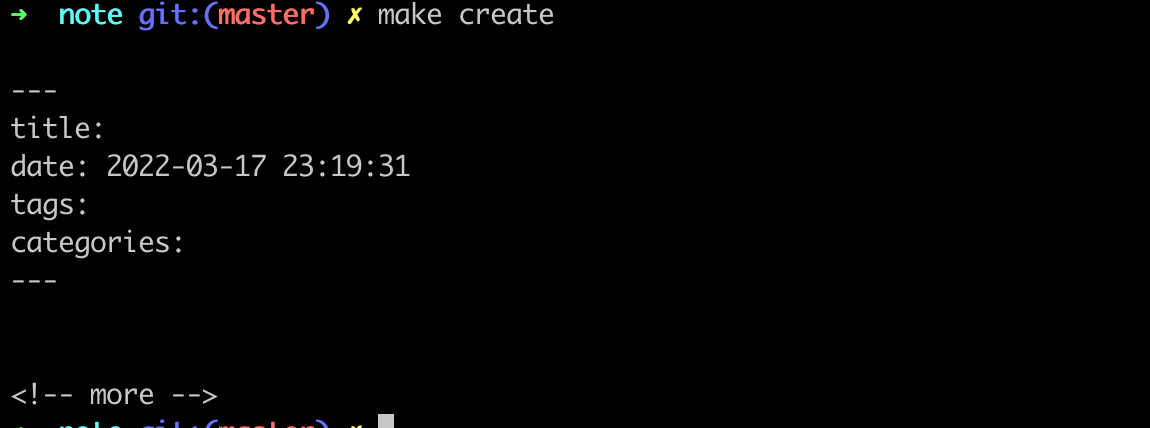
make create,会生成一个页眉,你只需要把这个东西 copy 到你的文章中去!
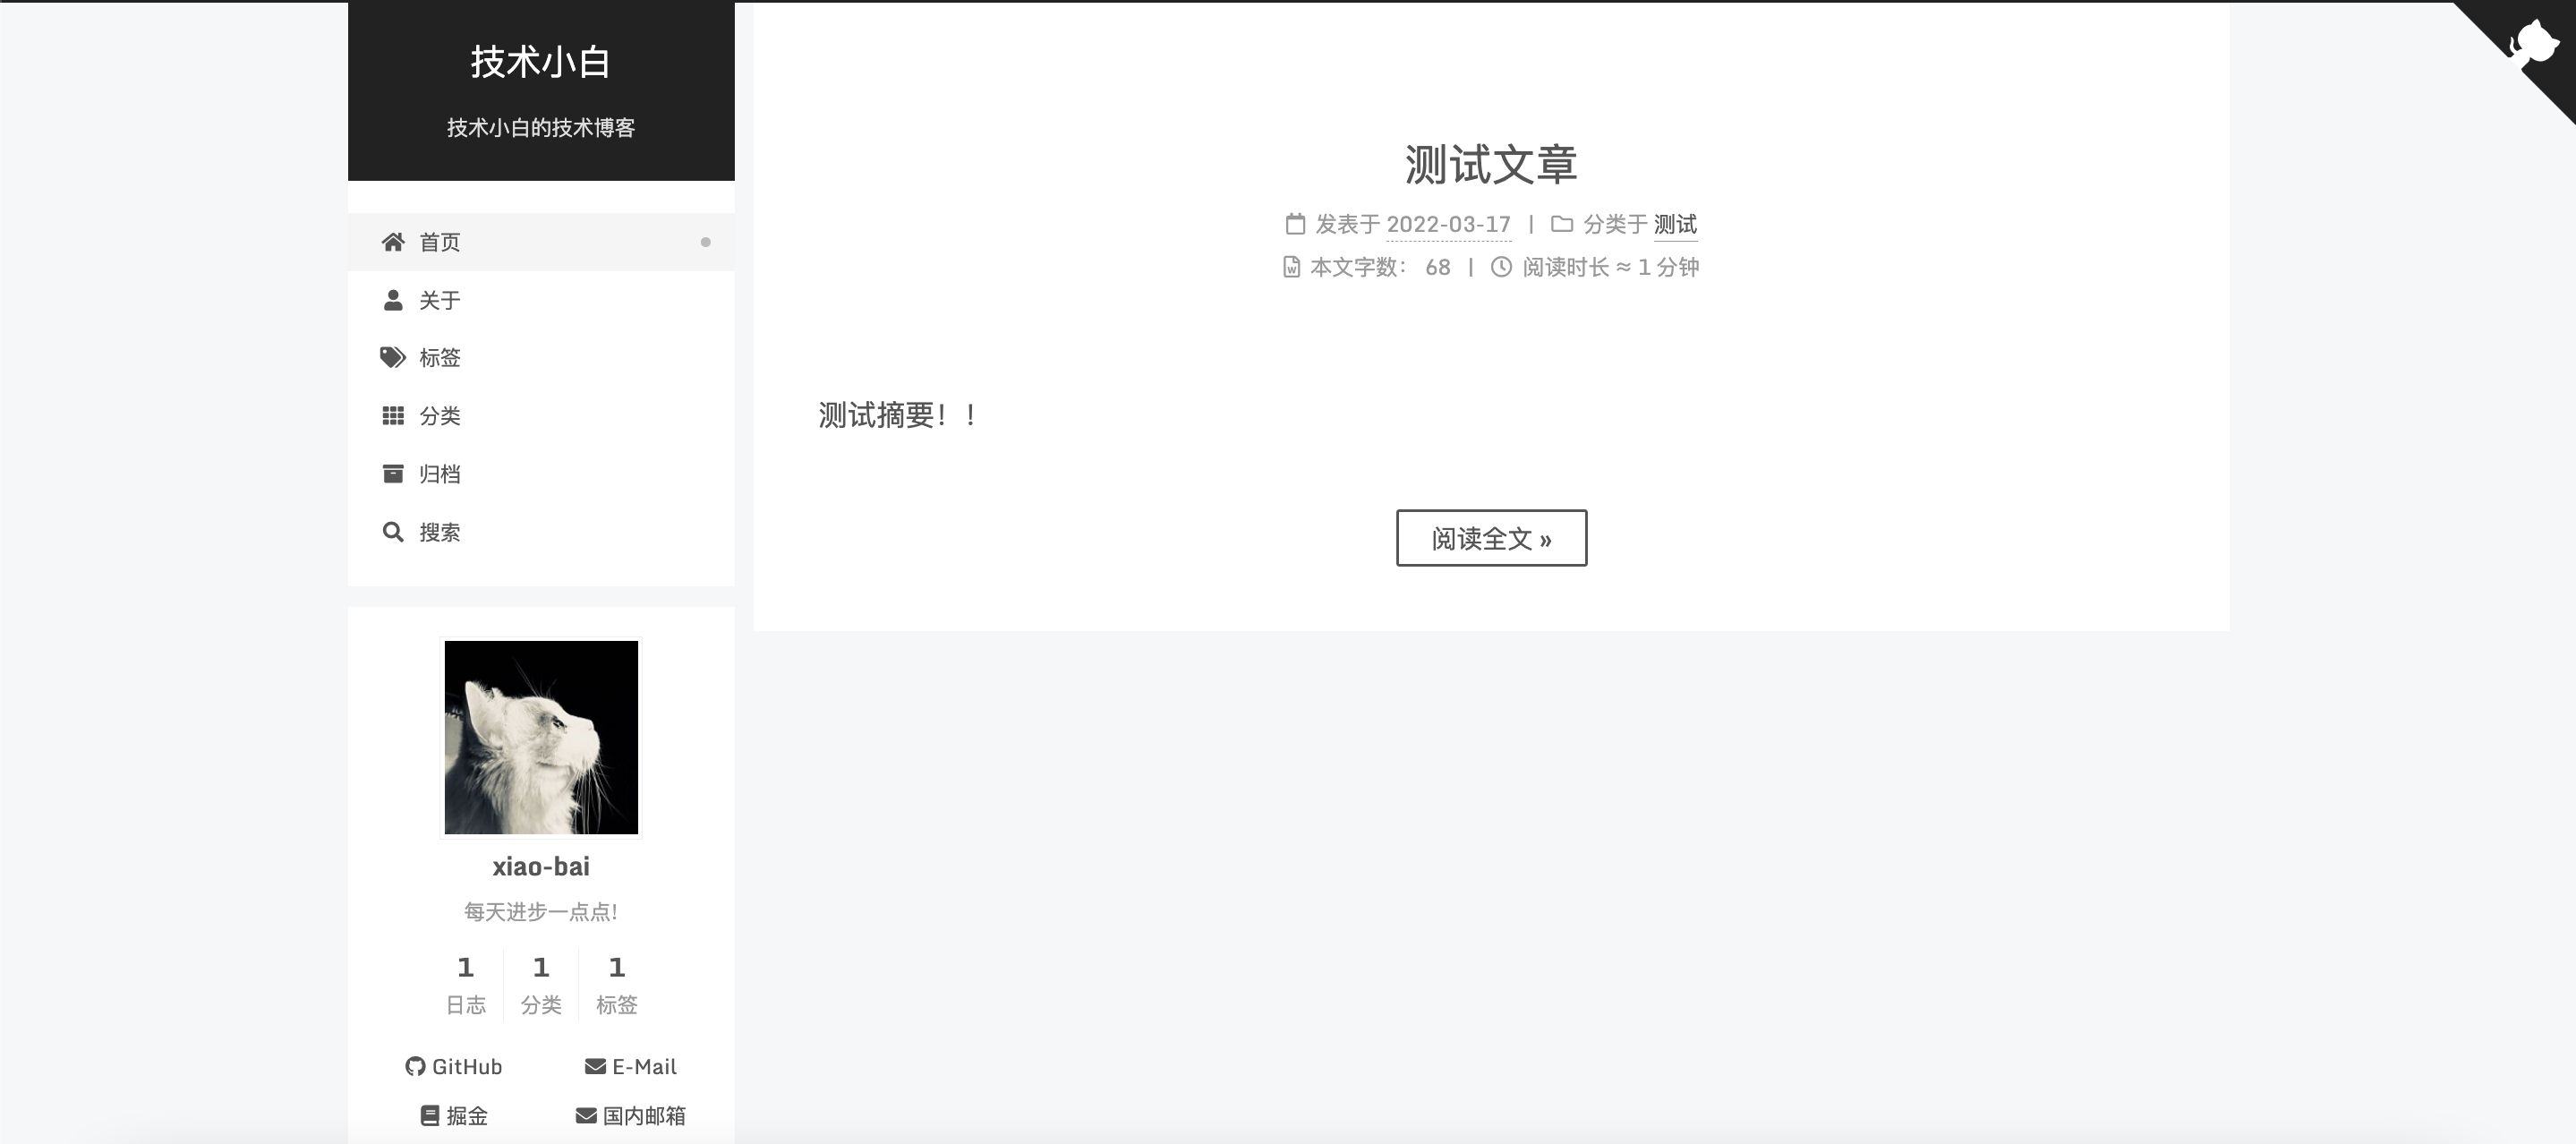
- 找到你的文章,写一些描述信息,例如我这篇文章就是这么写的!

- 本地构建一下
make run,看看详情信息
➜  note-master git:(master) ✗ make run
bin/go-tool hexo --dir ./ --target_dir ./hexo-home/source/_posts
2022/03/17 21:53:00.668245 api.go:63: [INFO] [hexo] command load config:
....


13:53:40.106 DEBUG Processed: layout/_third-party/search/localsearch.swig
13:53:40.366 DEBUG Generator: page
13:53:40.367 DEBUG Generator: post
13:53:40.367 DEBUG Generator: category
13:53:40.367 DEBUG Generator: archive
13:53:40.367 DEBUG Generator: json
13:53:40.368 DEBUG Generator: index
13:53:40.368 DEBUG Generator: tag
13:53:40.371 DEBUG Generator: asset
13:53:40.403 INFO  Hexo is running at http://localhost:4000 . Press Ctrl+C to stop.
13:53:40.425 DEBUG Database saved
13:53:59.402 DEBUG Rendering HTML index: index.html- 然后访问 http://localhost:4000 即可!看到网页
- 最后没问题,执行
make deploy即可发布到远程网站了!
make deploy这个我们都知道,公司会有安全团队扫描开源仓库,假如你涉及到公司敏感字眼也比较恶心,比如把你个人信息暴露了!但是要知道不能发布公司内部的文章上传出去,或者公司内部的代码,这个是任何公司的红线!切记,这个插件主要就是过滤一些公司的名字而已!
配置文件在: 你只需要列出敏感词即可!在KeyWord地方!
Hexo:
  KeyWord:
    - "敏感词"
    - "敏感词2"
  Ignore: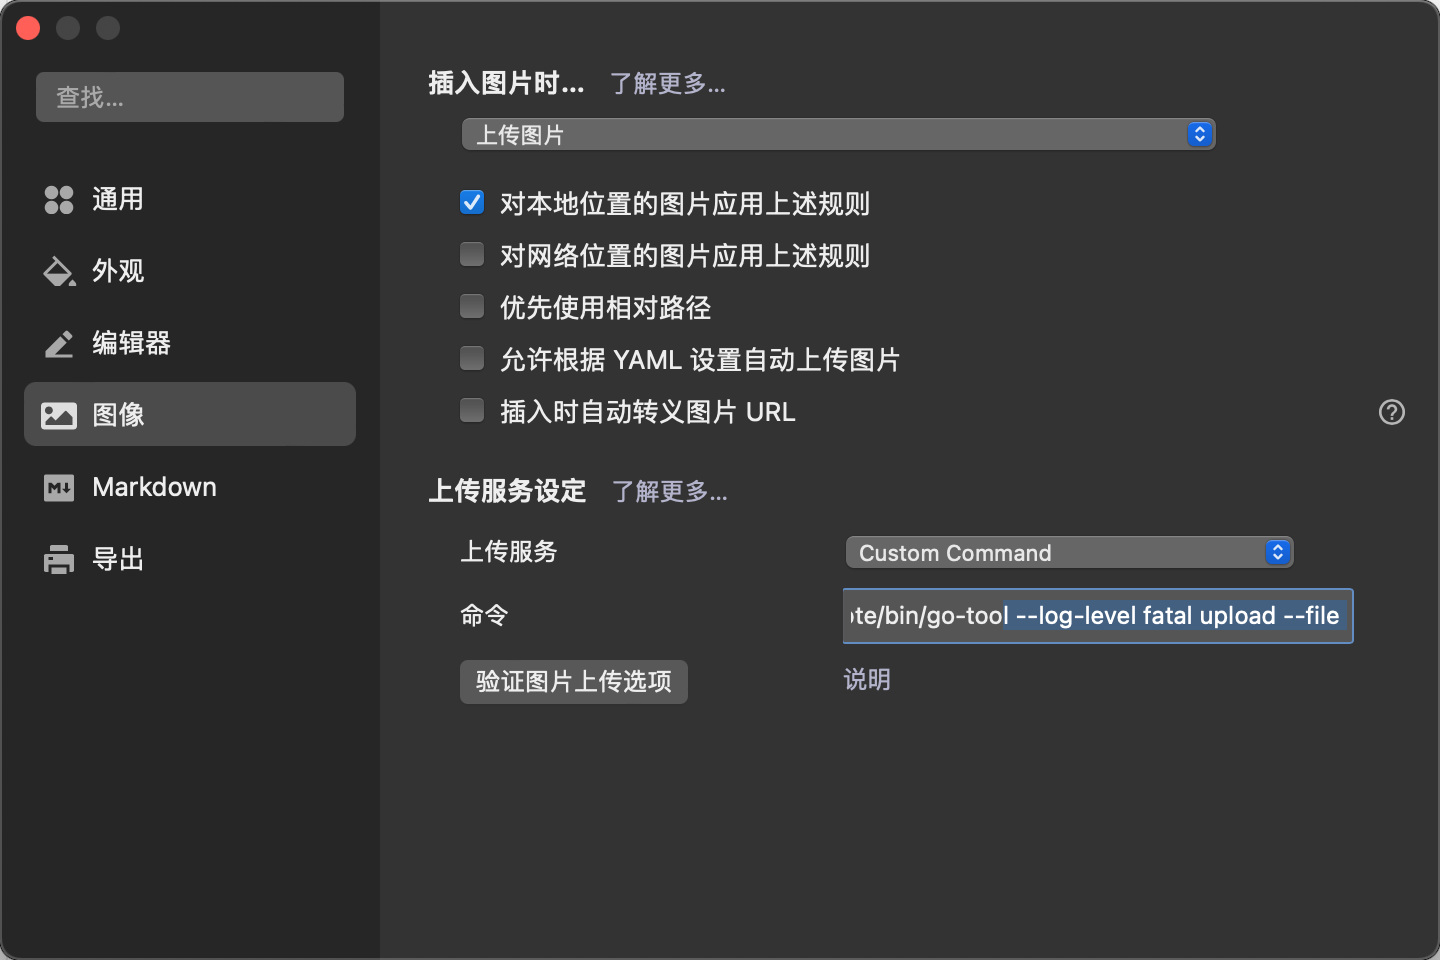
- hexo-home目前我使用的是我自己写的工具上传图片,主要是用的阿里云的OSS,基本上一年花个不到几块钱就可以搞定!
具体可以参考 Upload 插件
你在你本地的 .config/.go-tool.yaml 文件,配置一下配置即可!
Upload:
  Bucket:
    default:
      AccessKeyId: xxxx
      AccessKeySecret: xxxx
      Endpoint: oss-accelerate.aliyuncs.com
      UrlEndpoint: xxx.oss-accelerate.aliyuncs.com
      Bucket: xxxx
      PathPrefix: image
    pdf:
      AccessKeyId: xxxxx
      AccessKeySecret: xxxxx
      Endpoint: oss-accelerate.aliyuncs.com
      UrlEndpoint: xxxx.oss-accelerate.aliyuncs.com
      Bucket: xxxx
      PathPrefix: pdf
然后Typora配置下:
修改本地文件hexo-home/source/about/index.md 即可