A Radio Frequency Identification (RFID) and Keypad Door Lock for the Arduino Uno R3 Template
3. After connecting your Arduino device, choose it through Tools->Board->... and then selecting the proper COM Port for your device through Tools->Port->...
4. Click on verify to make sure that you have the necessary libraries included and that there are no compilation errors (If any libraries are missing, you can search for them through Sketch->Include Library->Manage Libraries...)
5. Before you click upload, make sure that the Digital Pin 0 (D0) is disconnected from the ID-20LA RFID Reader either from a switch or by pulling the pin out from the Arduino
6. Upload to your board and upon completion, make sure to reconnect the D0 pin to the ID-20LA RFID Reader

| Product | Model # | Price ($) | Links |
|---|---|---|---|
| Arduino Uno R3 | A000066 | 22.00 | Link |
| RFID Reader | ID-20LA | 34.95 | Link |
| RFID Reader Breakout | SEN-13030 | 1.95 | Link |
| Qwiic Keypad | SPX-14836 | 9.95 | Link |
| NeoPixel LED Ring | ----- | 9.95 | Link |
| Servo Motor | SG5010 | 7.99 | Link |
| Magnetic Contact Switch | ----- | 3.95 | Link |
| Piezo Buzzer | ----- | 0.95 | Link |
125 KHz reader used to scan tags in order to change the lock position on the door
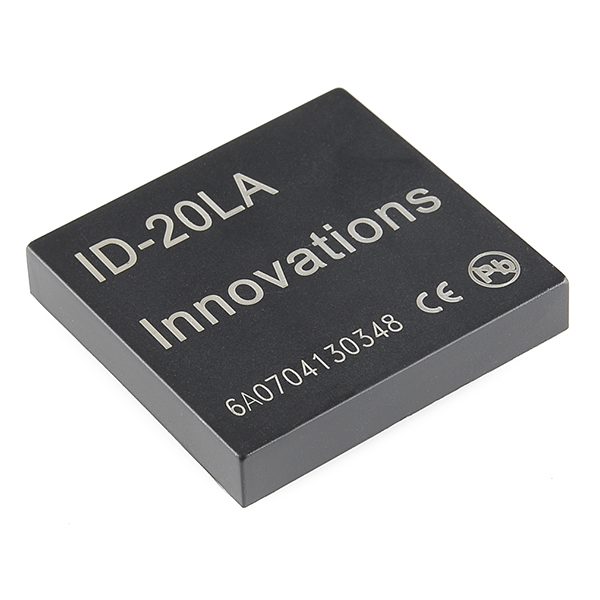
| ID-20LA | --> | Arduino Uno R3 |
|---|---|---|
| Pin 1 (GND) | --> | Ground (GND) |
| Pin 2 (RES) | --> | Digital Pin 7 (D7) |
| Pin 7 (FORM) | --> | Ground (GND) |
| Pin 9 (D0) | --> | Digital Pin 0 (D0) |
| Pin 11 (VCC) | --> | 3.3 Volts (3.3V) |
void checkReader();          // Checks the reader for tags
void checkTag(char tag[]);   // Checks given tag to the other predfined valid tags
void resetReader(); // Resets the reader to get ready for another readKeypad used to enter a 4-digit code in order to change the lock position on the door
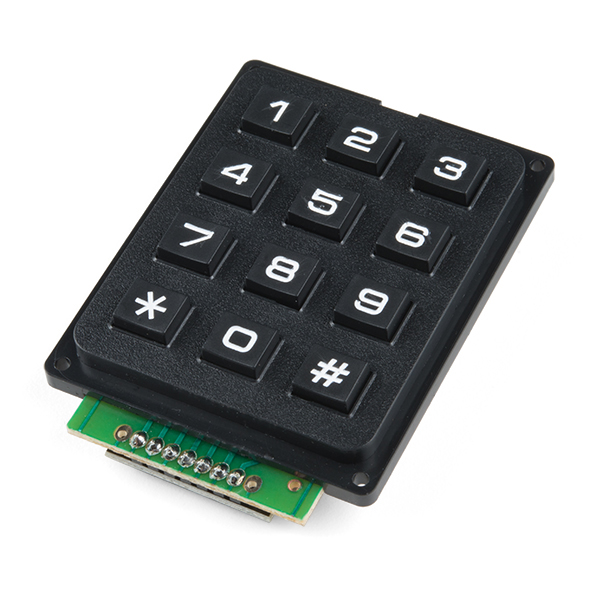
| Qwiic Keypad | --> | Arduino Uno R3 |
|---|---|---|
| Ground (GND) | --> | Ground (GND) |
| 3.3 Volts (3.3V) | --> | 3.3 Volts (3.3V) |
| SDA (SDA) | --> | Analog In 4 (A4) |
| SCL (SCL) | --> | Analog In 5 (A5) |
void checkKeypad();          // Reads the input from the keypad
void checkCode(String code); // Checks to see if the 4 digit code entered is correct
void dailyCode(); // Generates the 4 digit code based on the current dateGives the user feedback on things like lock countdown, number of pins digits entered, and more

| NeoPixel LED Ring | --> | Arduino Uno R3 |
|---|---|---|
| Ground (GND) | --> | Ground (GND) |
| V+ (V+) | --> | 5 Volts (5V) |
| IN (IN) | --> | Digital Pin 6 (D6) |
void rainbowCycle();         // Updates a single pixel every call to simulate a spinning rainbow
void keypadFeedback();       // Lights up the LEDring to give feedback on how many digits you have entered
void flash(uint32_t c);      // Takes a color and flashes the LEDring with it 3 times
void allSet(uint32_t c); // Takes a color and sets all the LEDring pixels to the colorUsed to rotate the lock on the door to adjust the lock state (locked/unlock)
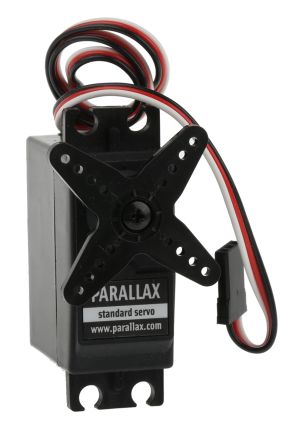
| Servo Motor | --> | Arduino Uno R3 |
|---|---|---|
| Ground (GND) | --> | Ground (GND) |
| 3.3 Volts (3.3V) | --> | 3.3 Volts (3.3V) |
| Source (Signal) | --> | Digital Pin 9 (D9) |
void lock();                 // Sets the lock position to locked
void unlock();               // Sets the lock position to unlocked
void changeLock();           // Changes the current lock position