-
The Angular CLI downloads and installs everything you need to test an Angular application with the Jasmine test framework
-
The project you create with the CLI is immediately ready to test. Just run the ng test CLI command:
ng test- The ng test command builds the application in watch mode, and launches the Karma test runner
-
The CLI takes care of Jasmine and Karma configuration for you.
-
Fine-tune many options by editing the
karma.conf.jsin the root folder of the project and thetest.tsfiles in thesrc/folder. -
The
karma.conf.jsfile is a partial Karma configuration file. The CLI constructs the full runtime configuration in memory, based on application structure specified in theangular.jsonfile, supplemented bykarma.conf.js.
-
Look inside the
src/appfolder.-
The CLI generated a test file for the
AppComponentnamedapp.component.spec.ts.-
The test file extension must be
.spec.tsso that tooling can identify it as a file with tests (also known as a spec file). -
The
app.component.tsandapp.component.spec.tsfiles are siblings in the same folder. The root file names (app.component) are the same for both files.
-
-
-
It's a good idea to put unit test spec files in the same folder as the application source code files that they test:
- Such tests are painless to find
- You see at a glance if a part of your application lacks tests
- Nearby tests can reveal how a part works in context
- When you move the source (inevitable), you remember to move the test
- When you rename the source file (inevitable), you remember to rename the test file
-
Application integration specs can test the interactions of multiple parts spread across folders and modules. They don't really belong to any part in particular, so they don't have a natural home next to any one file.
-
It's often better to create an appropriate folder for them in the tests directory.
-
Of course specs that test the test helpers belong in the test folder, next to their corresponding helper files.
-
One of the best ways to keep your project bug-free is through a test suite, but you might forget to run tests all the time. Continuous integration (CI) servers let you set up your project repository so that your tests run on every commit and pull request.
-
There are paid CI services like Circle CI and Travis CI, and you can also host your own for free using Jenkins and others. Although Circle CI and Travis CI are paid services, they are provided free for open source projects. You can create a public project on GitHub and add these services without paying. Contributions to the Angular repository are automatically run through a whole suite of Circle CI tests.
-
This article explains how to configure your project to run Circle CI and Travis CI, and also update your test configuration to be able to run tests in the Chrome browser in either environment.
-
- Create a folder called
.circleciat the project root.
- Create a folder called
-
- In the new folder, create a file called
config.ymlwith the following content:
-
config.yml
version: 2 jobs: build: working_directory: ~/my-project docker: ‐ image: circleci/node:10-browsers steps: ‐ checkout ‐ restore_cache: key: my-project-{{ .Branch }}-{{ checksum "package-lock.json" }} ‐ run: npm install ‐ save_cache: key: my-project-{{ .Branch }}-{{ checksum "package-lock.json" }} paths: ‐ "node_modules" ‐ run: npm run test -- --no-watch --no-progress --browsers=ChromeHeadlessCI -
This configuration caches node_modules/ and uses
npm runto run CLI commands, because @angular/cli is not installed globally. The double hyphen (--) characters is needed to pass arguments into the npm script.
- In the new folder, create a file called
-
- Commit your changes and push them to your repository.
-
- Sign up for Circle CI and add your project. Your project should start building.
-
- Create a file called
.travis.ymlat the project root, with the following content:
-
.travis.yml
language: node_js node_js: ‐ "10" addons: chrome: stable cache: directories: ‐ ./node_modules install: ‐ npm install script: ‐ npm run test -- --no-watch --no-progress --browsers=ChromeHeadlessCI -
This does the same things as the CircleCI configuration, except that Travis doesn't come with Chrome, so use Chromium instead.
- Create a file called
-
- Commit your changes and push them to your repository.
-
- Sign up for Travis CI and add your project. You'll need to push a new commit to trigger a build.
-
- Create a file called
.gitlab-ci.ymlat the project root, with the following content:
-
.gitlab-ci.yml
image: node:14.15-stretch variables: FF_USE_FASTZIP: "true" cache: untracked: true policy: push key: ${CI_COMMIT_SHORT_SHA} paths: ‐ node_modules/ .pull_cached_node_modules: cache: untracked: true key: ${CI_COMMIT_SHORT_SHA} policy: pull stages: ‐ setup ‐ test install: stage: setup script: ‐ npm ci test: stage: test extends: .pull_cached_node_modules before_script: ‐ apt-get update ‐ wget https://dl.google.com/linux/direct/google-chrome-stable_current_amd64.deb ‐ apt install -y ./google-chrome*.deb; ‐ export CHROME_BIN=/usr/bin/google-chrome script: ‐ npm run test -- --no-watch --no-progress --browsers=ChromeHeadlessCI -
This configuration caches
node_modules/in theinstalljob and re-uses the cachednode_modules/in thetestjob.
- Create a file called
-
- Sign up for GitLab CI and add your project. You'll need to push a new commit to trigger a build.
-
- Commit your changes and push them to your repository.
-
- Create a folder called
.github/workflowsat root of your project.
- Create a folder called
-
- In the new folder, create a file called
main.ymlwith the following content:
name: CI Angular app through GitHub Actions on: push jobs: build: runs-on: ubuntu-latest steps: ‐ uses: actions/checkout@v2 ‐ name: Use Node.js 14.x uses: actions/setup-node@v1 with: node-version: 14.x ‐ name: Setup run: npm ci ‐ name: Test run: | npm test -- --no-watch --no-progress --browsers=ChromeHeadlessCI - In the new folder, create a file called
-
- Sign up for GitHub and add your project. You'll need to push a new commit to trigger a build.
-
- Commit your changes and push them to your repository.
-
While the CLI command
ng testis generally running the CI tests in your environment, you might still need to adjust your configuration to run the Chrome browser tests. -
There is a configuration file for the Karma JavaScript test runner, which you must adjust to start Chrome without sandboxing.
-
We'll be using Headless Chrome in these examples.
-
In the Karma configuration file,
karma.conf.js, add a custom launcher called ChromeHeadlessCI below browsers:browsers: ['ChromeHeadlessCI'], customLaunchers: { ChromeHeadlessCI: { base: 'ChromeHeadless', flags: ['--no-sandbox'] } },
-
-
Now, run the following command to use the
--no-sandboxflag:ng test --no-watch --no-progress --browsers=ChromeHeadlessCI -
NOTE:
- Right now, you'll also want to include the
--disable-gpuflag if you're running on Windows.
- Right now, you'll also want to include the
-
The CLI can run unit tests and create code coverage reports. Code coverage reports show you any parts of your code base that might not be properly tested by your unit tests.
-
To generate a coverage report run the following command in the root of your project.
ng test --no-watch --code-coverage -
When the tests are complete, the command creates a new
/coveragefolder in the project. Open the index.html file to see a report with your source code and code coverage values. -
If you want to create code-coverage reports every time you test, set the following option in the CLI configuration file,
angular.json:"test": { "options": { "codeCoverage": true } }
-
The code coverage percentages let you estimate how much of your code is tested. If your team decides on a set minimum amount to be unit tested, enforce this minimum with the Angular CLI.
-
For example, suppose you want the code base to have a minimum of 80% code coverage. To enable this, open the Karma test platform configuration file,
karma.conf.js, and add thecheckproperty in thecoverageReporter:key.coverageReporter: { dir: require('path').join(__dirname, './coverage/<project-name>'), subdir: '.', reporters: [ { type: 'html' }, { type: 'text-summary' } ], check: { global: { statements: 80, branches: 80, functions: 80, lines: 80 } } }- The
checkproperty causes the tool to enforce a minimum of 80% code coverage when the unit tests are run in the project.
- The
-
To check that your services are working as you intend, you can write tests specifically for them.
-
Services are often the smoothest files to unit test. Here are some synchronous and asynchronous unit tests of the
ValueServicewritten without assistance from Angular testing utilities.-
app/demo/demo.spec.ts
// Straight Jasmine testing without Angular's testing support
describe('ValueService', () => {
  let service: ValueService;
  beforeEach(() => { service = new ValueService(); });

  it('#getValue should return real value', () => {
    expect(service.getValue()).toBe('real value');
  });

  it('#getObservableValue should return value from observable',
    (done: DoneFn) => {
    service.getObservableValue().subscribe(value => {
      expect(value).toBe('observable value');
      done();
    });
  });

  it('#getPromiseValue should return value from a promise',
    (done: DoneFn) => {
    service.getPromiseValue().then(value => {
      expect(value).toBe('promise value');
      done();
    });
  });
});
-
-
Services often depend on other services that Angular injects into the constructor. In many cases, you can create and inject these dependencies by hand while calling the service's constructor.
-
The
MasterServiceis a simple example:-
app/demo/demo.ts
@Injectable() export class MasterService { constructor(private valueService: ValueService) { } getValue() { return this.valueService.getValue(); } } -
MasterServicedelegates its only method,getValue, to the injectedValueService.
-
-
Here are several ways to test it.
-
app/demo/demo.spec.ts
describe('MasterService without Angular testing support', () => {
  let masterService: MasterService;

  it('#getValue should return real value from the real service', () => {
    masterService = new MasterService(new ValueService());
    expect(masterService.getValue()).toBe('real value');
  });

  it('#getValue should return faked value from a fakeService', () => {
    masterService = new MasterService(new FakeValueService());
    expect(masterService.getValue()).toBe('faked service value');
  });

  it('#getValue should return faked value from a fake object', () => {
    const fake =  { getValue: () => 'fake value' };
    masterService = new MasterService(fake as ValueService);
    expect(masterService.getValue()).toBe('fake value');
  });

  it('#getValue should return stubbed value from a spy', () => {
    // create `getValue` spy on an object representing the ValueService
    const valueServiceSpy =
      jasmine.createSpyObj('ValueService', ['getValue']);

    // set the value to return when the `getValue` spy is called.
    const stubValue = 'stub value';
    valueServiceSpy.getValue.and.returnValue(stubValue);

    masterService = new MasterService(valueServiceSpy);

    expect(masterService.getValue())
      .withContext('service returned stub value')
      .toBe(stubValue);
    expect(valueServiceSpy.getValue.calls.count())
      .withContext('spy method was called once')
      .toBe(1);
    expect(valueServiceSpy.getValue.calls.mostRecent().returnValue)
      .toBe(stubValue);
  });
});
-
-
The first test creates a
ValueServicewithnewand passes it to theMasterServiceconstructor. -
However, injecting the real service rarely works well as most dependent services are difficult to create and control.
-
Instead, mock the dependency, use a dummy value, or create a spy on the pertinent service method.
- Prefer spies as they are usually the best way to mock services.
-
These standard testing techniques are great for unit testing services in isolation.
-
However, you almost always inject services into application classes using Angular dependency injection and you should have tests that reflect that usage pattern. Angular testing utilities make it straightforward to investigate how injected services behave.
-
Your application relies on Angular dependency injection (DI) to create services. When a service has a dependent service, DI finds or creates that dependent service. And if that dependent service has its own dependencies, DI finds-or-creates them as well.
-
As service consumer, you don't worry about any of this. You don't worry about the order of constructor arguments or how they're created.
-
As a service tester, you must at least think about the first level of service dependencies but you can let Angular DI do the service creation and deal with constructor argument order when you use the TestBed testing utility to provide and create services.
-
The
TestBedis the most important of the Angular testing utilities. TheTestBedcreates a dynamically-constructed Angular test module that emulates an Angular@NgModule. -
The
TestBed.configureTestingModule()method takes a metadata object that can have most of the properties of an@NgModule. -
To test a service, you set the providers metadata property with an array of the services that you'll test or mock.
-
app/demo/demo.testbed.spec.ts (provide ValueService in beforeEach)
let service: ValueService;

beforeEach(() => {
  TestBed.configureTestingModule({ providers: [ValueService] });
});
-
-
Then inject it inside a test by calling
TestBed.inject()with the service class as the argument.- NOTE:
TestBed.get()was deprecated as of Angular version 9. To help minimize breaking changes, Angular introduces a new function called TestBed.inject(), which you should use instead.
it('should use ValueService', () => { service = TestBed.inject(ValueService); expect(service.getValue()).toBe('real value'); });- Or inside the
beforeEach()if you prefer to inject the service as part of your setup.beforeEach(() => { TestBed.configureTestingModule({ providers: [ValueService] }); service = TestBed.inject(ValueService); });
- NOTE:
-
When testing a service with a dependency, provide the mock in the
providersarray.-
In the following example, the mock is a spy object.
let masterService: MasterService;
let valueServiceSpy: jasmine.SpyObj<ValueService>;

beforeEach(() => {
  const spy = jasmine.createSpyObj('ValueService', ['getValue']);

  TestBed.configureTestingModule({
    // Provide both the service-to-test and its (spy) dependency
    providers: [
      MasterService,
      { provide: ValueService, useValue: spy }
    ]
  });
  // Inject both the service-to-test and its (spy) dependency
  masterService = TestBed.inject(MasterService);
  valueServiceSpy = TestBed.inject(ValueService) as jasmine.SpyObj<ValueService>;
});
-
-
The test consumes that spy in the same way it did earlier.
it('#getValue should return stubbed value from a spy', () => {
  const stubValue = 'stub value';
  valueServiceSpy.getValue.and.returnValue(stubValue);

  expect(masterService.getValue())
    .withContext('service returned stub value')
    .toBe(stubValue);
  expect(valueServiceSpy.getValue.calls.count())
    .withContext('spy method was called once')
    .toBe(1);
  expect(valueServiceSpy.getValue.calls.mostRecent().returnValue)
    .toBe(stubValue);
});
-
Most test suites in this guide call
beforeEach()to set the preconditions for eachit()test and rely on theTestBedto create classes and inject services. -
There's another school of testing that never calls
beforeEach()and prefers to create classes explicitly rather than use theTestBed. -
Here's how you might rewrite one of the
MasterServicetests in that style.-
Begin by putting re-usable, preparatory code in a setup function instead of
beforeEach().-
app/demo/demo.spec.ts (setup)
function setup() { const valueServiceSpy = jasmine.createSpyObj('ValueService', ['getValue']); const stubValue = 'stub value'; const masterService = new MasterService(valueServiceSpy); valueServiceSpy.getValue.and.returnValue(stubValue); return { masterService, stubValue, valueServiceSpy }; } -
The
setup()function returns an object literal with the variables, such asmasterService, that a test might reference. You don't define semi-global variables (for example,let masterService: MasterService) in the body of thedescribe().
-
-
Then each test invokes
setup()in its first line, before continuing with steps that manipulate the test subject and assert expectations.it('#getValue should return stubbed value from a spy', () => { const { masterService, stubValue, valueServiceSpy } = setup(); expect(masterService.getValue()) .withContext('service returned stub value') .toBe(stubValue); expect(valueServiceSpy.getValue.calls.count()) .withContext('spy method was called once') .toBe(1); expect(valueServiceSpy.getValue.calls.mostRecent().returnValue) .toBe(stubValue); });
-
-
Many developers feel this approach is cleaner and more explicit than the traditional
beforeEach()style.- Although this testing guide follows the traditional style and the default
CLI schematicsgenerate test files withbeforeEach()andTestBed, feel free to adopt this alternative approach in your own projects.
- Although this testing guide follows the traditional style and the default
-
Data services that make HTTP calls to remote servers typically inject and delegate to the Angular
HttpClientservice for XHR calls. -
You can test a data service with an injected
HttpClientspy as you would test any service with a dependency.-
app/model/hero.service.spec.ts (tests with spies)
let httpClientSpy: jasmine.SpyObj<HttpClient>;
let heroService: HeroService;

beforeEach(() => {
  // TODO: spy on other methods too
  httpClientSpy = jasmine.createSpyObj('HttpClient', ['get']);
  heroService = new HeroService(httpClientSpy);
});

it('should return expected heroes (HttpClient called once)', (done: DoneFn) => {
  const expectedHeroes: Hero[] =
    [{ id: 1, name: 'A' }, { id: 2, name: 'B' }];

  httpClientSpy.get.and.returnValue(asyncData(expectedHeroes));

  heroService.getHeroes().subscribe({
    next: heroes => {
      expect(heroes)
        .withContext('expected heroes')
        .toEqual(expectedHeroes);
      done();
    },
    error: done.fail
  });
  expect(httpClientSpy.get.calls.count())
    .withContext('one call')
    .toBe(1);
});

it('should return an error when the server returns a 404', (done: DoneFn) => {
  const errorResponse = new HttpErrorResponse({
    error: 'test 404 error',
    status: 404, statusText: 'Not Found'
  });

  httpClientSpy.get.and.returnValue(asyncError(errorResponse));

  heroService.getHeroes().subscribe({
    next: heroes => done.fail('expected an error, not heroes'),
    error: error  => {
      expect(error.message).toContain('test 404 error');
      done();
    }
  });
});
-
-
The
HeroServicemethods returnObservables. You must subscribe to an observable to (a) cause it to execute and (b) assert that the method succeeds or fails. -
The
subscribe()method takes a success (next) and fail (error) callback. Make sure you provide both callbacks so that you capture errors. Neglecting to do so produces an asynchronous uncaught observable error that the test runner will likely attribute to a completely different test.
-
Extended interactions between a data service and the
HttpClientcan be complex and difficult to mock with spies. -
The
HttpClientTestingModulecan make these testing scenarios more manageable. -
While the code sample accompanying this guide demonstrates
HttpClientTestingModule, this page defers to theHttp guide, which covers testing with theHttpClientTestingModulein detail.
-
A component, unlike all other parts of an Angular application, combines an HTML template and a TypeScript class. The component truly is the template and the class working together. To adequately test a component, you should test that they work together as intended.
-
Such tests require creating the component's host element in the browser DOM, as Angular does, and investigating the component class's interaction with the DOM as described by its template.
-
The Angular
TestBedfacilitates this kind of testing as you'll see in the following sections. But in many cases, testing the component class alone, without DOM involvement, can validate much of the component's behavior in a straightforward, more obvious way.
-
Test a component class on its own as you would test a service class.
-
Component class testing should be kept very clean and simple. It should test only a single unit. At first glance, you should be able to understand what the test is testing.
-
Consider this
LightswitchComponentwhich toggles a light on and off (represented by an on-screen message) when the user clicks the button.- app/demo/demo.ts (LightswitchComp)
@Component({
  selector: 'lightswitch-comp',
  template: `
    <button type="button" (click)="clicked()">Click me!</button>
    <span>{{message}}</span>`
})
export class LightswitchComponent {
  isOn = false;
  clicked() { this.isOn = !this.isOn; }
  get message() { return `The light is ${this.isOn ? 'On' : 'Off'}`; }
}
- app/demo/demo.ts (LightswitchComp)
-
You might decide only to test that the
clicked()method toggles the light's on/off state and sets the message appropriately. -
This component class has no dependencies. To test these types of classes, follow the same steps as you would for a service that has no dependencies:
- Create a component using the new keyword.
- Poke at its API.
- Assert expectations on its public state.
-
app/demo/demo.spec.ts (Lightswitch tests)
describe('LightswitchComp', () => {
  it('#clicked() should toggle #isOn', () => {
    const comp = new LightswitchComponent();
    expect(comp.isOn)
      .withContext('off at first')
      .toBe(false);
    comp.clicked();
    expect(comp.isOn)
      .withContext('on after click')
      .toBe(true);
    comp.clicked();
    expect(comp.isOn)
      .withContext('off after second click')
      .toBe(false);
  });

  it('#clicked() should set #message to "is on"', () => {
    const comp = new LightswitchComponent();
    expect(comp.message)
      .withContext('off at first')
      .toMatch(/is off/i);
    comp.clicked();
    expect(comp.message)
      .withContext('on after clicked')
      .toMatch(/is on/i);
  });
});
-
Here is the
DashboardHeroComponentfrom the Tour of Heroes tutorial.- app/dashboard/dashboard-hero.component.ts (component)
export class DashboardHeroComponent {
  @Input() hero!: Hero;
  @Output() selected = new EventEmitter<Hero>();
  click() { this.selected.emit(this.hero); }
}
- app/dashboard/dashboard-hero.component.ts (component)
-
It appears within the template of a parent component, which binds a
heroto the@Inputproperty and listens for an event raised through theselected@Outputproperty. -
You can test that the class code works without creating the
DashboardHeroComponentor its parent component.-
app/dashboard/dashboard-hero.component.spec.ts (class tests)
it('raises the selected event when clicked', () => {
  const comp = new DashboardHeroComponent();
  const hero: Hero = {id: 42, name: 'Test'};
  comp.hero = hero;

  comp.selected.pipe(first()).subscribe((selectedHero: Hero) => expect(selectedHero).toBe(hero));
  comp.click();
});
-
-
When a component has dependencies, you might want to use the TestBed to both create the component and its dependencies.
-
The following
WelcomeComponentdepends on the UserService to know the name of the user to greet.-
app/welcome/welcome.component.ts
export class WelcomeComponent implements OnInit {
  welcome = '';
  constructor(private userService: UserService) { }

  ngOnInit(): void {
    this.welcome = this.userService.isLoggedIn ?
      'Welcome, ' + this.userService.user.name : 'Please log in.';
  }
}
-
-
You might start by creating a mock of the
UserServicethat meets the minimum needs of this component.- app/welcome/welcome.component.spec.ts (MockUserService)
class MockUserService {
  isLoggedIn = true;
  user = { name: 'Test User'};
}
- app/welcome/welcome.component.spec.ts (MockUserService)
-
Then provide and inject both the component and the service in the
TestBedconfiguration.- app/welcome/welcome.component.spec.ts (class-only setup)
beforeEach(() => {
  TestBed.configureTestingModule({
    // provide the component-under-test and dependent service
    providers: [
      WelcomeComponent,
      { provide: UserService, useClass: MockUserService }
    ]
  });
  // inject both the component and the dependent service.
  comp = TestBed.inject(WelcomeComponent);
  userService = TestBed.inject(UserService);
});
- app/welcome/welcome.component.spec.ts (class-only setup)
-
Then exercise the component class, remembering to call the
lifecycle hook methodsas Angular does when running the application.-
app/welcome/welcome.component.spec.ts (class-only tests)
it('should not have welcome message after construction', () => {
  expect(comp.welcome).toBe('');
});

it('should welcome logged in user after Angular calls ngOnInit', () => {
  comp.ngOnInit();
  expect(comp.welcome).toContain(userService.user.name);
});

it('should ask user to log in if not logged in after ngOnInit', () => {
  userService.isLoggedIn = false;
  comp.ngOnInit();
  expect(comp.welcome).not.toContain(userService.user.name);
  expect(comp.welcome).toContain('log in');
});
-
-
-
Testing the component class is as straightforward as testing a service.
-
But a component is more than just its class. A component interacts with the DOM and with other components. The class-only tests can tell you about class behavior. They cannot tell you if the component is going to render properly, respond to user input and gestures, or integrate with its parent and child components.
-
None of the preceding class-only tests can answer key questions about how the components actually behave on screen.
- Is
Lightswitch.clicked()bound to anything such that the user can invoke it? - Is the
Lightswitch.messagedisplayed? - Can the user actually select the hero displayed by
DashboardHeroComponent? - Is the hero name displayed as expected (such as uppercase)?
- Is the welcome message displayed by the template of
WelcomeComponent?
- Is
-
These might not be troubling questions for the preceding simple components illustrated. But many components have complex interactions with the DOM elements described in their templates, causing HTML to appear and disappear as the component state changes.
-
To answer these kinds of questions, you have to create the DOM elements associated with the components, you must examine the DOM to confirm that component state displays properly at the appropriate times, and you must simulate user interaction with the screen to determine whether those interactions cause the component to behave as expected.
-
To write these kinds of test, you'll use additional features of the
TestBedas well as other testing helpers.
-
The CLI creates an initial test file for you by default when you ask it to generate a new component.
-
For example, the following CLI command generates a
BannerComponentin theapp/bannerfolder (with inline template and styles):ng generate component banner --inline-template --inline-style --module app -
It also generates an initial test file for the component,
banner-external.component.spec.ts, that looks like this:-
app/banner/banner-external.component.spec.ts (initial)
import { ComponentFixture, TestBed, waitForAsync } from '@angular/core/testing'; import { BannerComponent } from './banner.component'; describe('BannerComponent', () => { let component: BannerComponent; let fixture: ComponentFixture<BannerComponent>; beforeEach(waitForAsync(() => { TestBed.configureTestingModule({declarations: [BannerComponent]}).compileComponents(); })); beforeEach(() => { fixture = TestBed.createComponent(BannerComponent); component = fixture.componentInstance; fixture.detectChanges(); }); it('should create', () => { expect(component).toBeDefined(); }); }); -
Because
compileComponentsis asynchronous, it uses thewaitForAsyncutility function imported from@angular/core/testing.
-
-
-
Only the last three lines of this file actually test the component and all they do is assert that Angular can create the component.
-
The rest of the file is boilerplate setup code anticipating more advanced tests that might become necessary if the component evolves into something substantial.
-
You'll learn about these advanced test features in the following sections. For now, you can radically reduce this test file to a more manageable size:
-
app/banner/banner-initial.component.spec.ts (minimal)
describe('BannerComponent (minimal)', () => { it('should create', () => { TestBed.configureTestingModule({declarations: [BannerComponent]}); const fixture = TestBed.createComponent(BannerComponent); const component = fixture.componentInstance; expect(component).toBeDefined(); }); }); -
In this example, the metadata object passed to
TestBed.configureTestingModulesimply declaresBannerComponent, the component to test.TestBed.configureTestingModule({declarations: [BannerComponent]}); -
There's no need to declare or import anything else. The default test module is pre-configured with something like the
BrowserModulefrom@angular/platform-browser.- Later you'll call
TestBed.configureTestingModule()with imports, providers, and more declarations to suit your testing needs. Optionaloverridemethods can further fine-tune aspects of the configuration.
- Later you'll call
-
-
After configuring
TestBed, you call itscreateComponent()method.const fixture = TestBed.createComponent(BannerComponent); -
TestBed.createComponent()creates an instance of theBannerComponent, adds a corresponding element to the test-runner DOM, and returns aComponentFixture.-
Do not re-configure
TestBedafter callingcreateComponent.-
The
createComponentmethod freezes the currentTestBeddefinition, closing it to further configuration. -
You cannot call any more
TestBedconfiguration methods, notconfigureTestingModule(), norget(), nor any of theoverride... methods. If you try,TestBedthrows an error.
-
-
-
The
ComponentFixtureis a test harness for interacting with the created component and its corresponding element. -
Access the component instance through the fixture and confirm it exists with a Jasmine expectation:
const component = fixture.componentInstance;
expect(component).toBeDefined();
-
You will add more tests as this component evolves. Rather than duplicate the
TestBedconfiguration for each test, you refactor to pull the setup into a JasminebeforeEach()and some supporting variables:describe('BannerComponent (with beforeEach)', () => { let component: BannerComponent; let fixture: ComponentFixture<BannerComponent>; beforeEach(() => { TestBed.configureTestingModule({declarations: [BannerComponent]}); fixture = TestBed.createComponent(BannerComponent); component = fixture.componentInstance; }); it('should create', () => { expect(component).toBeDefined(); }); }); -
Now add a test that gets the component's element from
fixture.nativeElementand looks for the expected text.it('should contain "banner works!"', () => { const bannerElement: HTMLElement = fixture.nativeElement; expect(bannerElement.textContent).toContain('banner works!'); });
-
The value of
ComponentFixture.nativeElementhas theanytype. Later you'll encounter theDebugElement.nativeElementand it too has theanytype. -
Angular can't know at compile time what kind of HTML element the
nativeElementis or if it even is an HTML element. The application might be running on a non-browser platform, such as the server or a Web Worker, where the element might have a diminished API or not exist at all. -
The tests in this guide are designed to run in a browser so a
nativeElementvalue will always be anHTMLElementor one of its derived classes. -
Knowing that it is an HTMLElement of some sort, use the standard HTML
querySelectorto dive deeper into the element tree. -
Here's another test that calls
HTMLElement.querySelectorto get the paragraph element and look for the banner text:it('should have <p> with "banner works!"', () => { const bannerElement: HTMLElement = fixture.nativeElement; const p = bannerElement.querySelector('p')!; expect(p.textContent).toEqual('banner works!'); });
-
The Angular fixture provides the component's element directly through the
fixture.nativeElement.const bannerElement: HTMLElement = fixture.nativeElement; -
This is actually a convenience method, implemented as
fixture.debugElement.nativeElement.const bannerDe: DebugElement = fixture.debugElement; const bannerEl: HTMLElement = bannerDe.nativeElement; -
There's a good reason for this circuitous path to the element.
-
The properties of the
nativeElementdepend upon the runtime environment. You could be running these tests on a non-browser platform that doesn't have a DOM or whose DOM-emulation doesn't support the fullHTMLElementAPI. -
Angular relies on the
DebugElementabstraction to work safely across all supported platforms. Instead of creating an HTML element tree, Angular creates aDebugElementtree that wraps the native elements for the runtime platform. ThenativeElementproperty unwraps theDebugElementand returns the platform-specific element object.
-
-
Because the sample tests for this guide are designed to run only in a browser, a nativeElement in these tests is always an
HTMLElementwhose familiar methods and properties you can explore within a test. -
Here's the previous test, re-implemented with
fixture.debugElement.nativeElement:it('should find the <p> with fixture.debugElement.nativeElement)', () => { const bannerDe: DebugElement = fixture.debugElement; const bannerEl: HTMLElement = bannerDe.nativeElement; const p = bannerEl.querySelector('p')!; expect(p.textContent).toEqual('banner works!'); }); -
The
DebugElementhas other methods and properties that are useful in tests, as you'll see elsewhere in this guide. -
You import the
DebugElementsymbol from the Angular core library.import { DebugElement } from '@angular/core';
-
Although the tests in this guide all run in the browser, some applications might run on a different platform at least some of the time.
- For example, the component might render first on the server as part of a strategy to make the application launch faster on poorly connected devices. The server-side renderer might not support the full HTML element API. If it doesn't support
querySelector, the previous test could fail.
- For example, the component might render first on the server as part of a strategy to make the application launch faster on poorly connected devices. The server-side renderer might not support the full HTML element API. If it doesn't support
-
The
DebugElementoffers query methods that work for all supported platforms. These query methods take a predicate function that returnstruewhen a node in theDebugElementtree matches the selection criteria.-
You create a predicate with the help of a
Byclass imported from a library for the runtime platform. Here's theByimport for the browser platform:import { By } from '@angular/platform-browser';
-
-
The following example re-implements the previous test with
DebugElement.query()and the browser'sBy.cssmethod.it('should find the <p> with fixture.debugElement.query(By.css)', () => { const bannerDe: DebugElement = fixture.debugElement; const paragraphDe = bannerDe.query(By.css('p')); const p: HTMLElement = paragraphDe.nativeElement; expect(p.textContent).toEqual('banner works!'); }); -
Some noteworthy observations:
- The
By.css()static method selectsDebugElementnodes with astandard CSS selector. - The query returns a
DebugElementfor the paragraph. - You must unwrap that result to get the paragraph element.
- The
-
When you're filtering by CSS selector and only testing properties of a browser's native element, the
By.cssapproach might be overkill. -
It's often more straightforward and clear to filter with a standard
HTMLElementmethod such asquerySelector()orquerySelectorAll().
- This guide explores common component testing use cases.
-
In the example application, the
BannerComponentpresents static title text in the HTML template.-
After a few changes, the
BannerComponentpresents a dynamic title by binding to the component'stitleproperty like this.- app/banner/banner.component.ts
@Component({
  selector: 'app-banner',
  template: '<h1>{{title}}</h1>',
  styles: ['h1 { color: green; font-size: 350%}']
})
export class BannerComponent {
  title = 'Test Tour of Heroes';
}
- app/banner/banner.component.ts
-
As minimal as this is, you decide to add a test to confirm that component actually displays the right content where you think it should.
-
-
You'll write a sequence of tests that inspect the value of the
<h1>element that wraps the title property interpolation binding. -
You update the beforeEach to find that element with a standard HTML
querySelectorand assign it to theh1variable.-
app/banner/banner.component.spec.ts (setup)
let component: BannerComponent;
let fixture: ComponentFixture<BannerComponent>;
let h1: HTMLElement;

beforeEach(() => {
  TestBed.configureTestingModule({
    declarations: [ BannerComponent ],
  });
  fixture = TestBed.createComponent(BannerComponent);
  component = fixture.componentInstance; // BannerComponent test instance
  h1 = fixture.nativeElement.querySelector('h1');
});
-
-
For your first test you'd like to see that the screen displays the default title. Your instinct is to write a test that immediately inspects the
<h1>like this:it('should display original title', () => { expect(h1.textContent).toContain(component.title); });- That test fails with the message:
expected '' to contain 'Test Tour of Heroes'.
- That test fails with the message:
-
Binding happens when Angular performs change detection.
-
In production, change detection kicks in automatically when Angular creates a component or the user enters a keystroke or an asynchronous activity (for example, AJAX) completes.
-
The
TestBed.createComponentdoes not trigger change detection; a fact confirmed in the revised test:it('no title in the DOM after createComponent()', () => { expect(h1.textContent).toEqual(''); });
-
-
You must tell the
TestBedto perform data binding by callingfixture.detectChanges(). Only then does the<h1>have the expected title.it('should display original title after detectChanges()', () => { fixture.detectChanges(); expect(h1.textContent).toContain(component.title); }); -
Delayed change detection is intentional and useful. It gives the tester an opportunity to inspect and change the state of the component before Angular initiates data binding and calls
lifecycle hooks.- Here's another test that changes the component's title property before calling
fixture.detectChanges().it('should display a different test title', () => { component.title = 'Test Title'; fixture.detectChanges(); expect(h1.textContent).toContain('Test Title'); });
- Here's another test that changes the component's title property before calling
-
The
BannerComponenttests frequently calldetectChanges. Some testers prefer that the Angular test environment run change detection automatically. -
That's possible by configuring the
TestBedwith theComponentFixtureAutoDetectprovider. First import it from the testing utility library:- app/banner/banner.component.detect-changes.spec.ts (import)
import { ComponentFixtureAutoDetect } from '@angular/core/testing';
- app/banner/banner.component.detect-changes.spec.ts (import)
-
Then add it to the
providersarray of the testing module configuration:- app/banner/banner.component.detect-changes.spec.ts (AutoDetect)
TestBed.configureTestingModule({
  declarations: [ BannerComponent ],
  providers: [
    { provide: ComponentFixtureAutoDetect, useValue: true }
  ]
});
- app/banner/banner.component.detect-changes.spec.ts (AutoDetect)
-
Here are three tests that illustrate how automatic change detection works.
-
app/banner/banner.component.detect-changes.spec.ts (AutoDetect Tests)
it('should display original title', () => { // Hooray! No `fixture.detectChanges()` needed expect(h1.textContent).toContain(comp.title); }); it('should still see original title after comp.title change', () => { const oldTitle = comp.title; comp.title = 'Test Title'; // Displayed title is old because Angular didn't hear the change :( expect(h1.textContent).toContain(oldTitle); }); it('should display updated title after detectChanges', () => { comp.title = 'Test Title'; fixture.detectChanges(); // detect changes explicitly expect(h1.textContent).toContain(comp.title); }); -
The first test shows the benefit of automatic change detection.
-
The second and third test reveal an important limitation. The Angular testing environment does not know that the test changed the component's title. The
ComponentFixtureAutoDetectservice responds to asynchronous activities such as promise resolution, timers, and DOM events. But a direct, synchronous update of the component property is invisible. The test must callfixture.detectChanges()manually to trigger another cycle of change detection.
-
-
Rather than wonder when the test fixture will or won't perform change detection, the samples in this guide always call
detectChanges()explicitly. There is no harm in callingdetectChanges()more often than is strictly necessary.
-
To simulate user input, find the input element and set its
valueproperty. -
You will call
fixture.detectChanges()to trigger Angular's change detection. But there is an essential, intermediate step.-
Angular doesn't know that you set the input element's
valueproperty. It won't read that property until you raise the element's input event by callingdispatchEvent(). Then you calldetectChanges(). -
The following example demonstrates the proper sequence.
-
app/hero/hero-detail.component.spec.ts (pipe test)
it('should convert hero name to Title Case', () => {
  // get the name's input and display elements from the DOM
  const hostElement: HTMLElement = fixture.nativeElement;
  const nameInput: HTMLInputElement = hostElement.querySelector('input')!;
  const nameDisplay: HTMLElement = hostElement.querySelector('span')!;

  // simulate user entering a new name into the input box
  nameInput.value = 'quick BROWN  fOx';

  // Dispatch a DOM event so that Angular learns of input value change.
  nameInput.dispatchEvent(new Event('input'));

  // Tell Angular to update the display binding through the title pipe
  fixture.detectChanges();

  expect(nameDisplay.textContent).toBe('Quick Brown  Fox');
});
-
-
-
The preceding
BannerComponentis defined with an inline template and inline css, specified in the@Component.templateand@Component.stylesproperties respectively. -
Many components specify external templates and external css with the
@Component.templateUrland@Component.styleUrlsproperties respectively, as the following variant ofBannerComponentdoes.-
app/banner/banner-external.component.ts (metadata)
@Component({ selector: 'app-banner', templateUrl: './banner-external.component.html', styleUrls: ['./banner-external.component.css'] }) -
This syntax tells the Angular compiler to read the external files during component compilation.
-
That's not a problem when you run the CLI
ng testcommand because it compiles the application before running the tests. -
However, if you run the tests in a non-CLI environment, tests of this component might fail. For example, if you run the
BannerComponenttests in a web coding environment such as plunker, you'll see a message like this one:Error: This test module uses the component BannerComponent which is using a "templateUrl" or "styleUrls", but they were never compiled. Please call "TestBed.compileComponents" before your test. -
You get this test failure message when the runtime environment compiles the source code during the tests themselves.
-
-
To correct the problem, call
compileComponents()as explained in the following CallingcompileComponentssection.
-
Components often have service dependencies.
-
The
WelcomeComponentdisplays a welcome message to the logged-in user. It knows who the user is based on a property of the injectedUserService:-
app/welcome/welcome.component.ts
import { Component, OnInit } from '@angular/core'; import { UserService } from '../model/user.service'; @Component({ selector: 'app-welcome', template: '<h3 class="welcome"><i>{{welcome}}</i></h3>' }) export class WelcomeComponent implements OnInit { welcome = ''; constructor(private userService: UserService) { } ngOnInit(): void { this.welcome = this.userService.isLoggedIn ? 'Welcome, ' + this.userService.user.name : 'Please log in.'; } }
-
-
-
The
WelcomeComponenthas decision logic that interacts with the service, logic that makes this component worth testing. Here's the testing module configuration for the spec file:- app/welcome/welcome.component.spec.ts
TestBed.configureTestingModule({ declarations: [ WelcomeComponent ], // providers: [ UserService ], // NO! Don't provide the real service! // Provide a test-double instead providers: [ { provide: UserService, useValue: userServiceStub } ], }); - This time, in addition to declaring the component-under-test, the configuration adds a
UserServiceprovider to the providers list. But not the realUserService.
- app/welcome/welcome.component.spec.ts
-
A component-under-test doesn't have to be injected with real services. In fact, it is usually better if they are test doubles such as, stubs, fakes, spies, or mocks. The purpose of the spec is to test the component, not the service, and real services can be trouble.
-
Injecting the real UserService could be a nightmare. The real service might ask the user for login credentials and attempt to reach an authentication server. These behaviors can be hard to intercept. It is far easier and safer to create and register a test double in place of the real UserService.
-
This particular test suite supplies a minimal mock of the
UserServicethat satisfies the needs of theWelcomeComponentand its tests:-
app/welcome/welcome.component.spec.ts
let userServiceStub: Partial<UserService>; userServiceStub = { isLoggedIn: true, user: { name: 'Test User' }, };
-
-
The tests need access to the stub
UserServiceinjected into theWelcomeComponent. -
Angular has a hierarchical injection system. There can be injectors at multiple levels, from the root injector created by the
TestBeddown through the component tree. -
The safest way to get the injected service, the way that always works, is to get it from the injector of the component-under-test. The component injector is a property of the fixture's
DebugElement.- WelcomeComponent's injector
// UserService actually injected into the component userService = fixture.debugElement.injector.get(UserService);
- WelcomeComponent's injector
-
You might also be able to get the service from the root injector using
TestBed.inject(). This is easier to remember and less verbose. But it only works when Angular injects the component with the service instance in the test's root injector. -
In this test suite, the only provider of UserService is the root testing module, so it is safe to call
TestBed.inject()as follows:- TestBed injector
// UserService from the root injector userService = TestBed.inject(UserService);
- TestBed injector
-
For a use case in which
TestBed.inject()does not work, see theOverride component providerssection that explains when and why you must get the service from the component's injector instead.
-
Here's the complete
beforeEach(), usingTestBed.inject():-
app/welcome/welcome.component.spec.ts
let userServiceStub: Partial<UserService>; beforeEach(() => { // stub UserService for test purposes userServiceStub = { isLoggedIn: true, user: { name: 'Test User' }, }; TestBed.configureTestingModule({ declarations: [ WelcomeComponent ], providers: [ { provide: UserService, useValue: userServiceStub } ], }); fixture = TestBed.createComponent(WelcomeComponent); comp = fixture.componentInstance; // UserService from the root injector userService = TestBed.inject(UserService); // get the "welcome" element by CSS selector (e.g., by class name) el = fixture.nativeElement.querySelector('.welcome'); });
-
-
And here are some tests:
-
app/welcome/welcome.component.spec.ts
it('should welcome the user', () => { fixture.detectChanges(); const content = el.textContent; expect(content) .withContext('"Welcome ..."') .toContain('Welcome'); expect(content) .withContext('expected name') .toContain('Test User'); }); it('should welcome "Bubba"', () => { userService.user.name = 'Bubba'; // welcome message hasn't been shown yet fixture.detectChanges(); expect(el.textContent).toContain('Bubba'); }); it('should request login if not logged in', () => { userService.isLoggedIn = false; // welcome message hasn't been shown yet fixture.detectChanges(); const content = el.textContent; expect(content) .withContext('not welcomed') .not.toContain('Welcome'); expect(content) .withContext('"log in"') .toMatch(/log in/i); }); -
The first is a sanity test; it confirms that the stubbed UserService is called and working.
- The second parameter to the Jasmine matcher (for example, 'expected name') is an optional failure label. If the expectation fails, Jasmine appends this label to the expectation failure message. In a spec with multiple expectations, it can help clarify what went wrong and which expectation failed.
-
The remaining tests confirm the logic of the component when the service returns different values. The second test validates the effect of changing the user name. The third test checks that the component displays the proper message when there is no logged-in user.
-
-
In this sample, the
AboutComponenttemplate hosts aTwainComponent. TheTwainComponentdisplays Mark Twain quotes.-
app/twain/twain.component.ts (template)
template: ` <p class="twain"><i>{{quote | async}}</i></p> <button type="button" (click)="getQuote()">Next quote</button> <p class="error" *ngIf="errorMessage">{{ errorMessage }}</p>`, -
NOTE:
- The value of the component's quote property passes through an AsyncPipe. That means the property returns either a Promise or an Observable.
-
-
In this example, the
TwainComponent.getQuote()method tells you that the quote property returns an Observable.-
app/twain/twain.component.ts (getQuote)
getQuote() { this.errorMessage = ''; this.quote = this.twainService.getQuote().pipe( startWith('...'), catchError( (err: any) => { // Wait a turn because errorMessage already set once this turn setTimeout(() => this.errorMessage = err.message || err.toString()); return of('...'); // reset message to placeholder }) ); -
The
TwainComponentgets quotes from an injectedTwainService. The component starts the returned Observable with a placeholder value ('...'), before the service can return its first quote. -
The
catchErrorintercepts service errors, prepares an error message, and returns the placeholder value on the success channel. It must wait a tick to set theerrorMessagein order to avoid updating that message twice in the same change detection cycle. -
These are all features you'll want to test.
-
-
When testing a component, only the service's public API should matter. In general, tests themselves should not make calls to remote servers. They should emulate such calls. The setup in this
app/twain/twain.component.spec.tsshows one way to do that:-
app/twain/twain.component.spec.ts (setup)
beforeEach(() => { testQuote = 'Test Quote'; // Create a fake TwainService object with a `getQuote()` spy const twainService = jasmine.createSpyObj('TwainService', ['getQuote']); // Make the spy return a synchronous Observable with the test data getQuoteSpy = twainService.getQuote.and.returnValue(of(testQuote)); TestBed.configureTestingModule({ declarations: [TwainComponent], providers: [{provide: TwainService, useValue: twainService}] }); fixture = TestBed.createComponent(TwainComponent); component = fixture.componentInstance; quoteEl = fixture.nativeElement.querySelector('.twain'); });
-
-
Focus on the spy.
// Create a fake TwainService object with a `getQuote()` spy const twainService = jasmine.createSpyObj('TwainService', ['getQuote']); // Make the spy return a synchronous Observable with the test data getQuoteSpy = twainService.getQuote.and.returnValue(of(testQuote)); -
The spy is designed such that any call to
getQuotereceives an observable with a test quote. Unlike the realgetQuote()method, this spy bypasses the server and returns a synchronous observable whose value is available immediately. -
You can write many useful tests with this spy, even though its Observable is synchronous.
-
A key advantage of a synchronous Observable is that you can often turn asynchronous processes into synchronous tests.
it('should show quote after component initialized', () => { fixture.detectChanges(); // onInit() // sync spy result shows testQuote immediately after init expect(quoteEl.textContent).toBe(testQuote); expect(getQuoteSpy.calls.any()) .withContext('getQuote called') .toBe(true); }); -
Because the spy result returns synchronously, the
getQuote()method updates the message on screen immediately after the first change detection cycle during which Angular callsngOnInit. -
You're not so lucky when testing the error path. Although the service spy will return an error synchronously, the component method calls
setTimeout(). The test must wait at least one full turn of the JavaScript engine before the value becomes available. The test must become asynchronous.
-
To use
fakeAsync()functionality, you must importzone.js/testingin your test setup file. If you created your project with the Angular CLI,zone-testingis already imported insrc/test.ts. -
The following test confirms the expected behavior when the service returns an
ErrorObservable.it('should display error when TwainService fails', fakeAsync(() => { // tell spy to return an error observable getQuoteSpy.and.returnValue(throwError(() => new Error('TwainService test failure'))); fixture.detectChanges(); // onInit() // sync spy errors immediately after init tick(); // flush the component's setTimeout() fixture.detectChanges(); // update errorMessage within setTimeout() expect(errorMessage()) .withContext('should display error') .toMatch(/test failure/, ); expect(quoteEl.textContent) .withContext('should show placeholder') .toBe('...'); }));- NOTE:
- The
it()function receives an argument of the following form.fakeAsync(() => { /* test body */ })
- The
- NOTE:
-
The
fakeAsync()function enables a linear coding style by running the test body in a specialfakeAsync test zone. The test body appears to be synchronous. There is no nested syntax (like aPromise.then()) to disrupt the flow of control. -
Limitation: The
fakeAsync()function won't work if the test body makes anXMLHttpRequest(XHR) call. XHR calls within a test are rare, but if you need to call XHR, see thewaitForAsync()section.
-You do have to call tick() to advance the virtual clock.
-
Calling tick() simulates the passage of time until all pending asynchronous activities finish. In this case, it waits for the error handler's setTimeout().
-
The tick() function accepts millis and tickOptions as parameters. The millis parameter specifies how much the virtual clock advances and defaults to 0 if not provided. For example, if you have a setTimeout(fn, 100) in a fakeAsync() test, you need to use tick(100) to trigger the fn callback. The optional tickOptions parameter has a property named
processNewMacroTasksSynchronously. TheprocessNewMacroTasksSynchronouslyproperty represents whether to invoke new generated macro tasks when ticking and defaults to true.it('should run timeout callback with delay after call tick with millis', fakeAsync(() => { let called = false; setTimeout(() => { called = true; }, 100); tick(100); expect(called).toBe(true); }));
-
In this example, you have a new macro task, the nested
setTimeoutfunction. By default, when thetickis setTimeout,outsideand nested will both be triggered.it('should run new macro task callback with delay after call tick with millis', fakeAsync(() => { function nestedTimer(cb: () => any): void { setTimeout(() => setTimeout(() => cb())); } const callback = jasmine.createSpy('callback'); nestedTimer(callback); expect(callback).not.toHaveBeenCalled(); tick(0); // the nested timeout will also be triggered expect(callback).toHaveBeenCalled(); })); -
In some case, you don't want to trigger the new macro task when ticking. You can use
tick(millis, {processNewMacroTasksSynchronously: false})to not invoke a new macro task.it('should not run new macro task callback with delay after call tick with millis', fakeAsync(() => { function nestedTimer(cb: () => any): void { setTimeout(() => setTimeout(() => cb())); } const callback = jasmine.createSpy('callback'); nestedTimer(callback); expect(callback).not.toHaveBeenCalled(); tick(0, {processNewMacroTasksSynchronously: false}); // the nested timeout will not be triggered expect(callback).not.toHaveBeenCalled(); tick(0); expect(callback).toHaveBeenCalled(); }));
fakeAsync()simulates passage of time, which lets you calculate the difference between dates insidefakeAsync().it('should get Date diff correctly in fakeAsync', fakeAsync(() => { const start = Date.now(); tick(100); const end = Date.now(); expect(end - start).toBe(100); }));
-
Jasmine also provides a
clockfeature to mock dates. Angular automatically runs tests that are run afterjasmine.clock().install()is called inside afakeAsync()method untiljasmine.clock().uninstall()is called.fakeAsync()is not needed and throws an error if nested. -
By default, this feature is disabled. To enable it, set a global flag before importing
zone-testing. -
If you use the Angular CLI, configure this flag in
src/test.ts.(window as any)['__zone_symbol__fakeAsyncPatchLock'] = true; import 'zone.js/testing';describe('use jasmine.clock()', () => { // need to config __zone_symbol__fakeAsyncPatchLock flag // before loading zone.js/testing beforeEach(() => { jasmine.clock().install(); }); afterEach(() => { jasmine.clock().uninstall(); }); it('should auto enter fakeAsync', () => { // is in fakeAsync now, don't need to call fakeAsync(testFn) let called = false; setTimeout(() => { called = true; }, 100); jasmine.clock().tick(100); expect(called).toBe(true); }); });
-
You can also use RxJS scheduler in
fakeAsync()just like usingsetTimeout()orsetInterval(), but you need to importzone.js/plugins/zone-patch-rxjs-fake-asyncto patch RxJS scheduler.it('should get Date diff correctly in fakeAsync with rxjs scheduler', fakeAsync(() => { // need to add `import 'zone.js/plugins/zone-patch-rxjs-fake-async' // to patch rxjs scheduler let result = ''; of('hello').pipe(delay(1000)).subscribe(v => { result = v; }); expect(result).toBe(''); tick(1000); expect(result).toBe('hello'); const start = new Date().getTime(); let dateDiff = 0; interval(1000).pipe(take(2)).subscribe(() => dateDiff = (new Date().getTime() - start)); tick(1000); expect(dateDiff).toBe(1000); tick(1000); expect(dateDiff).toBe(2000); }));
-
By default,
fakeAsync()supports the following macro tasks.- setTimeout
- setInterval
- requestAnimationFrame
- webkitRequestAnimationFrame
- mozRequestAnimationFrame
-
If you run other macro tasks such as
HTMLCanvasElement.toBlob(), an "Unknown macroTask scheduled in fake async test" error is thrown.-
src/app/shared/canvas.component.ts
import { Component, AfterViewInit, ViewChild, ElementRef } from '@angular/core'; @Component({ selector: 'sample-canvas', template: '<canvas #sampleCanvas width="200" height="200"></canvas>', }) export class CanvasComponent implements AfterViewInit { blobSize = 0; @ViewChild('sampleCanvas') sampleCanvas!: ElementRef; ngAfterViewInit() { const canvas: HTMLCanvasElement = this.sampleCanvas.nativeElement; const context = canvas.getContext('2d')!; context.clearRect(0, 0, 200, 200); context.fillStyle = '#FF1122'; context.fillRect(0, 0, 200, 200); canvas.toBlob(blob => { this.blobSize = blob?.size ?? 0; }); } } -
src/app/shared/canvas.component.spec.ts (failing)
import { fakeAsync, TestBed, tick } from '@angular/core/testing'; import { CanvasComponent } from './canvas.component'; describe('CanvasComponent', () => { beforeEach(async () => { await TestBed .configureTestingModule({ declarations: [CanvasComponent], }) .compileComponents(); }); it('should be able to generate blob data from canvas', fakeAsync(() => { const fixture = TestBed.createComponent(CanvasComponent); const canvasComp = fixture.componentInstance; fixture.detectChanges(); expect(canvasComp.blobSize).toBe(0); tick(); expect(canvasComp.blobSize).toBeGreaterThan(0); })); });
-
-
If you want to support such a case, you need to define the macro task you want to support in
beforeEach(). For example:- src/app/shared/canvas.component.spec.ts (excerpt)
beforeEach(() => { (window as any).__zone_symbol__FakeAsyncTestMacroTask = [ { source: 'HTMLCanvasElement.toBlob', callbackArgs: [{size: 200}], }, ]; });
- src/app/shared/canvas.component.spec.ts (excerpt)
-
NOTE:
-
In order to make the
<canvas>element Zone.js-aware in your app, you need to import thezone-patch-canvaspatch (either inpolyfills.tsor in the specific file that uses<canvas>): -
src/polyfills.ts or src/app/shared/canvas.component.ts
// Import patch to make async `HTMLCanvasElement` methods (such as `.toBlob()`) Zone.js-aware. // Either import in `polyfills.ts` (if used in more than one places in the app) or in the component // file using `HTMLCanvasElement` (if it is only used in a single file). import 'zone.js/plugins/zone-patch-canvas';
-
-
You might be satisfied with the test coverage of these tests.
-
However, you might be troubled by the fact that the real service doesn't quite behave this way. The real service sends requests to a remote server. A server takes time to respond and the response certainly won't be available immediately as in the previous two tests.
-
Your tests will reflect the real world more faithfully if you return an asynchronous observable from the
getQuote()spy like this.// Simulate delayed observable values with the `asyncData()` helper getQuoteSpy.and.returnValue(asyncData(testQuote));
-
The async observable was produced by an
asyncDatahelper. TheasyncDatahelper is a utility function that you'll have to write yourself, or copy this one from the sample code.-
testing/async-observable-helpers.ts
/** * Create async observable that emits-once and completes * after a JS engine turn */ export function asyncData<T>(data: T) { return defer(() => Promise.resolve(data)); } -
This helper's observable emits the
datavalue in the next turn of the JavaScript engine. -
The
RxJS defer() operatorreturns an observable. It takes a factory function that returns either a promise or an observable. When something subscribes to defer's observable, it adds the subscriber to a new observable created with that factory. -
The
defer()operator transforms thePromise.resolve()into a new observable that, likeHttpClient, emits once and completes. Subscribers are unsubscribed after they receive the data value.
-
-
There's a similar helper for producing an async error.
/** * Create async observable error that errors * after a JS engine turn */ export function asyncError<T>(errorObject: any) { return defer(() => Promise.reject(errorObject)); }
-
Now that the
getQuote()spy is returning async observables, most of your tests will have to be async as well. -
Here's a
fakeAsync()test that demonstrates the data flow you'd expect in the real world.it('should show quote after getQuote (fakeAsync)', fakeAsync(() => { fixture.detectChanges(); // ngOnInit() expect(quoteEl.textContent) .withContext('should show placeholder') .toBe('...'); tick(); // flush the observable to get the quote fixture.detectChanges(); // update view expect(quoteEl.textContent) .withContext('should show quote') .toBe(testQuote); expect(errorMessage()) .withContext('should not show error') .toBeNull(); }));-
Notice that the quote element displays the placeholder value (
'...') after ngOnInit(). The first quote hasn't arrived yet. -
To flush the first quote from the observable, you call
tick(). Then calldetectChanges()to tell Angular to update the screen. -
Then you can assert that the quote element displays the expected text.
-
-
To use
waitForAsync()functionality, you must importzone.js/testingin your test setup file. If you created your project with the Angular CLI,zone-testingis already imported insrc/test.ts. -
Here's the previous
fakeAsync()test, re-written with thewaitForAsync()utility.it('should show quote after getQuote (waitForAsync)', waitForAsync(() => { fixture.detectChanges(); // ngOnInit() expect(quoteEl.textContent) .withContext('should show placeholder') .toBe('...'); fixture.whenStable().then(() => { // wait for async getQuote fixture.detectChanges(); // update view with quote expect(quoteEl.textContent).toBe(testQuote); expect(errorMessage()) .withContext('should not show error') .toBeNull(); }); })); -
The
waitForAsync()utility hides some asynchronous boilerplate by arranging for the tester's code to run in a special async test zone. You don't need to pass Jasmine's done() into the test and call done() because it is undefined in promise or observable callbacks. -
But the test's asynchronous nature is revealed by the call to
fixture.whenStable(), which breaks the linear flow of control. -
When using an
intervalTimer()such assetInterval()inwaitForAsync(), remember to cancel the timer withclearInterval()after the test, otherwise thewaitForAsync()never ends.
-
The test must wait for the
getQuote()observable to emit the next quote. Instead of callingtick(), it callsfixture.whenStable(). -
The
fixture.whenStable()returns a promise that resolves when the JavaScript engine's task queue becomes empty. In this example, the task queue becomes empty when the observable emits the first quote.
The test resumes within the promise callback, which calls detectChanges() to update the quote element with the expected text.
-
While the
waitForAsync()andfakeAsync()functions greatly simplify Angular asynchronous testing, you can still fall back to the traditional technique and pass it a function that takes adone callback. -
You can't call
done()inwaitForAsync()orfakeAsync()functions, because thedone parameterisundefined. -
Now you are responsible for chaining promises, handling errors, and calling
done()at the appropriate moments. -
Writing test functions with
done(), is more cumbersome thanwaitForAsync()andfakeAsync(), but it is occasionally necessary when code involves theintervalTimer()likesetInterval. -
Here are two more versions of the previous test, written with
done(). The first one subscribes to the Observable exposed to the template by the component'squoteproperty.it('should show last quote (quote done)', (done: DoneFn) => { fixture.detectChanges(); component.quote.pipe(last()).subscribe(() => { fixture.detectChanges(); // update view with quote expect(quoteEl.textContent).toBe(testQuote); expect(errorMessage()) .withContext('should not show error') .toBeNull(); done(); }); }); -
The RxJS
last()operator emits the observable's last value before completing, which will be the test quote. The subscribe callback callsdetectChanges()to update the quote element with the test quote, in the same manner as the earlier tests. -
In some tests, you're more interested in how an injected service method was called and what values it returned, than what appears on screen.
-
A service spy, such as the
qetQuote()spy of the fakeTwainService, can give you that information and make assertions about the state of the view.it('should show quote after getQuote (spy done)', (done: DoneFn) => { fixture.detectChanges(); // the spy's most recent call returns the observable with the test quote getQuoteSpy.calls.mostRecent().returnValue.subscribe(() => { fixture.detectChanges(); // update view with quote expect(quoteEl.textContent).toBe(testQuote); expect(errorMessage()) .withContext('should not show error') .toBeNull(); done(); }); });
-
The previous
TwainComponenttests simulated an asynchronous observable response from theTwainServicewith theasyncDataandasyncErrorutilities. -
These are short, simple functions that you can write yourself. Unfortunately, they're too simple for many common scenarios. An observable often emits multiple times, perhaps after a significant delay. A component might coordinate multiple observables with overlapping sequences of values and errors.
-
RxJS marble testing is a great way to test observable scenarios, both simple and complex. You've likely seen the marble diagrams that illustrate how observables work. Marble testing uses a similar marble language to specify the observable streams and expectations in your tests.
-
The following examples revisit two of the
TwainComponenttests with marble testing. -
Start by installing the
jasmine-marblesnpm package. Then import the symbols you need.- app/twain/twain.component.marbles.spec.ts (import marbles)
import { cold, getTestScheduler } from 'jasmine-marbles';
- app/twain/twain.component.marbles.spec.ts (import marbles)
-
Here's the complete test for getting a quote:
-
app/dashboard/dashboard-hero.component.spec.ts (setup)
it('should show quote after getQuote (marbles)', () => { // observable test quote value and complete(), after delay const q$ = cold('---x|', { x: testQuote }); getQuoteSpy.and.returnValue( q$ ); fixture.detectChanges(); // ngOnInit() expect(quoteEl.textContent) .withContext('should show placeholder') .toBe('...'); getTestScheduler().flush(); // flush the observables fixture.detectChanges(); // update view expect(quoteEl.textContent) .withContext('should show quote') .toBe(testQuote); expect(errorMessage()) .withContext('should not show error') .toBeNull(); });
-
-
Notice that the Jasmine test is synchronous. There's no fakeAsync(). Marble testing uses a test scheduler to simulate the passage of time in a synchronous test.
-
The beauty of marble testing is in the visual definition of the observable streams. This test defines a cold observable that waits three frames (---), emits a value (x), and completes (|). In the second argument you map the value marker (x) to the emitted value (testQuote).
const q$ = cold('---x|', { x: testQuote }); -
The marble library constructs the corresponding observable, which the test sets as the getQuote spy's return value.
-
When you're ready to activate the marble observables, you tell the
TestSchedulerto flush its queue of prepared tasks like this.getTestScheduler().flush(); // flush the observables -
This step serves a purpose analogous to
tick()andwhenStable()in the earlierfakeAsync()andwaitForAsync()examples. The balance of the test is the same as those examples.
-
Here's the marble testing version of the
getQuote()error test.it('should display error when TwainService fails', fakeAsync(() => { // observable error after delay const q$ = cold('---#|', null, new Error('TwainService test failure')); getQuoteSpy.and.returnValue( q$ ); fixture.detectChanges(); // ngOnInit() expect(quoteEl.textContent) .withContext('should show placeholder') .toBe('...'); getTestScheduler().flush(); // flush the observables tick(); // component shows error after a setTimeout() fixture.detectChanges(); // update error message expect(errorMessage()) .withContext('should display error') .toMatch(/test failure/); expect(quoteEl.textContent) .withContext('should show placeholder') .toBe('...'); }));-
It's still an async test, calling
fakeAsync()andtick(), because the component itself callssetTimeout()when processing errors. -
Look at the marble observable definition.
const q$ = cold('---#|', null, new Error('TwainService test failure')); -
This is a cold observable that waits three frames and then emits an error, the hash (
#) character indicates the timing of the error that is specified in the third argument. The second argument is null because the observable never emits a value.
-
-
A marble frame is a virtual unit of testing time. Each symbol (-, x, |, #) marks the passing of one frame.
-
A cold observable doesn't produce values until you subscribe to it. Most of your application observables are cold. All
HttpClientmethods return cold observables.
A hot observable is already producing values before you subscribe to it. The Router.events observable, which reports router activity, is a hot observable.
RxJS marble testing is a rich subject, beyond the scope of this guide. Learn about it on the web, starting with the official documentation.
-
A component with inputs and outputs typically appears inside the view template of a host component. The host uses a property binding to set the input property and an event binding to listen to events raised by the output property.
-
The testing goal is to verify that such bindings work as expected. The tests should set input values and listen for output events.
-
The
DashboardHeroComponentis a tiny example of a component in this role. It displays an individual hero provided by theDashboardComponent. Clicking that hero tells theDashboardComponentthat the user has selected the hero. -
The
DashboardHeroComponentis embedded in theDashboardComponenttemplate like this:- app/dashboard/dashboard.component.html (excerpt)
<dashboard-hero *ngFor="let hero of heroes" class="col-1-4" [hero]=hero (selected)="gotoDetail($event)" > </dashboard-hero> - The
DashboardHeroComponentappears in an*ngForrepeater, which sets each component'sheroinput property to the looping value and listens for the component'sselectedevent.
- app/dashboard/dashboard.component.html (excerpt)
-
Here's the component's full definition:
- app/dashboard/dashboard-hero.component.ts (component)
@Component({ selector: 'dashboard-hero', template: ` <button type="button" (click)="click()" class="hero"> {{hero.name | uppercase}} </button> `, styleUrls: [ './dashboard-hero.component.css' ] }) export class DashboardHeroComponent { @Input() hero!: Hero; @Output() selected = new EventEmitter<Hero>(); click() { this.selected.emit(this.hero); } }
- app/dashboard/dashboard-hero.component.ts (component)
-
While testing a component this simple has little intrinsic value, it's worth knowing how. Use one of these approaches:
- Test it as used by
DashboardComponent - Test it as a stand-alone component
- Test it as used by a substitute for
DashboardComponent
- Test it as used by
-
A quick look at the
DashboardComponentconstructor discourages the first approach:- app/dashboard/dashboard.component.ts (constructor)
constructor( private router: Router, private heroService: HeroService) { }
- app/dashboard/dashboard.component.ts (constructor)
-
The DashboardComponentdepends on the Angular router and the HeroService. You'd probably have to replace them both with test doubles, which is a lot of work. The router seems particularly challenging. -
The immediate goal is to test the
DashboardHeroComponent, not theDashboardComponent, so, try the second and third options.
-
Here's the meat of the spec file setup.
TestBed .configureTestingModule({declarations: [DashboardHeroComponent]}) fixture = TestBed.createComponent(DashboardHeroComponent); comp = fixture.componentInstance; ``` // find the hero's DebugElement and element heroDe = fixture.debugElement.query(By.css('.hero')); heroEl = heroDe.nativeElement; // mock the hero supplied by the parent component expectedHero = {id: 42, name: 'Test Name'}; // simulate the parent setting the input property with that hero comp.hero = expectedHero; // trigger initial data binding fixture.detectChanges(); -
Notice how the setup code assigns a test hero (expectedHero) to the component's hero property, emulating the way the DashboardComponent would set it using the property binding in its repeater.
-
The following test verifies that the hero name is propagated to the template using a binding.
it('should display hero name in uppercase', () => { const expectedPipedName = expectedHero.name.toUpperCase(); expect(heroEl.textContent).toContain(expectedPipedName); }); -
Because the template passes the hero name through the Angular
UpperCasePipe, the test must match the element value with the upper-cased name. -
This small test demonstrates how Angular tests can verify a component's visual representation —something not possible with
component class tests— at low cost and without resorting to much slower and more complicated end-to-end tests.
-
Clicking the hero should raise a selected event that the host component (
DashboardComponentpresumably) can hear:it('should raise selected event when clicked (triggerEventHandler)', () => { let selectedHero: Hero | undefined; comp.selected.pipe(first()).subscribe((hero: Hero) => selectedHero = hero); heroDe.triggerEventHandler('click'); expect(selectedHero).toBe(expectedHero); });-
The component's selected property returns an EventEmitter, which looks like an RxJS synchronous Observable to consumers. The test subscribes to it explicitly just as the host component does implicitly.
-
If the component behaves as expected, clicking the hero's element should tell the component's selected property to emit the hero object.
-
The test detects that event through its subscription to selected.
-
-
The heroDe in the previous test is a
DebugElementthat represents the hero<div>. -
It has Angular properties and methods that abstract interaction with the native element. This test calls the
DebugElement.triggerEventHandlerwith the "click" event name. The "click" event binding responds by calling DashboardHeroComponent.click(). -
The Angular
DebugElement.triggerEventHandlercan raise any data-bound event by its event name. The second parameter is the event object passed to the handler. -
The test triggered a "click" event.
heroDe.triggerEventHandler('click');- In this case, the test correctly assumes that the runtime event handler, the component's click() method, doesn't care about the event object.
-
Other handlers are less forgiving. For example, the RouterLink directive expects an object with a button property that identifies which mouse button, if any, was pressed during the click. The RouterLink directive throws an error if the event object is missing.
-
The following test alternative calls the native element's own click() method, which is perfectly fine for this component.
it('should raise selected event when clicked (element.click)', () => { let selectedHero: Hero | undefined; comp.selected.pipe(first()).subscribe((hero: Hero) => selectedHero = hero); heroEl.click(); expect(selectedHero).toBe(expectedHero); });
-
Clicking a button, an anchor, or an arbitrary HTML element is a common test task.
-
Make that consistent and straightforward by encapsulating the click-triggering process in a helper such as the following
click()function:-
testing/index.ts (click helper)
/** Button events to pass to `DebugElement.triggerEventHandler` for RouterLink event handler */ export const ButtonClickEvents = { left: { button: 0 }, right: { button: 2 } }; /** Simulate element click. Defaults to mouse left-button click event. */ export function click(el: DebugElement | HTMLElement, eventObj: any = ButtonClickEvents.left): void { if (el instanceof HTMLElement) { el.click(); } else { el.triggerEventHandler('click', eventObj); } } -
The first parameter is the element-to-click. If you want, pass a custom event object as the second parameter. The default is a partial left-button mouse event object accepted by many handlers including the RouterLink directive.
- The click() helper function is not one of the Angular testing utilities. It's a function defined in this guide's sample code. All of the sample tests use it. If you like it, add it to your own collection of helpers.
-
-
Here's the previous test, rewritten using the click helper.
-
app/dashboard/dashboard-hero.component.spec.ts (test with click helper)
it('should raise selected event when clicked (click helper with DebugElement)', () => { let selectedHero: Hero | undefined; comp.selected.pipe(first()).subscribe((hero: Hero) => selectedHero = hero); click(heroDe); // click helper with DebugElement expect(selectedHero).toBe(expectedHero); });
-
-
The previous tests played the role of the host DashboardComponent themselves. But does the DashboardHeroComponent work correctly when properly data-bound to a host component?
-
You could test with the actual DashboardComponent. But doing so could require a lot of setup, especially when its template features an *ngFor repeater, other components, layout HTML, additional bindings, a constructor that injects multiple services, and it starts interacting with those services right away.
-
Imagine the effort to disable these distractions, just to prove a point that can be made satisfactorily with a test host like this one:
- app/dashboard/dashboard-hero.component.spec.ts (test host)
@Component({ template: ` <dashboard-hero [hero]="hero" (selected)="onSelected($event)"> </dashboard-hero>` }) class TestHostComponent { hero: Hero = {id: 42, name: 'Test Name'}; selectedHero: Hero | undefined; onSelected(hero: Hero) { this.selectedHero = hero; } } - This test host binds to
DashboardHeroComponentas theDashboardComponentwould but without the noise of the Router, theHeroService, or the *ngFor repeater.
- app/dashboard/dashboard-hero.component.spec.ts (test host)
-
The test host sets the component's hero input property with its test hero. It binds the component's selected event with its onSelected handler, which records the emitted hero in its selectedHero property.
-
Later, the tests will be able to check selectedHero to verify that the DashboardHeroComponent.selected event emitted the expected hero.
-
The setup for the test-host tests is similar to the setup for the stand-alone tests:
-
app/dashboard/dashboard-hero.component.spec.ts (test host setup)
TestBed .configureTestingModule({declarations: [DashboardHeroComponent, TestHostComponent]}) // create TestHostComponent instead of DashboardHeroComponent fixture = TestBed.createComponent(TestHostComponent); testHost = fixture.componentInstance; heroEl = fixture.nativeElement.querySelector('.hero'); fixture.detectChanges(); // trigger initial data binding -
This testing module configuration shows three important differences:
- It declares both the
DashboardHeroComponentand theTestHostComponent - It creates the
TestHostComponentinstead of theDashboardHeroComponent - The
TestHostComponentsets theDashboardHeroComponent.herowith a binding
- It declares both the
-
The createComponent returns a fixture that holds an instance of TestHostComponent instead of an instance of DashboardHeroComponent.
-
Creating the TestHostComponent has the side effect of creating a DashboardHeroComponent because the latter appears within the template of the former. The query for the hero element (heroEl) still finds it in the test DOM, albeit at greater depth in the element tree than before.
-
-
The tests themselves are almost identical to the stand-alone version:
-
app/dashboard/dashboard-hero.component.spec.ts (test-host)
it('should display hero name', () => { const expectedPipedName = testHost.hero.name.toUpperCase(); expect(heroEl.textContent).toContain(expectedPipedName); }); it('should raise selected event when clicked', () => { click(heroEl); // selected hero should be the same data bound hero expect(testHost.selectedHero).toBe(testHost.hero); }); -
Only the selected event test differs. It confirms that the selected DashboardHeroComponent hero really does find its way up through the event binding to the host component.
-
-
A routing component is a component that tells the Router to navigate to another component. The DashboardComponent is a routing component because the user can navigate to the HeroDetailComponent by clicking on one of the hero buttons on the dashboard.
-
Routing is pretty complicated. Testing the DashboardComponent seemed daunting in part because it involves the Router, which it injects together with the HeroService.
- app/dashboard/dashboard.component.ts (constructor)
constructor( private router: Router, private heroService: HeroService) { }
- app/dashboard/dashboard.component.ts (constructor)
-
Mocking the HeroService with a spy is a familiar story. But the Router has a complicated API and is entwined with other services and application preconditions. Might it be difficult to mock?
-
Fortunately, not in this case because the DashboardComponent isn't doing much with the Router
- app/dashboard/dashboard.component.ts (goToDetail)
gotoDetail(hero: Hero) { const url = `/heroes/${hero.id}`; this.router.navigateByUrl(url); }
- app/dashboard/dashboard.component.ts (goToDetail)
-
This is often the case with routing components. As a rule you test the component, not the router, and care only if the component navigates with the right address under the given conditions.
-
Providing a router spy for this component test suite happens to be as easy as providing a HeroService spy.
-
app/dashboard/dashboard.component.spec.ts (spies)
const routerSpy = jasmine.createSpyObj('Router', ['navigateByUrl']); const heroServiceSpy = jasmine.createSpyObj('HeroService', ['getHeroes']); TestBed .configureTestingModule({ providers: [ {provide: HeroService, useValue: heroServiceSpy}, {provide: Router, useValue: routerSpy} ] })
-
-
The following test clicks the displayed hero and confirms that Router.navigateByUrl is called with the expected url.
-
app/dashboard/dashboard.component.spec.ts (navigate test)
it('should tell ROUTER to navigate when hero clicked', () => { heroClick(); // trigger click on first inner <div class="hero"> // args passed to router.navigateByUrl() spy const spy = router.navigateByUrl as jasmine.Spy; const navArgs = spy.calls.first().args[0]; // expecting to navigate to id of the component's first hero const id = comp.heroes[0].id; expect(navArgs) .withContext('should nav to HeroDetail for first hero') .toBe('/heroes/' + id); });
-
-
A routed component is the destination of a Router navigation. It can be trickier to test, especially when the route to the component includes parameters. The HeroDetailComponent is a routed component that is the destination of such a route.
-
When a user clicks a Dashboard hero, the DashboardComponent tells the Router to navigate to heroes/:id. The :id is a route parameter whose value is the id of the hero to edit.
-
The Router matches that URL to a route to the HeroDetailComponent. It creates an ActivatedRoute object with the routing information and injects it into a new instance of the HeroDetailComponent.
-
Here's the HeroDetailComponent constructor:
- app/hero/hero-detail.component.ts (constructor)
constructor( private heroDetailService: HeroDetailService, private route: ActivatedRoute, private router: Router) { }
- app/hero/hero-detail.component.ts (constructor)
-
The HeroDetail component needs the id parameter so it can fetch the corresponding hero using the HeroDetailService. The component has to get the id from the ActivatedRoute.paramMap property which is an Observable.
-
It can't just reference the id property of the ActivatedRoute.paramMap. The component has to subscribe to the ActivatedRoute.paramMap observable and be prepared for the id to change during its lifetime.
- app/hero/hero-detail.component.ts (ngOnInit)
ngOnInit(): void { // get hero when `id` param changes this.route.paramMap.subscribe(pmap => this.getHero(pmap.get('id'))); }
- app/hero/hero-detail.component.ts (ngOnInit)
-
Tests can explore how the
HeroDetailComponentresponds to different id parameter values by manipulating theActivatedRouteinjected into the component's constructor. -
You know how to spy on the Router and a data service.
-
You'll take a different approach with ActivatedRoute because
paramMapreturns an Observable that can emit more than one value during a test- You need the router helper function,
convertToParamMap(), to create aParamMap - Other routed component tests need a test double for
ActivatedRoute
-
These differences argue for a re-usable stub class.
-
The following `ActivatedRouteStub class serves as a test double for ActivatedRoute.
-
testing/activated-route-stub.ts (ActivatedRouteStub)
import { convertToParamMap, ParamMap, Params } from '@angular/router'; import { ReplaySubject } from 'rxjs'; /** * An ActivateRoute test double with a `paramMap` observable. * Use the `setParamMap()` method to add the next `paramMap` value. */ export class ActivatedRouteStub { // Use a ReplaySubject to share previous values with subscribers // and pump new values into the `paramMap` observable private subject = new ReplaySubject<ParamMap>(); constructor(initialParams?: Params) { this.setParamMap(initialParams); } /** The mock paramMap observable */ readonly paramMap = this.subject.asObservable(); /** Set the paramMap observable's next value */ setParamMap(params: Params = {}) { this.subject.next(convertToParamMap(params)); } }
-
-
Consider placing such helpers in a testing folder sibling to the app folder. This sample puts
ActivatedRouteStubintesting/activated-route-stub.ts.
-
Here's a test demonstrating the component's behavior when the observed id refers to an existing hero:
-
app/hero/hero-detail.component.spec.ts (existing id)
describe('when navigate to existing hero', () => { let expectedHero: Hero; beforeEach(async () => { expectedHero = firstHero; activatedRoute.setParamMap({id: expectedHero.id}); await createComponent(); }); it("should display that hero's name", () => { expect(page.nameDisplay.textContent).toBe(expectedHero.name); }); }); -
When the id cannot be found, the component should re-route to the HeroListComponent.
-
The test suite setup provided the same router spy described above which spies on the router without actually navigating.
-
This test expects the component to try to navigate to the HeroListComponent.
-
app/hero/hero-detail.component.spec.ts (bad id)
describe('when navigate to non-existent hero id', () => { beforeEach(async () => { activatedRoute.setParamMap({id: 99999}); await createComponent(); }); it('should try to navigate back to hero list', () => { expect(page.gotoListSpy.calls.any()) .withContext('comp.gotoList called') .toBe(true); expect(page.navigateSpy.calls.any()) .withContext('router.navigate called') .toBe(true); }); });
-
-
-
While this application doesn't have a route to the HeroDetailComponent that omits the id parameter, it might add such a route someday. The component should do something reasonable when there is no id.
-
In this implementation, the component should create and display a new hero. New heroes have id=0 and a blank name. This test confirms that the component behaves as expected:
-
app/hero/hero-detail.component.spec.ts (no id)
describe('when navigate with no hero id', () => { beforeEach(async () => { await createComponent(); }); it('should have hero.id === 0', () => { expect(component.hero.id).toBe(0); }); it('should display empty hero name', () => { expect(page.nameDisplay.textContent).toBe(''); }); });
-
-
Component templates often have nested components, whose templates might contain more components.
-
The component tree can be very deep and, most of the time, the nested components play no role in testing the component at the top of the tree.
-
The AppComponent, for example, displays a navigation bar with anchors and their RouterLink directives.
-
app/app.component.html
<app-banner></app-banner> <app-welcome></app-welcome> <nav> <a routerLink="/dashboard">Dashboard</a> <a routerLink="/heroes">Heroes</a> <a routerLink="/about">About</a> </nav> <router-outlet></router-outlet> -
While the AppComponent class is empty, you might want to write unit tests to confirm that the links are wired properly to the RouterLink directives, perhaps for the reasons as explained in the following section.
-
To validate the links, you don't need the Router to navigate and you don't need the
<router-outlet>to mark where the Router inserts routed components. -
The BannerComponent and WelcomeComponent (indicated by
<app-banner>and<app-welcome>)are also irrelevant. -
Yet any test that creates the AppComponent in the DOM also creates instances of these three components and, if you let that happen, you'll have to configure the TestBed to create them.
-
If you neglect to declare them, the Angular compiler won't recognize the
<app-banner>,, and <router-outlet>tags in the AppComponent template and will throw an error.
If you declare the real components, you'll also have to declare their nested components and provide for all services injected in any component in the tree.
That's too much effort just to answer a few simple questions about links.
This section describes two techniques for minimizing the setup. Use them, alone or in combination, to stay focused on testing the primary component.
-
In the first technique, you create and declare stub versions of the components and directive that play little or no role in the tests.
-
app/app.component.spec.ts (stub declaration)
@Component({selector: 'app-banner', template: ''}) class BannerStubComponent { } @Component({selector: 'router-outlet', template: ''}) class RouterOutletStubComponent { } @Component({selector: 'app-welcome', template: ''}) class WelcomeStubComponent { }
-
-
The stub selectors match the selectors for the corresponding real components. But their templates and classes are empty.
-
Then declare them in the
TestBedconfiguration next to the components, directives, and pipes that need to be real.- app/app.component.spec.ts (TestBed stubs)
TestBed .configureTestingModule({ declarations: [ AppComponent, RouterLinkDirectiveStub, BannerStubComponent, RouterOutletStubComponent, WelcomeStubComponent ] })
- app/app.component.spec.ts (TestBed stubs)
-
The
AppComponentis the test subject, so of course you declare the real version. -
The
RouterLinkDirectiveStub, described later, is a test version of the realRouterLinkthat helps with the link tests. -
The rest are stubs.
-
In the second approach, add
NO_ERRORS_SCHEMAto theTestBed.schemasmetadata.-
app/app.component.spec.ts (NO_ERRORS_SCHEMA)
TestBed .configureTestingModule({ declarations: [ AppComponent, RouterLinkDirectiveStub ], schemas: [NO_ERRORS_SCHEMA] }) -
The NO_ERRORS_SCHEMA tells the Angular compiler to ignore unrecognized elements and attributes.
-
The compiler recognizes the
<app-root>element and the routerLink attribute because you declared a correspondingAppComponentandRouterLinkDirectiveStubin the TestBed` configuration. -
But the compiler won't throw an error when it encounters
<app-banner>,<app-welcome>, or<router-outlet>. It simply renders them as empty tags and the browser ignores them. -
You no longer need the stub components.
-
-
These are techniques for Shallow Component Testing, so-named because they reduce the visual surface of the component to just those elements in the component's template that matter for tests.
-
The NO_ERRORS_SCHEMA approach is the easier of the two but don't overuse it.
-
The NO_ERRORS_SCHEMA also prevents the compiler from telling you about the missing components and attributes that you omitted inadvertently or misspelled. You could waste hours chasing phantom bugs that the compiler would have caught in an instant.
-
The stub component approach has another advantage. While the stubs in this example were empty, you could give them stripped-down templates and classes if your tests need to interact with them in some way.
-
In practice you will combine the two techniques in the same setup, as seen in this example.
-
app/app.component.spec.ts (mixed setup)
TestBed .configureTestingModule({ declarations: [ AppComponent, BannerStubComponent, RouterLinkDirectiveStub ], schemas: [NO_ERRORS_SCHEMA] }) -
The Angular compiler creates the BannerComponentStub for the
<app-banner>element and applies the RouterLinkStubDirective to the anchors with the routerLink attribute, but it ignores the<app-welcome>and<router-outlet>tags.
-
-
The real RouterLinkDirective is quite complicated and entangled with other components and directives of the RouterModule. It requires challenging setup to mock and use in tests.
-
The RouterLinkDirectiveStub in this sample code replaces the real directive with an alternative version designed to validate the kind of anchor tag wiring seen in the AppComponent template.
-
testing/router-link-directive-stub.ts (RouterLinkDirectiveStub)
@Directive({ selector: '[routerLink]' }) export class RouterLinkDirectiveStub { @Input('routerLink') linkParams: any; navigatedTo: any = null; @HostListener('click') onClick() { this.navigatedTo = this.linkParams; } } -
The URL bound to the [routerLink] attribute flows in to the directive's linkParams property.
-
The HostListener wires the click event of the host element (the
<a>anchor elements in AppComponent) to the stub directive's onClick method. -
Clicking the anchor should trigger the onClick() method, which sets the stub's telltale navigatedTo property. Tests inspect navigatedTo to confirm that clicking the anchor sets the expected route definition.
-
Note:
- Whether the router is configured properly to navigate with that route definition is a question for a separate set of tests.
-
A little more setup triggers the initial data binding and gets references to the navigation links:
-
app/app.component.spec.ts (test setup)
beforeEach(() => { fixture.detectChanges(); // trigger initial data binding // find DebugElements with an attached RouterLinkStubDirective linkDes = fixture.debugElement.queryAll(By.directive(RouterLinkDirectiveStub)); // get attached link directive instances // using each DebugElement's injector routerLinks = linkDes.map(de => de.injector.get(RouterLinkDirectiveStub)); }); -
Three points of special interest:
- Locate the anchor elements with an attached directive using
By.directive - The query returns
DebugElementwrappers around the matching elements - Each
DebugElementexposes a dependency injector with the specific instance of the directive attached to that element
- Locate the anchor elements with an attached directive using
-
-
The AppComponent links to validate are as follows:
- app/app.component.html (navigation links)
<nav> <a routerLink="/dashboard">Dashboard</a> <a routerLink="/heroes">Heroes</a> <a routerLink="/about">About</a> </nav>
- app/app.component.html (navigation links)
-
Here are some tests that confirm those links are wired to the routerLink directives as expected:
-
app/app.component.spec.ts (selected tests)
it('can get RouterLinks from template', () => { expect(routerLinks.length) .withContext('should have 3 routerLinks') .toBe(3); expect(routerLinks[0].linkParams).toBe('/dashboard'); expect(routerLinks[1].linkParams).toBe('/heroes'); expect(routerLinks[2].linkParams).toBe('/about'); }); it('can click Heroes link in template', () => { const heroesLinkDe = linkDes[1]; // heroes link DebugElement const heroesLink = routerLinks[1]; // heroes link directive expect(heroesLink.navigatedTo) .withContext('should not have navigated yet') .toBeNull(); heroesLinkDe.triggerEventHandler('click'); fixture.detectChanges(); expect(heroesLink.navigatedTo).toBe('/heroes'); }); -
Note:
-
The "click" test in this example is misleading. It tests the RouterLinkDirectiveStub rather than the component. This is a common failing of directive stubs.
-
It has a legitimate purpose in this guide. It demonstrates how to find a RouterLink element, click it, and inspect a result, without engaging the full router machinery. This is a skill you might need to test a more sophisticated component, one that changes the display, re-calculates parameters, or re-arranges navigation options when the user clicks the link.
-
-
-
Stubbed RouterLink tests can confirm that a component with links and an outlet is set up properly, that the component has the links it should have, and that they are all pointing in the expected direction. These tests do not concern whether the application will succeed in navigating to the target component when the user clicks a link.
-
Stubbing the RouterLink and RouterOutlet is the best option for such limited testing goals. Relying on the real router would make them brittle. They could fail for reasons unrelated to the component. For example, a navigation guard could prevent an unauthorized user from visiting the HeroListComponent. That's not the fault of the AppComponent and no change to that component could cure the failed test.
-
A different battery of tests can explore whether the application navigates as expected in the presence of conditions that influence guards such as whether the user is authenticated and authorized.
-
Note:
- A future guide update explains how to write such tests with the
RouterTestingModule.
- A future guide update explains how to write such tests with the
-
The HeroDetailComponent is a simple view with a title, two hero fields, and two buttons.
-
But there's plenty of template complexity even in this simple form.
- app/hero/hero-detail.component.html
<div *ngIf="hero"> <h2><span>{{hero.name | titlecase}}</span> Details</h2> <div> <span>id: </span>{{hero.id}}</div> <div> <label for="name">name: </label> <input id="name" [(ngModel)]="hero.name" placeholder="name" /> </div> <button type="button" (click)="save()">Save</button> <button type="button" (click)="cancel()">Cancel</button> </div>
- app/hero/hero-detail.component.html
-
Tests that exercise the component need …
- To wait until a hero arrives before elements appear in the DOM
- A reference to the title text
- A reference to the name input box to inspect and set it
- References to the two buttons so they can click them
- Spies for some of the component and router methods
-
Even a small form such as this one can produce a mess of tortured conditional setup and CSS element selection.
-
Tame the complexity with a
Pageclass that handles access to component properties and encapsulates the logic that sets them. -
Here is such a
Pageclass for thehero-detail.component.spec.ts-
app/hero/hero-detail.component.spec.ts (Page)
class Page { // getter properties wait to query the DOM until called. get buttons() { return this.queryAll<HTMLButtonElement>('button'); } get saveBtn() { return this.buttons[0]; } get cancelBtn() { return this.buttons[1]; } get nameDisplay() { return this.query<HTMLElement>('span'); } get nameInput() { return this.query<HTMLInputElement>('input'); } gotoListSpy: jasmine.Spy; navigateSpy: jasmine.Spy; constructor(someFixture: ComponentFixture<HeroDetailComponent>) { // get the navigate spy from the injected router spy object const routerSpy = someFixture.debugElement.injector.get(Router) as any; this.navigateSpy = routerSpy.navigate; // spy on component's `gotoList()` method const someComponent = someFixture.componentInstance; this.gotoListSpy = spyOn(someComponent, 'gotoList').and.callThrough(); } //// query helpers //// private query<T>(selector: string): T { return fixture.nativeElement.querySelector(selector); } private queryAll<T>(selector: string): T[] { return fixture.nativeElement.querySelectorAll(selector); } } -
Now the important hooks for component manipulation and inspection are neatly organized and accessible from an instance of
Page.
-
-
A
createComponentmethod creates a page object and fills in the blanks once theheroarrives.-
app/hero/hero-detail.component.spec.ts (createComponent)
/** Create the HeroDetailComponent, initialize it, set test variables */ function createComponent() { fixture = TestBed.createComponent(HeroDetailComponent); component = fixture.componentInstance; page = new Page(fixture); // 1st change detection triggers ngOnInit which gets a hero fixture.detectChanges(); return fixture.whenStable().then(() => { // 2nd change detection displays the async-fetched hero fixture.detectChanges(); }); } -
The
HeroDetailComponenttests in an earlier section demonstrate howcreateComponentandpagekeep the tests short and on message. There are no distractions: no waiting for promises to resolve and no searching the DOM for element values to compare.
-
-
Here are a few more
HeroDetailComponenttests to reinforce the point.-
app/hero/hero-detail.component.spec.ts (selected tests)
it("should display that hero's name", () => { expect(page.nameDisplay.textContent).toBe(expectedHero.name); }); it('should navigate when click cancel', () => { click(page.cancelBtn); expect(page.navigateSpy.calls.any()) .withContext('router.navigate called') .toBe(true); }); it('should save when click save but not navigate immediately', () => { // Get service injected into component and spy on its`saveHero` method. // It delegates to fake `HeroService.updateHero` which delivers a safe test result. const hds = fixture.debugElement.injector.get(HeroDetailService); const saveSpy = spyOn(hds, 'saveHero').and.callThrough(); click(page.saveBtn); expect(saveSpy.calls.any()) .withContext('HeroDetailService.save called') .toBe(true); expect(page.navigateSpy.calls.any()) .withContext('router.navigate not called') .toBe(false); }); it('should navigate when click save and save resolves', fakeAsync(() => { click(page.saveBtn); tick(); // wait for async save to complete expect(page.navigateSpy.calls.any()) .withContext('router.navigate called') .toBe(true); })); it('should convert hero name to Title Case', () => { // get the name's input and display elements from the DOM const hostElement: HTMLElement = fixture.nativeElement; const nameInput: HTMLInputElement = hostElement.querySelector('input')!; const nameDisplay: HTMLElement = hostElement.querySelector('span')!; // simulate user entering a new name into the input box nameInput.value = 'quick BROWN fOx'; // Dispatch a DOM event so that Angular learns of input value change. nameInput.dispatchEvent(new Event('input')); // Tell Angular to update the display binding through the title pipe fixture.detectChanges(); expect(nameDisplay.textContent).toBe('Quick Brown Fox'); });
-

-
Note:
- Ignore this section if you only run tests with the CLI
ng testcommand because the CLI compiles the application before running the tests.
- Ignore this section if you only run tests with the CLI
-
If you run tests in a non-CLI environment, the tests might fail with a message like this one:
Error: This test module uses the component BannerComponent which is using a "templateUrl" or "styleUrls", but they were never compiled. Please call "TestBed.compileComponents" before your test. -
The root of the problem is at least one of the components involved in the test specifies an external template or CSS file as the following version of the
BannerComponentdoes.-
app/banner/banner-external.component.ts (external template & css)
import { Component } from '@angular/core';

@Component({
  selector: 'app-banner',
  templateUrl: './banner-external.component.html',
  styleUrls:  ['./banner-external.component.css']
})
export class BannerComponent {
  title = 'Test Tour of Heroes';
}
-
-
The test fails when the TestBed tries to create the component.
- app/banner/banner-external.component.spec.ts (setup that fails)
beforeEach(async () => {
  await TestBed.configureTestingModule({
    declarations: [ BannerComponent ],
  }); // missing call to compileComponents()
  fixture = TestBed.createComponent(BannerComponent);
});
- app/banner/banner-external.component.spec.ts (setup that fails)
-
Recall that the application hasn't been compiled. So when you call createComponent(), the TestBed compiles implicitly.
-
That's not a problem when the source code is in memory. But the BannerComponent requires external files that the compiler must read from the file system, an inherently asynchronous operation.
-
If the TestBed were allowed to continue, the tests would run and fail mysteriously before the compiler could finish.
-
The preemptive error message tells you to compile explicitly with compileComponents().
-
You must call
compileComponents()within an asynchronous test function.-
If you neglect to make the test function async (for example, forget to use
waitForAsync() as described), you'll see this error messageError: ViewDestroyedError: Attempt to use a destroyed view
-
-
A typical approach is to divide the setup logic into two separate beforeEach() functions:
FUNCTIONS DETAILS Asynchronous beforeEach() Compiles the components Synchronous beforeEach() Performs the remaining setup
-
Write the first async
beforeEachlike this.- app/banner/banner-external.component.spec.ts (async beforeEach)
beforeEach(async () => {
  await TestBed.configureTestingModule({
    declarations: [ BannerComponent ],
  }).compileComponents();  // compile template and css
});
- app/banner/banner-external.component.spec.ts (async beforeEach)
-
The
TestBed.configureTestingModule()method returns theTestBedclass so you can chain calls to otherTestBedstatic methods such ascompileComponents(). -
In this example, the
BannerComponentis the only component to compile. Other examples configure the testing module with multiple components and might import application modules that hold yet more components. Any of them could require external files. -
The
TestBed.compileComponentsmethod asynchronously compiles all components configured in the testing module. -
Note:
- Do not re-configure the
TestBedafter calling compileComponents().
- Do not re-configure the
-
Calling
compileComponents()closes the currentTestBedinstance to further configuration. You cannot call any moreTestBedconfiguration methods, notconfigureTestingModule()nor any of theoverride...methods. The TestBed throws an error if you try. -
Make
compileComponents()the last step before callingTestBed.createComponent().
-
The second, synchronous
beforeEach()contains the remaining setup steps, which include creating the component and querying for elements to inspect.- app/banner/banner-external.component.spec.ts (synchronous beforeEach)
beforeEach(() => {
  fixture = TestBed.createComponent(BannerComponent);
  component = fixture.componentInstance;  // BannerComponent test instance
  h1 = fixture.nativeElement.querySelector('h1');
});
- app/banner/banner-external.component.spec.ts (synchronous beforeEach)
-
Count on the test runner to wait for the first asynchronous
beforeEachto finish before calling the second.
-
You can consolidate the two
beforeEach()functions into a single, asyncbeforeEach(). -
The
compileComponents()method returns a promise so you can perform the synchronous setup tasks after compilation by moving the synchronous code after theawaitkeyword, where the promise has been resolved.- app/banner/banner-external.component.spec.ts (one beforeEach)
beforeEach(async () => {
  await TestBed.configureTestingModule({
    declarations: [ BannerComponent ],
  }).compileComponents();
  fixture = TestBed.createComponent(BannerComponent);
  component = fixture.componentInstance;
  h1 = fixture.nativeElement.querySelector('h1');
});
- app/banner/banner-external.component.spec.ts (one beforeEach)
-
There's no harm in calling
compileComponents()when it's not required. -
The component test file generated by the CLI calls
compileComponents()even though it is never required when running ng test. -
The tests in this guide only call
compileComponentswhen necessary.
-
Earlier component tests configured the testing module with a few declarations like this:
- app/dashboard/dashboard-hero.component.spec.ts (configure TestBed)
TestBed
  .configureTestingModule({declarations: [DashboardHeroComponent]})
- app/dashboard/dashboard-hero.component.spec.ts (configure TestBed)
-
The
DashboardComponentis simple. It needs no help. But more complex components often depend on other components, directives, pipes, and providers and these must be added to the testing module too. -
Fortunately, the
TestBed.configureTestingModuleparameter parallels the metadata passed to the@NgModuledecorator which means you can also specifyprovidersandimports. -
The
HeroDetailComponentrequires a lot of help despite its small size and simple construction. In addition to the support it receives from the default testing module CommonModule, it needs:NgModeland friends in theFormsModuleto enable two-way data binding- The
TitleCasePipefrom thesharedfolder - The Router services that these tests are stubbing out
- The Hero data access services that are also stubbed out
-
One approach is to configure the testing module from the individual pieces as in this example:
-
app/hero/hero-detail.component.spec.ts (FormsModule setup)
beforeEach(async () => { const routerSpy = createRouterSpy(); await TestBed .configureTestingModule({ imports: [FormsModule], declarations: [HeroDetailComponent, TitleCasePipe], providers: [ {provide: ActivatedRoute, useValue: activatedRoute}, {provide: HeroService, useClass: TestHeroService}, {provide: Router, useValue: routerSpy}, ] }) .compileComponents(); }); -
Note:
-
Notice that the beforeEach() is asynchronous and calls TestBed.compileComponents because the HeroDetailComponent has an external template and css file.
-
As explained in Calling compileComponents(), these tests could be run in a non-CLI environment where Angular would have to compile them in the browser.
-
-
-
Because many application components need the
FormsModuleand theTitleCasePipe, the developer created aSharedModuleto combine these and other frequently requested parts. -
The test configuration can use the
SharedModuletoo as seen in this alternative setup:-
app/hero/hero-detail.component.spec.ts (SharedModule setup)
beforeEach(async () => {
const routerSpy = createRouterSpy();

await TestBed
    .configureTestingModule({
      imports: [SharedModule],
      declarations: [HeroDetailComponent],
      providers: [
        {provide: ActivatedRoute, useValue: activatedRoute},
        {provide: HeroService, useClass: TestHeroService},
        {provide: Router, useValue: routerSpy},
      ]
    })
    .compileComponents();
});
-
-
It's a bit tighter and smaller, with fewer import statements, which are not shown in this example.
-
The
HeroDetailComponentis part of theHeroModuleFeature Module that aggregates more of the interdependent pieces including theSharedModule. Try a test configuration that imports theHeroModulelike this one:-
app/hero/hero-detail.component.spec.ts (HeroModule setup)
beforeEach(async () => {
  const routerSpy = createRouterSpy();

  await TestBed
      .configureTestingModule({
        imports: [HeroModule],
        providers: [
          {provide: ActivatedRoute, useValue: activatedRoute},
          {provide: HeroService, useClass: TestHeroService},
          {provide: Router, useValue: routerSpy},
        ]
      })
      .compileComponents();
});
-
-
That's really crisp. Only the test doubles in the
providersremain. Even theHeroDetailComponentdeclaration is gone. -
In fact, if you try to declare it, Angular will throw an error because
HeroDetailComponentis declared in both theHeroModuleand theDynamicTestModulecreated by theTestBed. -
Note:
- Importing the component's feature module can be the best way to configure tests when there are many mutual dependencies within the module and the module is small, as feature modules tend to be.
-
The
HeroDetailComponentprovides its ownHeroDetailService.- app/hero/hero-detail.component.ts (prototype)
@Component({
  selector:    'app-hero-detail',
  templateUrl: './hero-detail.component.html',
  styleUrls:  ['./hero-detail.component.css' ],
  providers:  [ HeroDetailService ]
})
export class HeroDetailComponent implements OnInit {
  constructor(
    private heroDetailService: HeroDetailService,
    private route: ActivatedRoute,
    private router: Router) {
  }
}
- app/hero/hero-detail.component.ts (prototype)
-
It's not possible to stub the component's
HeroDetailServicein theprovidersof theTestBed.configureTestingModule. Those are providers for the testing module, not the component. They prepare the dependency injector at the fixture level. -
Angular creates the component with its own injector, which is a child of the fixture injector. It registers the component's providers (the
HeroDetailServicein this case) with the child injector. -
A test cannot get to child injector services from the fixture injector. And
TestBed.configureTestingModulecan't configure them either. -
Angular has created new instances of the real
HeroDetailServiceall along!-
These tests could fail or timeout if the
HeroDetailServicemade its own XHR calls to a remote server. There might not be a remote server to call. -
Fortunately, the
HeroDetailServicedelegates responsibility for remote data access to an injectedHeroService.-
app/hero/hero-detail.service.ts (prototype)
@Injectable() export class HeroDetailService { constructor(private heroService: HeroService) { } /* . . . */ } -
The previous test configuration replaces the real
HeroServicewith aTestHeroServicethat intercepts server requests and fakes their responses.
-
-
-
What if you aren't so lucky. What if faking the
HeroServiceis hard? What ifHeroDetailServicemakes its own server requests? -
The
TestBed.overrideComponentmethod can replace the component'sproviderswith easy-to-manage test doubles as seen in the following setup variation:-
app/hero/hero-detail.component.spec.ts (Override setup)
beforeEach(async () => { const routerSpy = createRouterSpy(); await TestBed .configureTestingModule({ imports: [HeroModule], providers: [ {provide: ActivatedRoute, useValue: activatedRoute}, {provide: Router, useValue: routerSpy}, ] }) // Override component's own provider .overrideComponent( HeroDetailComponent, {set: {providers: [{provide: HeroDetailService, useClass: HeroDetailServiceSpy}]}}) .compileComponents(); }); -
Notice that
TestBed.configureTestingModuleno longer provides a fakeHeroServicebecause it's not needed.
-
-
Focus on the
overrideComponentmethod.-
app/hero/hero-detail.component.spec.ts (overrideComponent)
.overrideComponent( HeroDetailComponent, {set: {providers: [{provide: HeroDetailService, useClass: HeroDetailServiceSpy}]}}) -
It takes two arguments: the component type to override (HeroDetailComponent) and an override metadata object. The override metadata object is a generic defined as follows:
type MetadataOverride<T> = { add?: Partial<T>; remove?: Partial<T>; set?: Partial<T>; };-
A metadata override object can either add-and-remove elements in metadata properties or completely reset those properties. This example resets the component's providers metadata.
-
The type parameter, T, is the kind of metadata you'd pass to the @Component decorator:
selector?: string;
template?: string;
templateUrl?: string;
providers?: any[];
…
-
-
-
This example completely replaces the component's
providersarray with a new array containing aHeroDetailServiceSpy. -
The
HeroDetailServiceSpyis a stubbed version of the realHeroDetailServicethat fakes all necessary features of that service. It neither injects nor delegates to the lower levelHeroServiceso there's no need to provide a test double for that. -
The related
HeroDetailComponenttests will assert that methods of theHeroDetailServicewere called by spying on the service methods. Accordingly, the stub implements its methods as spies:-
app/hero/hero-detail.component.spec.ts (HeroDetailServiceSpy)
class HeroDetailServiceSpy {
  testHero: Hero = {id: 42, name: 'Test Hero'};

  /* emit cloned test hero */
  getHero = jasmine.createSpy('getHero').and.callFake(
      () => asyncData(Object.assign({}, this.testHero)));

  /* emit clone of test hero, with changes merged in */
  saveHero = jasmine.createSpy('saveHero')
                .and.callFake((hero: Hero) => asyncData(Object.assign(this.testHero, hero)));
}
-
-
Now the tests can control the component's hero directly by manipulating the spy-stub's
testHeroand confirm that service methods were called.-
app/hero/hero-detail.component.spec.ts (override tests)
let hdsSpy: HeroDetailServiceSpy;

beforeEach(async () => {
  await createComponent();
  // get the component's injected HeroDetailServiceSpy
  hdsSpy = fixture.debugElement.injector.get(HeroDetailService) as any;
});

it('should have called `getHero`', () => {
  expect(hdsSpy.getHero.calls.count())
    .withContext('getHero called once')
    .toBe(1, 'getHero called once');
});

it("should display stub hero's name", () => {
  expect(page.nameDisplay.textContent).toBe(hdsSpy.testHero.name);
});

it('should save stub hero change', fakeAsync(() => {
    const origName = hdsSpy.testHero.name;
    const newName = 'New Name';

    page.nameInput.value = newName;

    page.nameInput.dispatchEvent(new Event('input')); // tell Angular

    expect(component.hero.name)
      .withContext('component hero has new name')
      .toBe(newName);
    expect(hdsSpy.testHero.name)
      .withContext('service hero unchanged before save')
      .toBe(origName);

    click(page.saveBtn);
    expect(hdsSpy.saveHero.calls.count())
      .withContext('saveHero called once')
      .toBe(1);

    tick();  // wait for async save to complete
    expect(hdsSpy.testHero.name)
      .withContext('service hero has new name after save')
      .toBe(newName);
    expect(page.navigateSpy.calls.any())
      .withContext('router.navigate called')
      .toBe(true);
  }));
-
-
The
TestBed.overrideComponentmethod can be called multiple times for the same or different components. TheTestBedoffers similaroverrideDirective,overrideModule, andoverridePipemethods for digging into and replacing parts of these other classes. -
Explore the options and combinations on your own.
- An attribute directive modifies the behavior of an element, component or another directive. Its name reflects the way the directive is applied: as an attribute on a host element.
-
The sample application's
HighlightDirectivesets the background color of an element based on either a data bound color or a default color (lightgray). It also sets a custom property of the element (customProperty) to true for no reason other than to show that it can.-
app/shared/highlight.directive.ts
import { Directive, ElementRef, Input, OnChanges } from '@angular/core';

@Directive({ selector: '[highlight]' })
/**
* Set backgroundColor for the attached element to highlight color
* and set the element's customProperty to true
*/
export class HighlightDirective implements OnChanges {

  defaultColor =  'rgb(211, 211, 211)'; // lightgray

  @Input('highlight') bgColor = '';

  constructor(private el: ElementRef) {
    el.nativeElement.style.customProperty = true;
  }

  ngOnChanges() {
    this.el.nativeElement.style.backgroundColor = this.bgColor || this.defaultColor;
  }
}
-
-
It's used throughout the application, perhaps most simply in the
AboutComponent:- app/about/about.component.ts
import { Component } from '@angular/core';
@Component({
  template: `
  <h2 highlight="skyblue">About</h2>
  <h3>Quote of the day:</h3>
  <twain-quote></twain-quote>
  `
})
export class AboutComponent { }
- app/about/about.component.ts
-
Testing the specific use of the
HighlightDirectivewithin theAboutComponentrequires only the techniques explored in the"Nested component tests"section ofComponent testing scenarios.-
app/about/about.component.spec.ts
beforeEach(() => {
  fixture = TestBed.configureTestingModule({
    declarations: [ AboutComponent, HighlightDirective ],
    schemas:      [ CUSTOM_ELEMENTS_SCHEMA ]
  })
  .createComponent(AboutComponent);
  fixture.detectChanges(); // initial binding
});

it('should have skyblue <h2>', () => {
  const h2: HTMLElement = fixture.nativeElement.querySelector('h2');
  const bgColor = h2.style.backgroundColor;
  expect(bgColor).toBe('skyblue');
});
-
-
However, testing a single use case is unlikely to explore the full range of a directive's capabilities. Finding and testing all components that use the directive is tedious, brittle, and almost as unlikely to afford full coverage.
-
Class-only tests might be helpful, but attribute directives like this one tend to manipulate the DOM. Isolated unit tests don't touch the DOM and, therefore, do not inspire confidence in the directive's efficacy.
-
A better solution is to create an artificial test component that demonstrates all ways to apply the directive.
-
app/shared/highlight.directive.spec.ts (TestComponent)
@Component({ template: ` <h2 highlight="yellow">Something Yellow</h2> <h2 highlight>The Default (Gray)</h2> <h2>No Highlight</h2> <input #box [highlight]="box.value" value="cyan"/>` }) class TestComponent { } -
The
<input>case binds theHighlightDirectiveto the name of a color value in the input box. The initial value is the word "cyan" which should be the background color of the input box.
-
-
Here are some tests of this component:
-
app/shared/highlight.directive.spec.ts (selected tests)
beforeEach(() => {
  fixture = TestBed.configureTestingModule({
    declarations: [ HighlightDirective, TestComponent ]
  })
  .createComponent(TestComponent);

  fixture.detectChanges(); // initial binding

  // all elements with an attached HighlightDirective
  des = fixture.debugElement.queryAll(By.directive(HighlightDirective));

  // the h2 without the HighlightDirective
  bareH2 = fixture.debugElement.query(By.css('h2:not([highlight])'));
});

// color tests
it('should have three highlighted elements', () => {
  expect(des.length).toBe(3);
});

it('should color 1st <h2> background "yellow"', () => {
  const bgColor = des[0].nativeElement.style.backgroundColor;
  expect(bgColor).toBe('yellow');
});

it('should color 2nd <h2> background w/ default color', () => {
  const dir = des[1].injector.get(HighlightDirective) as HighlightDirective;
  const bgColor = des[1].nativeElement.style.backgroundColor;
  expect(bgColor).toBe(dir.defaultColor);
});

it('should bind <input> background to value color', () => {
  // easier to work with nativeElement
  const input = des[2].nativeElement as HTMLInputElement;
  expect(input.style.backgroundColor)
    .withContext('initial backgroundColor')
    .toBe('cyan');

  input.value = 'green';

  // Dispatch a DOM event so that Angular responds to the input value change.
  input.dispatchEvent(new Event('input'));
  fixture.detectChanges();

  expect(input.style.backgroundColor)
    .withContext('changed backgroundColor')
    .toBe('green');
});


it('bare <h2> should not have a customProperty', () => {
  expect(bareH2.properties['customProperty']).toBeUndefined();
});
-
-
A few techniques are noteworthy:
-
The
By.directivepredicate is a great way to get the elements that have this directive when their element types are unknown -
The
:not pseudo-classinBy.css('h2:not([highlight])')helps find<h2>elements that do not have the directive.By.css('*:not([highlight])')finds any element that does not have the directive. -
DebugElement.stylesaffords access to element styles even in the absence of a real browser, thanks to theDebugElementabstraction. But feel free to exploit thenativeElementwhen that seems easier or more clear than the abstraction. -
Angular adds a directive to the injector of the element to which it is applied. The test for the default color uses the injector of the second
<h2>to get itsHighlightDirectiveinstance and itsdefaultColor. -
DebugElement.propertiesaffords access to the artificial custom property that is set by the directive
-

- You can test
pipeswithout the Angular testing utilities.
-
A pipe class has one method,
transform, that manipulates the input value into a transformed output value. Thetransformimplementation rarely interacts with the DOM. Most pipes have no dependence on Angular other than the@Pipemetadata and an interface. -
Consider a
TitleCasePipethat capitalizes the first letter of each word. Here's an implementation with a regular expression.-
app/shared/title-case.pipe.ts
import { Pipe, PipeTransform } from '@angular/core';

@Pipe({name: 'titlecase', pure: true})
/** Transform to Title Case: uppercase the first letter of the words in a string. */
export class TitleCasePipe implements PipeTransform {
  transform(input: string): string {
    return input.length === 0 ? '' :
      input.replace(/\w\S*/g, (txt => txt[0].toUpperCase() + txt.slice(1).toLowerCase() ));
  }
}
-
-
Anything that uses a regular expression is worth testing thoroughly. Use simple Jasmine to explore the expected cases and the edge cases.
-
app/shared/title-case.pipe.spec.ts
describe('TitleCasePipe', () => {
  // This pipe is a pure, stateless function so no need for BeforeEach
  const pipe = new TitleCasePipe();

  it('transforms "abc" to "Abc"', () => {
    expect(pipe.transform('abc')).toBe('Abc');
  });

  it('transforms "abc def" to "Abc Def"', () => {
    expect(pipe.transform('abc def')).toBe('Abc Def');
  });

  // ... more tests ...
});
-
-
These are tests of the pipe in isolation. They can't tell if the
TitleCasePipeis working properly as applied in the application components. -
Consider adding component tests such as this one:
-
app/hero/hero-detail.component.spec.ts (pipe test)
it('should convert hero name to Title Case', () => {
  // get the name's input and display elements from the DOM
  const hostElement: HTMLElement = fixture.nativeElement;
  const nameInput: HTMLInputElement = hostElement.querySelector('input')!;
  const nameDisplay: HTMLElement = hostElement.querySelector('span')!;

  // simulate user entering a new name into the input box
  nameInput.value = 'quick BROWN  fOx';

  // Dispatch a DOM event so that Angular learns of input value change.
  nameInput.dispatchEvent(new Event('input'));

  // Tell Angular to update the display binding through the title pipe
  fixture.detectChanges();

  expect(nameDisplay.textContent).toBe('Quick Brown  Fox');
});
-
-
If your tests aren't working as you expect them to, you can inspect and debug them in the browser.
-
Debug specs in the browser in the same way that you debug an application.
-
Reveal the Karma browser window. See Set up testing if you need help with this step.
-
Click the DEBUG button to open a new browser tab and re-run the tests.
-
Open the browser's
Developer Tools. On Windows, pressCtrl-Shift-I. On macOS, pressCommand-Option-I. -
Pick the
Sourcessection. -
Press
Control/Command-P, and then start typing the name of your test file to open it. -
Set a breakpoint in the test.
-
Refresh the browser, and notice how it stops at the breakpoint.
-
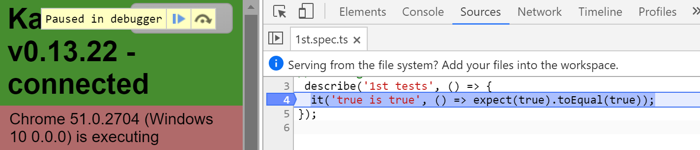
-
The Angular testing utilities include the
TestBed, theComponentFixture, and a handful of functions that control the test environment. TheTestBedandComponentFixtureclasses are covered separately. -
Here's a summary of the stand-alone functions, in order of likely utility:
-
waitForAsync
- Runs the body of a test (
it) or setup (beforeEach) function within a special async test zone. See waitForAsync.
- Runs the body of a test (
-
fakeAsync
- Runs the body of a test (
it) within a special fakeAsync test zone, enabling a linear control flow coding style. See fakeAsync.
- Runs the body of a test (
-
tick
-
Simulates the passage of time and the completion of pending asynchronous activities by flushing both timer and micro-task queues within the fakeAsync test zone.
-
The curious, dedicated reader might enjoy this lengthy blog post, "Tasks, microtasks, queues and schedules"
-
Accepts an optional argument that moves the virtual clock forward by the specified number of milliseconds, clearing asynchronous activities scheduled within that timeframe. See tick.
-
-
inject
- Injects one or more services from the current
TestBedinjector into a test function. It cannot inject a service provided by the component itself. See discussion of thedebugElement.injector.
- Injects one or more services from the current
-
discardPeriodicTasks
-
When a
fakeAsync()test ends with pending timer event tasks (queuedsetTimeOutandsetIntervalcallbacks), the test fails with a clear error message. -
In general, a test should end with no queued tasks. When pending timer tasks are expected, call
discardPeriodicTasksto flush the task queue and avoid the error.
-
-
flushMicrotasks
-
When a
fakeAsync()test ends with pending micro-tasks such as unresolved promises, the test fails with a clear error message. -
In general, a test should wait for micro-tasks to finish. When pending microtasks are expected, call
flushMicrotasksto flush the micro-task queue and avoid the error.
-
-
ComponentFixtureAutoDetect
- A provider token for a service that turns on automatic change detection.
-
getTestBed
- Gets the current instance of the
TestBed. Usually unnecessary because the static class methods of the TestBed class are typically sufficient. TheTestBedinstance exposes a few rarely used members that are not available as static methods.
- Gets the current instance of the
-
-
The
TestBedclass is one of the principal Angular testing utilities. Its API is quite large and can be overwhelming until you've explored it, a little at a time. Read the early part of this guide first to get the basics before trying to absorb the full API. -
The module definition passed to
configureTestingModuleis a subset of the@NgModulemetadata properties.type TestModuleMetadata = { providers?: any[]; declarations?: any[]; imports?: any[]; schemas?: Array<SchemaMetadata | any[]>; }; -
Each override method takes a
MetadataOverride<T>whereTis the kind of metadata appropriate to the method, that is, the parameter of an@NgModule,@Component,@Directive, or@Pipe.type MetadataOverride<T> = { add?: Partial<T>; remove?: Partial<T>; set?: Partial<T>; }; -
The
TestBedAPI consists of static class methods that either update or reference a global instance of theTestBed. -
Internally, all static methods cover methods of the current runtime
TestBedinstance, which is also returned by thegetTestBed()function. -
Call
TestBedmethods within abeforeEach()to ensure a fresh start before each individual test. -
Here are the most important static methods, in order of likely utility.
-
configureTestingModule
-
The testing shims (
karma-test-shim,browser-test-shim) establish the initial test environment and a default testing module. The default testing module is configured with basic declaratives and some Angular service substitutes that every tester needs. -
Call
configureTestingModuleto refine the testing module configuration for a particular set of tests by adding and removing imports, declarations (of components, directives, and pipes), and providers.
-
-
compileComponents
-
Compile the testing module asynchronously after you've finished configuring it. You must call this method if any of the testing module components have a
templateUrlorstyleUrlsbecause fetching component template and style files is necessarily asynchronous. See compileComponents. -
After calling
compileComponents, theTestBedconfiguration is frozen for the duration of the current spec.
-
-
createComponent
-
Create an instance of a component of type
Tbased on the currentTestBedconfiguration. -
After calling
createComponent, theTestBedconfiguration is frozen for the duration of the current spec.
-
-
overrideModule
- Replace metadata for the given
NgModule. Recall that modules can import other modules. TheoverrideModulemethod can reach deeply into the current testing module to modify one of these inner modules.
- Replace metadata for the given
-
overrideComponent
- Replace metadata for the given component class, which could be nested deeply within an inner module.
-
overrideDirective
- Replace metadata for the given directive class, which could be nested deeply within an inner module.
-
overridePipe
- Replace metadata for the given pipe class, which could be nested deeply within an inner module.
-
inject
-
Retrieve a service from the current
TestBedinjector. The inject function is often adequate for this purpose. But inject throws an error if it can't provide the service. -
What if the service is optional?
-
The
TestBed.inject()method takes an optional second parameter, the object to return if Angular can't find the provider (nullin this example):-
app/demo/demo.testbed.spec.ts
expect(TestBed.inject(NotProvided, null)).toBeNull();
-
-
-
After calling
TestBed.inject, theTestBedconfiguration is frozen for the duration of the current spec.
-
-
initTestEnvironment
-
Initialize the testing environment for the entire test run.
-
The testing shims (
karma-test-shim,browser-test-shim) call it for you so there is rarely a reason for you to call it yourself. -
Call this method exactly once. To change this default in the middle of a test run, call
resetTestEnvironmentfirst. -
Specify the Angular compiler factory, a
PlatformRef, and a default Angular testing module.- Alternatives for non-browser platforms are available in the general form
@angular/platform-<platform_name>/testing/<platform_name>.
- Alternatives for non-browser platforms are available in the general form
-
-
resetTestEnvironment
- Reset the initial test environment, including the default testing module.
-
-
A few of the
TestBedinstance methods are not covered by staticTestBedclass methods. These are rarely needed.
-
The
TestBed.createComponent<T>creates an instance of the componentTand returns a strongly typedComponentFixturefor that component. -
The
ComponentFixtureproperties and methods provide access to the component, its DOM representation, and aspects of its Angular environment.
-
Here are the most important properties for testers, in order of likely utility.
-
componentInstance
- The instance of the component class created by
TestBed.createComponent
- The instance of the component class created by
-
debugElement
-
The
DebugElementassociated with the root element of the component. -
The
debugElementprovides insight into the component and its DOM element during test and debugging. It's a critical property for testers. The most interesting members are covered below.
-
-
nativeElement
- The native DOM element at the root of the component.
-
changeDetectorRef
-
The
ChangeDetectorReffor the component. -
The
ChangeDetectorRefis most valuable when testing a component that has theChangeDetectionStrategy.OnPushmethod or the component's change detection is under your programmatic control.
-
-
-
The fixture methods cause Angular to perform certain tasks on the component tree. Call these method to trigger Angular behavior in response to simulated user action.
-
Here are the most useful methods for testers.
-
detectChanges
-
Trigger a change detection cycle for the component.
-
Call it to initialize the component (it calls
ngOnInit) and after your test code, change the component's data bound property values. Angular can't see that you've changedpersonComponent.nameand won't update thenamebinding until you calldetectChanges. -
Runs
checkNoChangesafterwards to confirm that there are no circular updates unless called asdetectChanges(false);
-
-
autoDetectChanges
-
Set this to true when you want the fixture to detect changes automatically.
-
When autodetect is
true, the test fixture callsdetectChangesimmediately after creating the component. Then it listens for pertinent zone events and callsdetectChangesaccordingly. When your test code modifies component property values directly, you probably still have to callfixture.detectChangesto trigger data binding updates. -
The default is false. Testers who prefer fine control over test behavior tend to keep it false.
-
-
checkNoChanges
- Do a change detection run to make sure there are no pending changes. Throws an exceptions if there are.
-
isStable
- If the fixture is currently stable, returns
true. If there are async tasks that have not completed, returnsfalse.
- If the fixture is currently stable, returns
-
whenStable
-
Returns a promise that resolves when the fixture is stable.
-
To resume testing after completion of asynchronous activity or asynchronous change detection, hook that promise. See whenStable.
-
-
destroy
- Trigger component destruction.
-
-
The
DebugElementprovides crucial insights into the component's DOM representation. -
From the test root component's
DebugElementreturned byfixture.debugElement, you can walk (and query) the fixture's entire element and component subtrees. -
Here are the most useful
DebugElementmembers for testers, in approximate order of utility:-
nativeElement
- The corresponding DOM element in the browser (null for WebWorkers).
-
query
- Calling
query(predicate: Predicate<DebugElement>)returns the firstDebugElementthat matches thepredicateat any depth in the subtree.
- Calling
-
queryAll
- Calling
queryAll(predicate: Predicate<DebugElement>)returns allDebugElementsthat matches the predicate at any depth in subtree.
- Calling
-
injector
- The host dependency injector. For example, the root element's component instance injector.
-
componentInstance
- The element's own component instance, if it has one.
-
context
-
An object that provides parent context for this element. Often an ancestor component instance that governs this element.
-
When an element is repeated within
*ngFor, the context is anNgForOfwhose$implicitproperty is the value of the row instance value. For example, the hero in*ngFor="let hero of heroes".
-
-
children
-
The immediate
DebugElementchildren. Walk the tree by descending throughchildren. -
DebugElementalso haschildNodes, a list ofDebugNodeobjects.DebugElementderives fromDebugNodeobjects and there are often more nodes than elements. Testers can usually ignore plain nodes.
-
-
parent
- The
DebugElementparent. Null if this is the root element.
- The
-
name The element tag name, if it is an element.
-
triggerEventHandler
-
Triggers the event by its name if there is a corresponding listener in the element's listeners collection. The second parameter is the event object expected by the handler. See triggerEventHandler.
-
If the event lacks a listener or there's some other problem, consider calling
nativeElement.dispatchEvent(eventObject).
-
-
listeners
- The callbacks attached to the component's
@Outputproperties and/or the element's event properties.
- The callbacks attached to the component's
-
providerTokens
- This component's injector lookup tokens. Includes the component itself plus the tokens that the component lists in its
providersmetadata.
- This component's injector lookup tokens. Includes the component itself plus the tokens that the component lists in its
-
source
- Where to find this element in the source component template.
-
references
- Dictionary of objects associated with template local variables (for example,
#foo), keyed by the local variable name.
- Dictionary of objects associated with template local variables (for example,
-
-
The
DebugElement.query(predicate)andDebugElement.queryAll(predicate)methods take a predicate that filters the source element's subtree for matchingDebugElement. -
The predicate is any method that takes a
DebugElementand returns a truthy value. The following example finds allDebugElementswith a reference to a template local variable named "content":- app/demo/demo.testbed.spec.ts
// Filter for DebugElements with a #content reference
const contentRefs = el.queryAll( de => de.references['content']);
- app/demo/demo.testbed.spec.ts
-
The Angular By class has three static methods for common predicates:
STATIC METHOD DETAILS By.all Return all elements By.css(selector) Return elements with matching CSS selectors By.directive(directive) Return elements that Angular matched to an instance of the directive class - app/hero/hero-list.component.spec.ts
// Can find DebugElement either by css selector or by directive
const h2 = fixture.debugElement.query(By.css('h2'));
const directive = fixture.debugElement.query(By.directive(HighlightDirective));
- app/hero/hero-list.component.spec.ts