
retinaface效果如何,只能通过对比实验才能得到验证。这里对pytorch_retinaface版本进行测试,该版本是社区所有版本中star最高的一版。
该地址包含干净的Wideface数据集:https://github.com/Linzaer/Ultra-Light-Fast-Generic-Face-Detector-1MB

下载后的数据集一共包含这三个:

此时的文件夹是只有图片的,然而作者要求的数据格式是:

所以我们还少了数据的索引文件,这时候要使用作者提供的脚本wider_val.py,将图片信息导出成txt文件,导出后的完整格式如下:

每份数据集都有一份包含样本信息的txt文件,txt文件内容大致是这样(以train.txt为例),包含图片信息和人脸位置信息:
# 0--Parade/0_Parade_marchingband_1_849.jpg
449 330 122 149 488.906 373.643 0.0 542.089 376.442 0.0 515.031 412.83 0.0 485.174 425.893 0.0 538.357 431.491 0.0 0.82
# 0--Parade/0_Parade_Parade_0_904.jpg
361 98 263 339 424.143 251.656 0.0 547.134 232.571 0.0 494.121 325.875 0.0 453.83 368.286 0.0 561.978 342.839 0.0 0.89
python train.py --network mobile0.25
如有需要,请先下载预训练模型,放在weights文件夹中。如果想从头开始训练,则在data/config.py文件中指定'pretrain': False,
cd ./widerface_evaluate
python setup.py build_ext --inplace
python test_widerface.py --trained_model ./weights/mobilenet0.25_Final.pth --network mobile0.25
python widerface_evaluate/evaluation.py
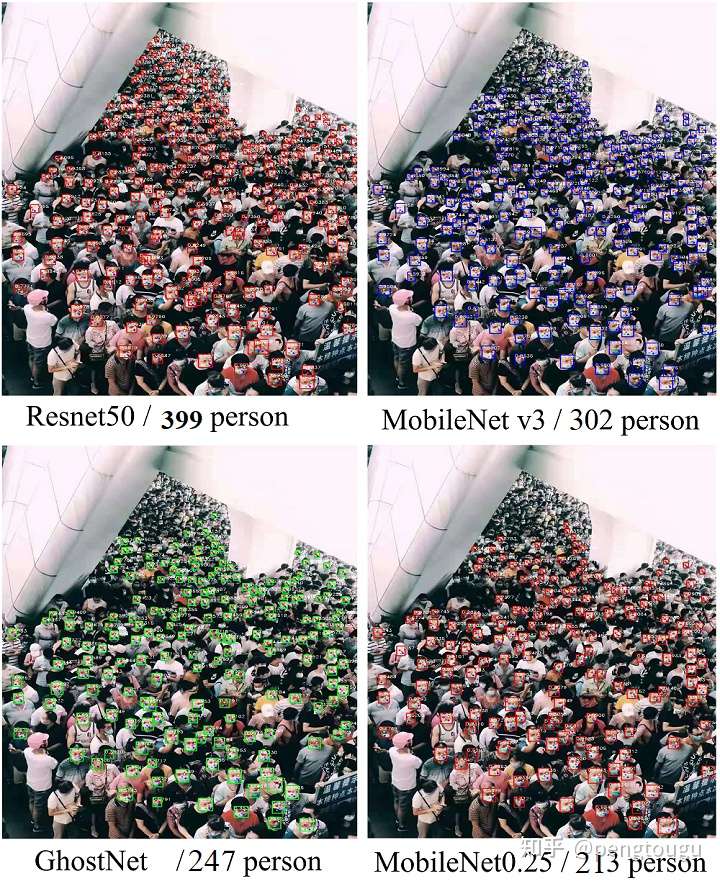
上节测试后,又拿了一张只包含一张人脸的图片进行检测,可以发现,resnet50对于检测单张图片且图片仅含单张人脸耗时比较久,如果项目注重实时性的话mb0.25是个更好的选择,但对于人脸密集且尺度较小的场景就显得比较吃力。 倘若骨架替换成其他网络,是否能兼顾实时性和精度? 这里的骨架替换暂时使用ghostnet和mobilev3网络(主要也想测试下这两个网络的效果是否能像论文一样出众)。
我们在retinaface.py文件的父类指定相关引用,并在IntermediateLayerGetter(backbone, cfg['return_layers'])指定需要调用的网络层ID,该ID在config.py文件中已经指明:
def __init__(self, cfg=None, phase='train'):
    """
    :param cfg:  Network related settings.
    :param phase: train or test.
    """
    super(RetinaFace, self).__init__()
    self.phase = phase
    backbone = None
    if cfg['name'] == 'mobilenet0.25':
        backbone = MobileNetV1()
        if cfg['pretrain']:
            checkpoint = torch.load("./weights/mobilenetV1X0.25_pretrain.tar", map_location=torch.device('cpu'))
            from collections import OrderedDict
            new_state_dict = OrderedDict()
            for k, v in checkpoint['state_dict'].items():
                name = k[7:]  # remove module.
                new_state_dict[name] = v
            # load params
            backbone.load_state_dict(new_state_dict)
    elif cfg['name'] == 'Resnet50':
        import torchvision.models as models
        backbone = models.resnet50(pretrained=cfg['pretrain'])
    elif cfg['name'] == 'ghostnet':
        backbone = ghostnet()
    elif cfg['name'] == 'mobilev3':
        backbone = MobileNetV3()

    self.body = _utils.IntermediateLayerGetter(backbone, cfg['return_layers'])
我们指定FPN的网络通道数,并为模型中制定的三层FPN结构固定每一层的in_channels:
in_channels_stage2 = cfg['in_channel']
        in_channels_list = [
            in_channels_stage2 * 2,
            in_channels_stage2 * 4,
            in_channels_stage2 * 8,
        ]
        out_channels = cfg['out_channel']
        # self.FPN = FPN(in_channels_list, out_channels)
        self.FPN = FPN(in_channels_list, out_channels)
我们在models/ghostnet.py中插入ghontnet网络,网络结构来源于诺亚方舟实验室开源地址https://github.com/huawei-noah/ghostnet:
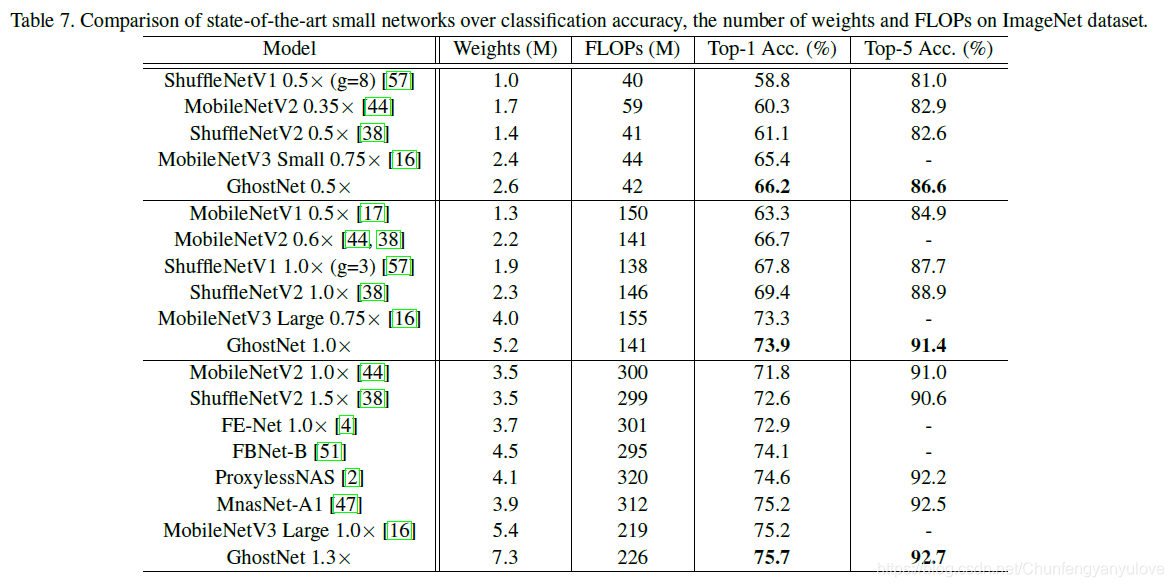
轻量级网络分类效果对比:
因为包含残差卷积分离模块和SE模块,源码相对较长,修改后的网络源码如下:models/ghostnet.py
我们在models/mobilev3.py中插入MobileNetv3网络,网络结构来源于github网友复现的pytorch版本,真即插即用!https://github.com/kuan-wang/pytorch-mobilenet-v3:
修改后的源码如下:models/mobilenetv3.py
执行命令:python train.py --network ghostnet开始训练
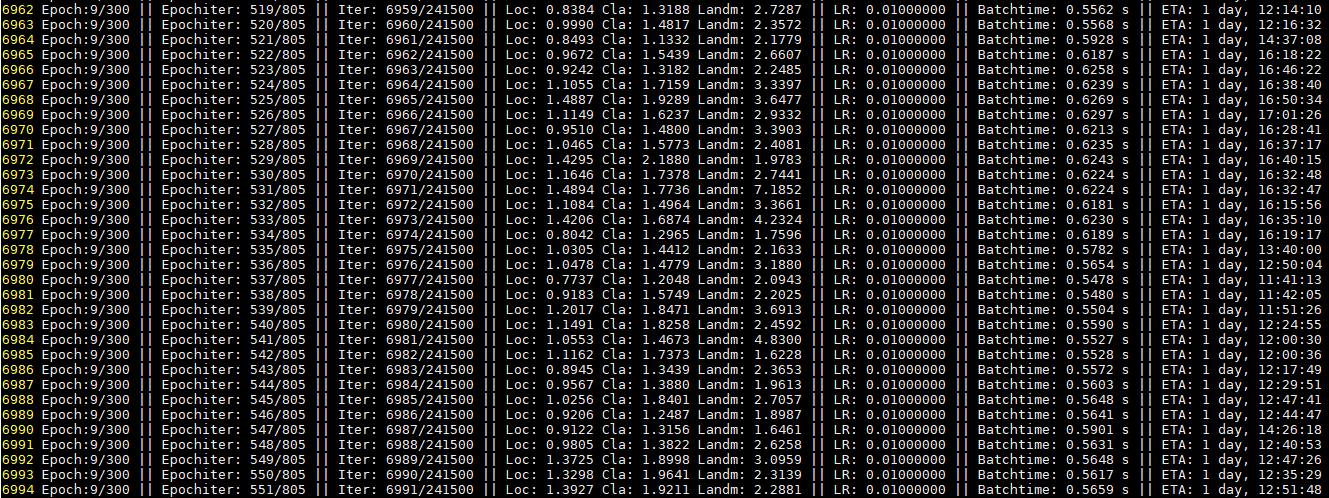
统计每个网络训练单个epoch的时长:
- resnet50>>mobilenetv3>ghostnet-m>ghostnet-s>mobilenet0.25
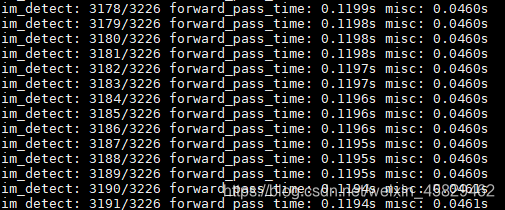
测试ghostnet(se-ratio=0.25):
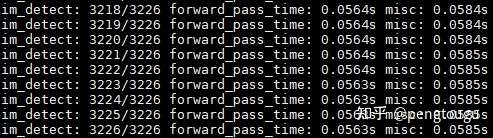
可以看出,一份batch的测试大概在56ms左右
评估ghostnet(se-ratio=0.25):

可以看出,ghostnet对小样本数据和人脸遮挡的情况识别相对较差。
测试MobileNetV3(se-ratio=1):
可以看出,一份batch的测试大概在120ms左右
评估MobileNetV3(se-ratio=1):

这里的评估效果在三份子集上均优于ghostnet(这里的比对其实是有点不科学的,因为是用的mbv3的se_ratio全开对标ghostnet的se_ratio开1/4,但ghostnet的se_ratio全开会导致模型内存暴涨的情况(se-ratio=0时weights=6M,se-ratio=0.25时weights=12M,se-ratio=1时weights=30M,且精度勉强超过se-ratio=1的MobileNetV3,个人感觉性价比过低))
-
调用webcam:
python detect.py -fourcc 0
-
检测图片:
python detect.py --image img_path
-
检测图片并保存结果:
python detect.py --image img_path --sava_image True
推理性能对比:
| Backbone | Computing backend | size(MB) | Framework | input_size | Run time |
|---|---|---|---|---|---|
| resnet50 | Core i5-4210M | 106 | torch | 640 | 1571 ms |
| Core i5-4210M | 12 | torch | 640 | 403 ms | |
| MobileNet v3 | Core i5-4210M | 8 | torch | 640 | 576 ms |
| MobileNet0.25 | Core i5-4210M | 1.7 | torch | 640 | 187 ms |
| MobileNet0.25 | Core i5-4210M | 1.7 | onnxruntime | 640 | 73 ms |
检测性能对比:
| Backbone | Easy | Medium | Hard |
|---|---|---|---|
| resnet50 | 95.48% | 94.04% | 84.43% |
| 93.48% | 91.23% | 80.19% | |
| 93.35% | 90.84% | 76.11% | |
| MobileNet0.25 | 90.70% | 88.16% | 73.82% |
单图测试效果对比:
@inproceedings{deng2019retinaface,
title={RetinaFace: Single-stage Dense Face Localisation in the Wild},
author={Deng, Jiankang and Guo, Jia and Yuxiang, Zhou and Jinke Yu and Irene Kotsia and Zafeiriou, Stefanos},
booktitle={arxiv},
year={2019}