Releases: huggingface/diffusers
Patch Release: v0.17.1
Patch release to fix timestep for inpainting
- Stable Diffusion Inpaint & ControlNet inpaint - Correct timestep inpaint in #3749 by @patrickvonplaten
Contributors
Assets 2
v0.17.0 Improved LoRA, Kandinsky 2.1, Torch Compile Speed-up & More
Kandinsky 2.1
Kandinsky 2.1 inherits best practices from DALL-E 2 and Latent Diffusion while introducing some new ideas.
Installation
pip install diffusers transformers accelerateCode example
from diffusers import DiffusionPipeline
import torch

pipe_prior = DiffusionPipeline.from_pretrained("kandinsky-community/kandinsky-2-1-prior", torch_dtype=torch.float16)
pipe_prior.to("cuda")

t2i_pipe = DiffusionPipeline.from_pretrained("kandinsky-community/kandinsky-2-1", torch_dtype=torch.float16)
t2i_pipe.to("cuda")

prompt = "A alien cheeseburger creature eating itself, claymation, cinematic, moody lighting"
negative_prompt = "low quality, bad quality"

generator = torch.Generator(device="cuda").manual_seed(12)
image_embeds, negative_image_embeds = pipe_prior(prompt, negative_prompt, guidance_scale=1.0, generator=generator).to_tuple()

image = t2i_pipe(prompt, negative_prompt=negative_prompt, image_embeds=image_embeds, negative_image_embeds=negative_image_embeds).images[0]
image.save("cheeseburger_monster.png")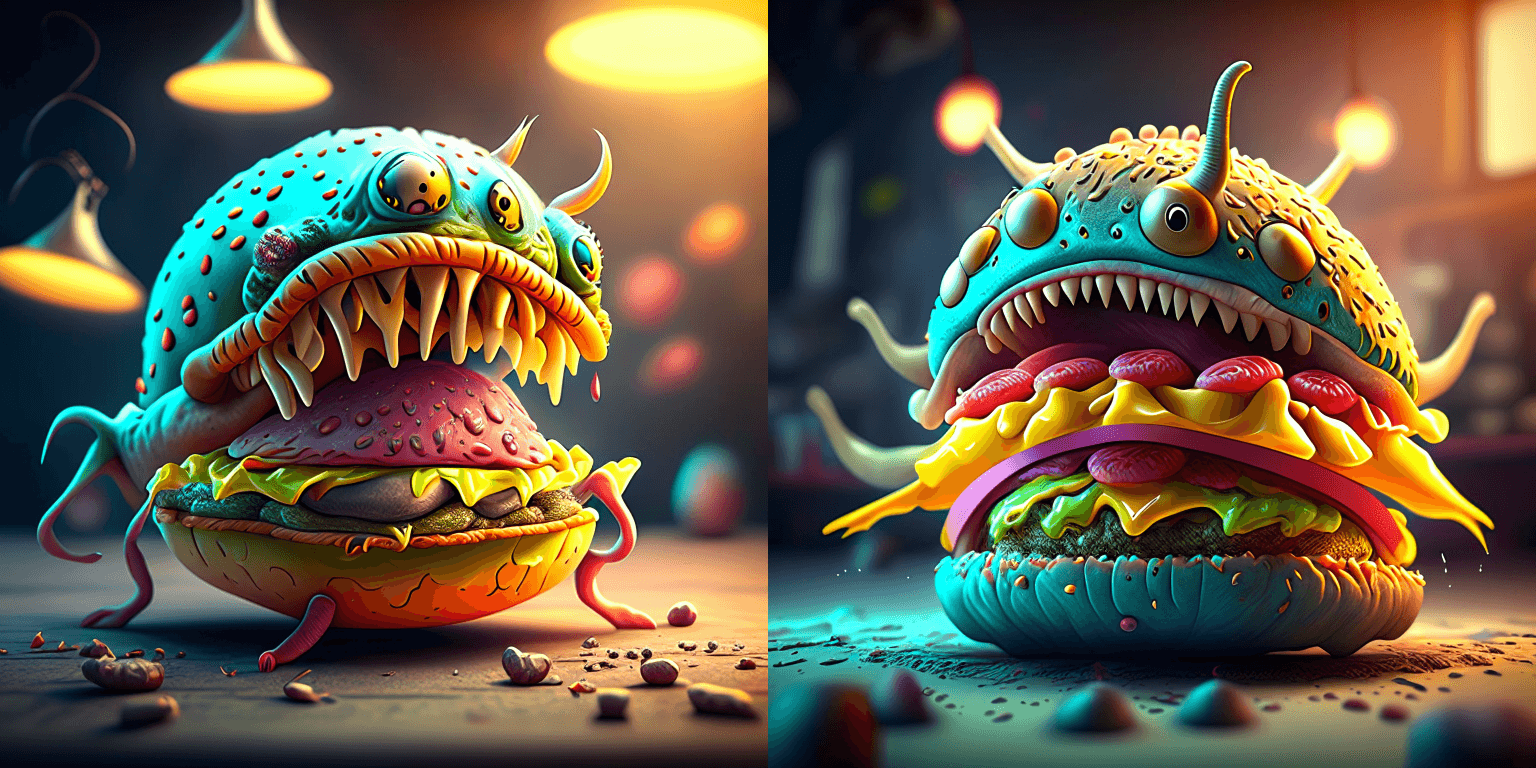
To learn more about the Kandinsky pipelines, and more details about speed and memory optimizations, please have a look at the docs.
Thanks @ayushtues, for helping with the integration of Kandinsky 2.1!
UniDiffuser
UniDiffuser introduces a multimodal diffusion process that is capable of handling different generation tasks using a single unified approach:
- Unconditional image and text generation
- Joint image-text generation
- Text-to-image generation
- Image-to-text generation
- Image variation
- Text variation
Below is an example of how to use UniDiffuser for text-to-image generation:
import torch
from diffusers import UniDiffuserPipeline

model_id_or_path = "thu-ml/unidiffuser-v1"
pipe = UniDiffuserPipeline.from_pretrained(model_id_or_path, torch_dtype=torch.float16)
pipe.to("cuda")

# This mode can be inferred from the input provided to the `pipe`.
pipe.set_text_to_image_mode()

prompt = "an elephant under the sea"
sample = pipe(prompt=prompt, num_inference_steps=20, guidance_scale=8.0).images[0]
sample.save("elephant.png")
Check out the UniDiffuser docs to know more.

UniDiffuser was added by @dg845 in this PR.
LoRA
We're happy to support the A1111 formatted CivitAI LoRA checkpoints in a limited capacity.
First, download a checkpoint. We’ll use this one for demonstration purposes.
wget https://civitai.com/api/download/models/15603 -O light_and_shadow.safetensorsNext, we initialize a DiffusionPipeline:
import torch

from diffusers import StableDiffusionPipeline, DPMSolverMultistepScheduler

pipeline = StableDiffusionPipeline.from_pretrained(
    "gsdf/Counterfeit-V2.5", torch_dtype=torch.float16, safety_checker=None
).to("cuda")
pipeline.scheduler = DPMSolverMultistepScheduler.from_config(
    pipeline.scheduler.config, use_karras_sigmas=True
)
We then load the checkpoint downloaded from CivitAI:
pipeline.load_lora_weights(".", weight_name="light_and_shadow.safetensors")(If you’re loading a checkpoint in the safetensors format, please ensure you have safetensors installed.)
And then it’s time for running inference:
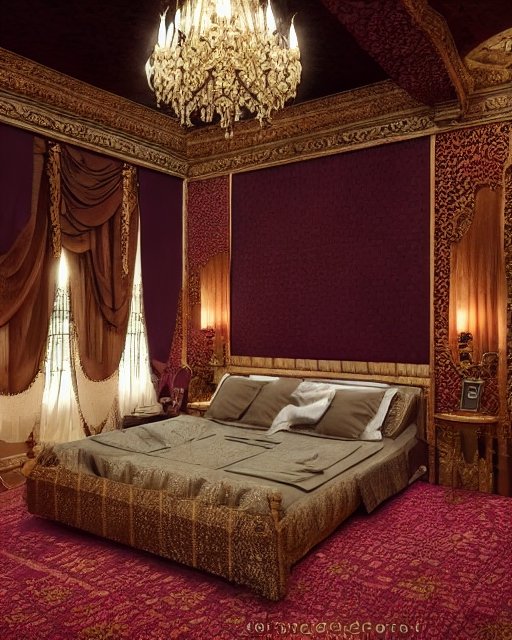
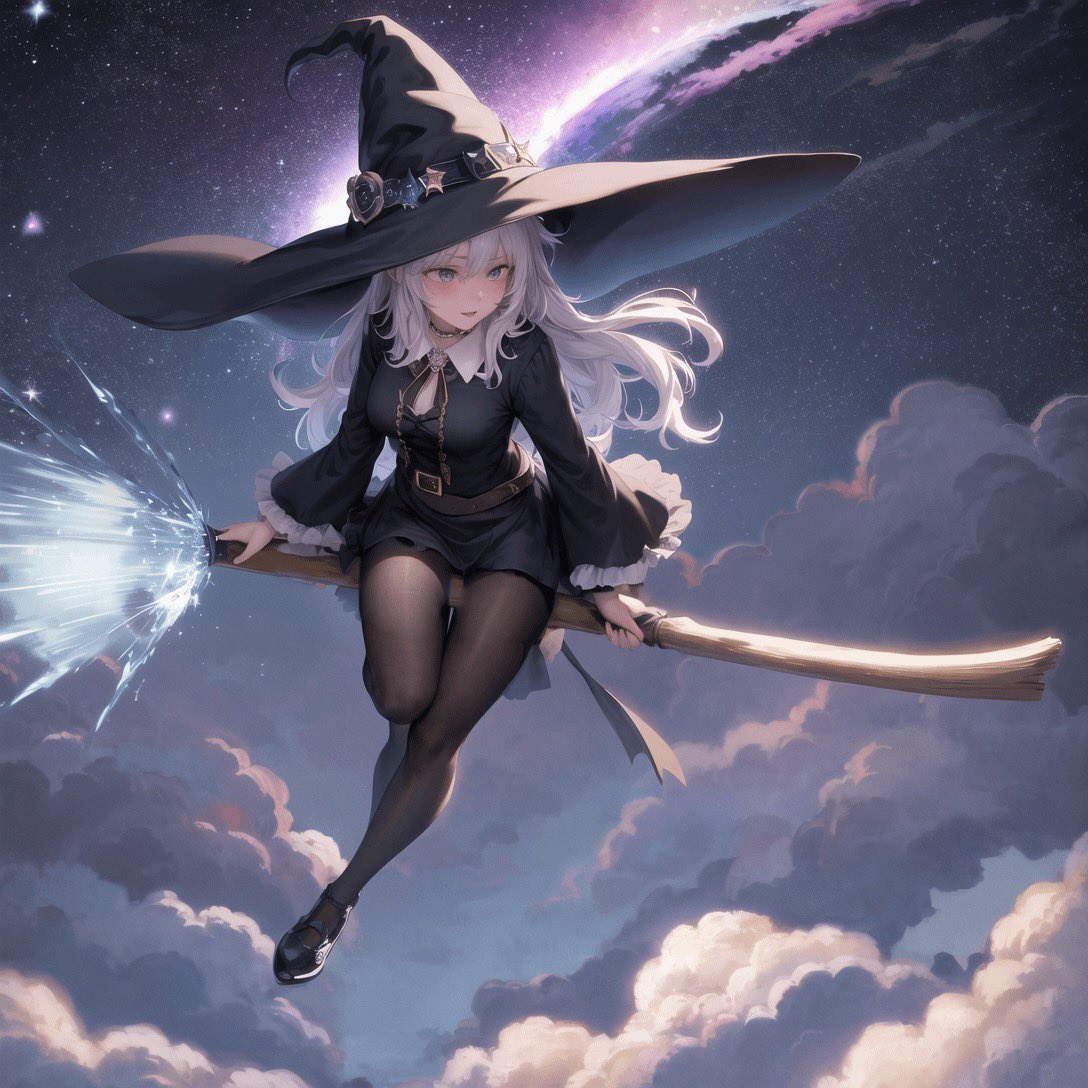
prompt = "masterpiece, best quality, 1girl, at dusk"
negative_prompt = ("(low quality, worst quality:1.4), (bad anatomy), (inaccurate limb:1.2), "
                   "bad composition, inaccurate eyes, extra digit, fewer digits, (extra arms:1.2), large breasts")

images = pipeline(prompt=prompt,
    negative_prompt=negative_prompt,
    width=512,
    height=768,
    num_inference_steps=15,
    num_images_per_prompt=4,
    generator=torch.manual_seed(0)
).images
Below is a comparison between the LoRA and the non-LoRA results:
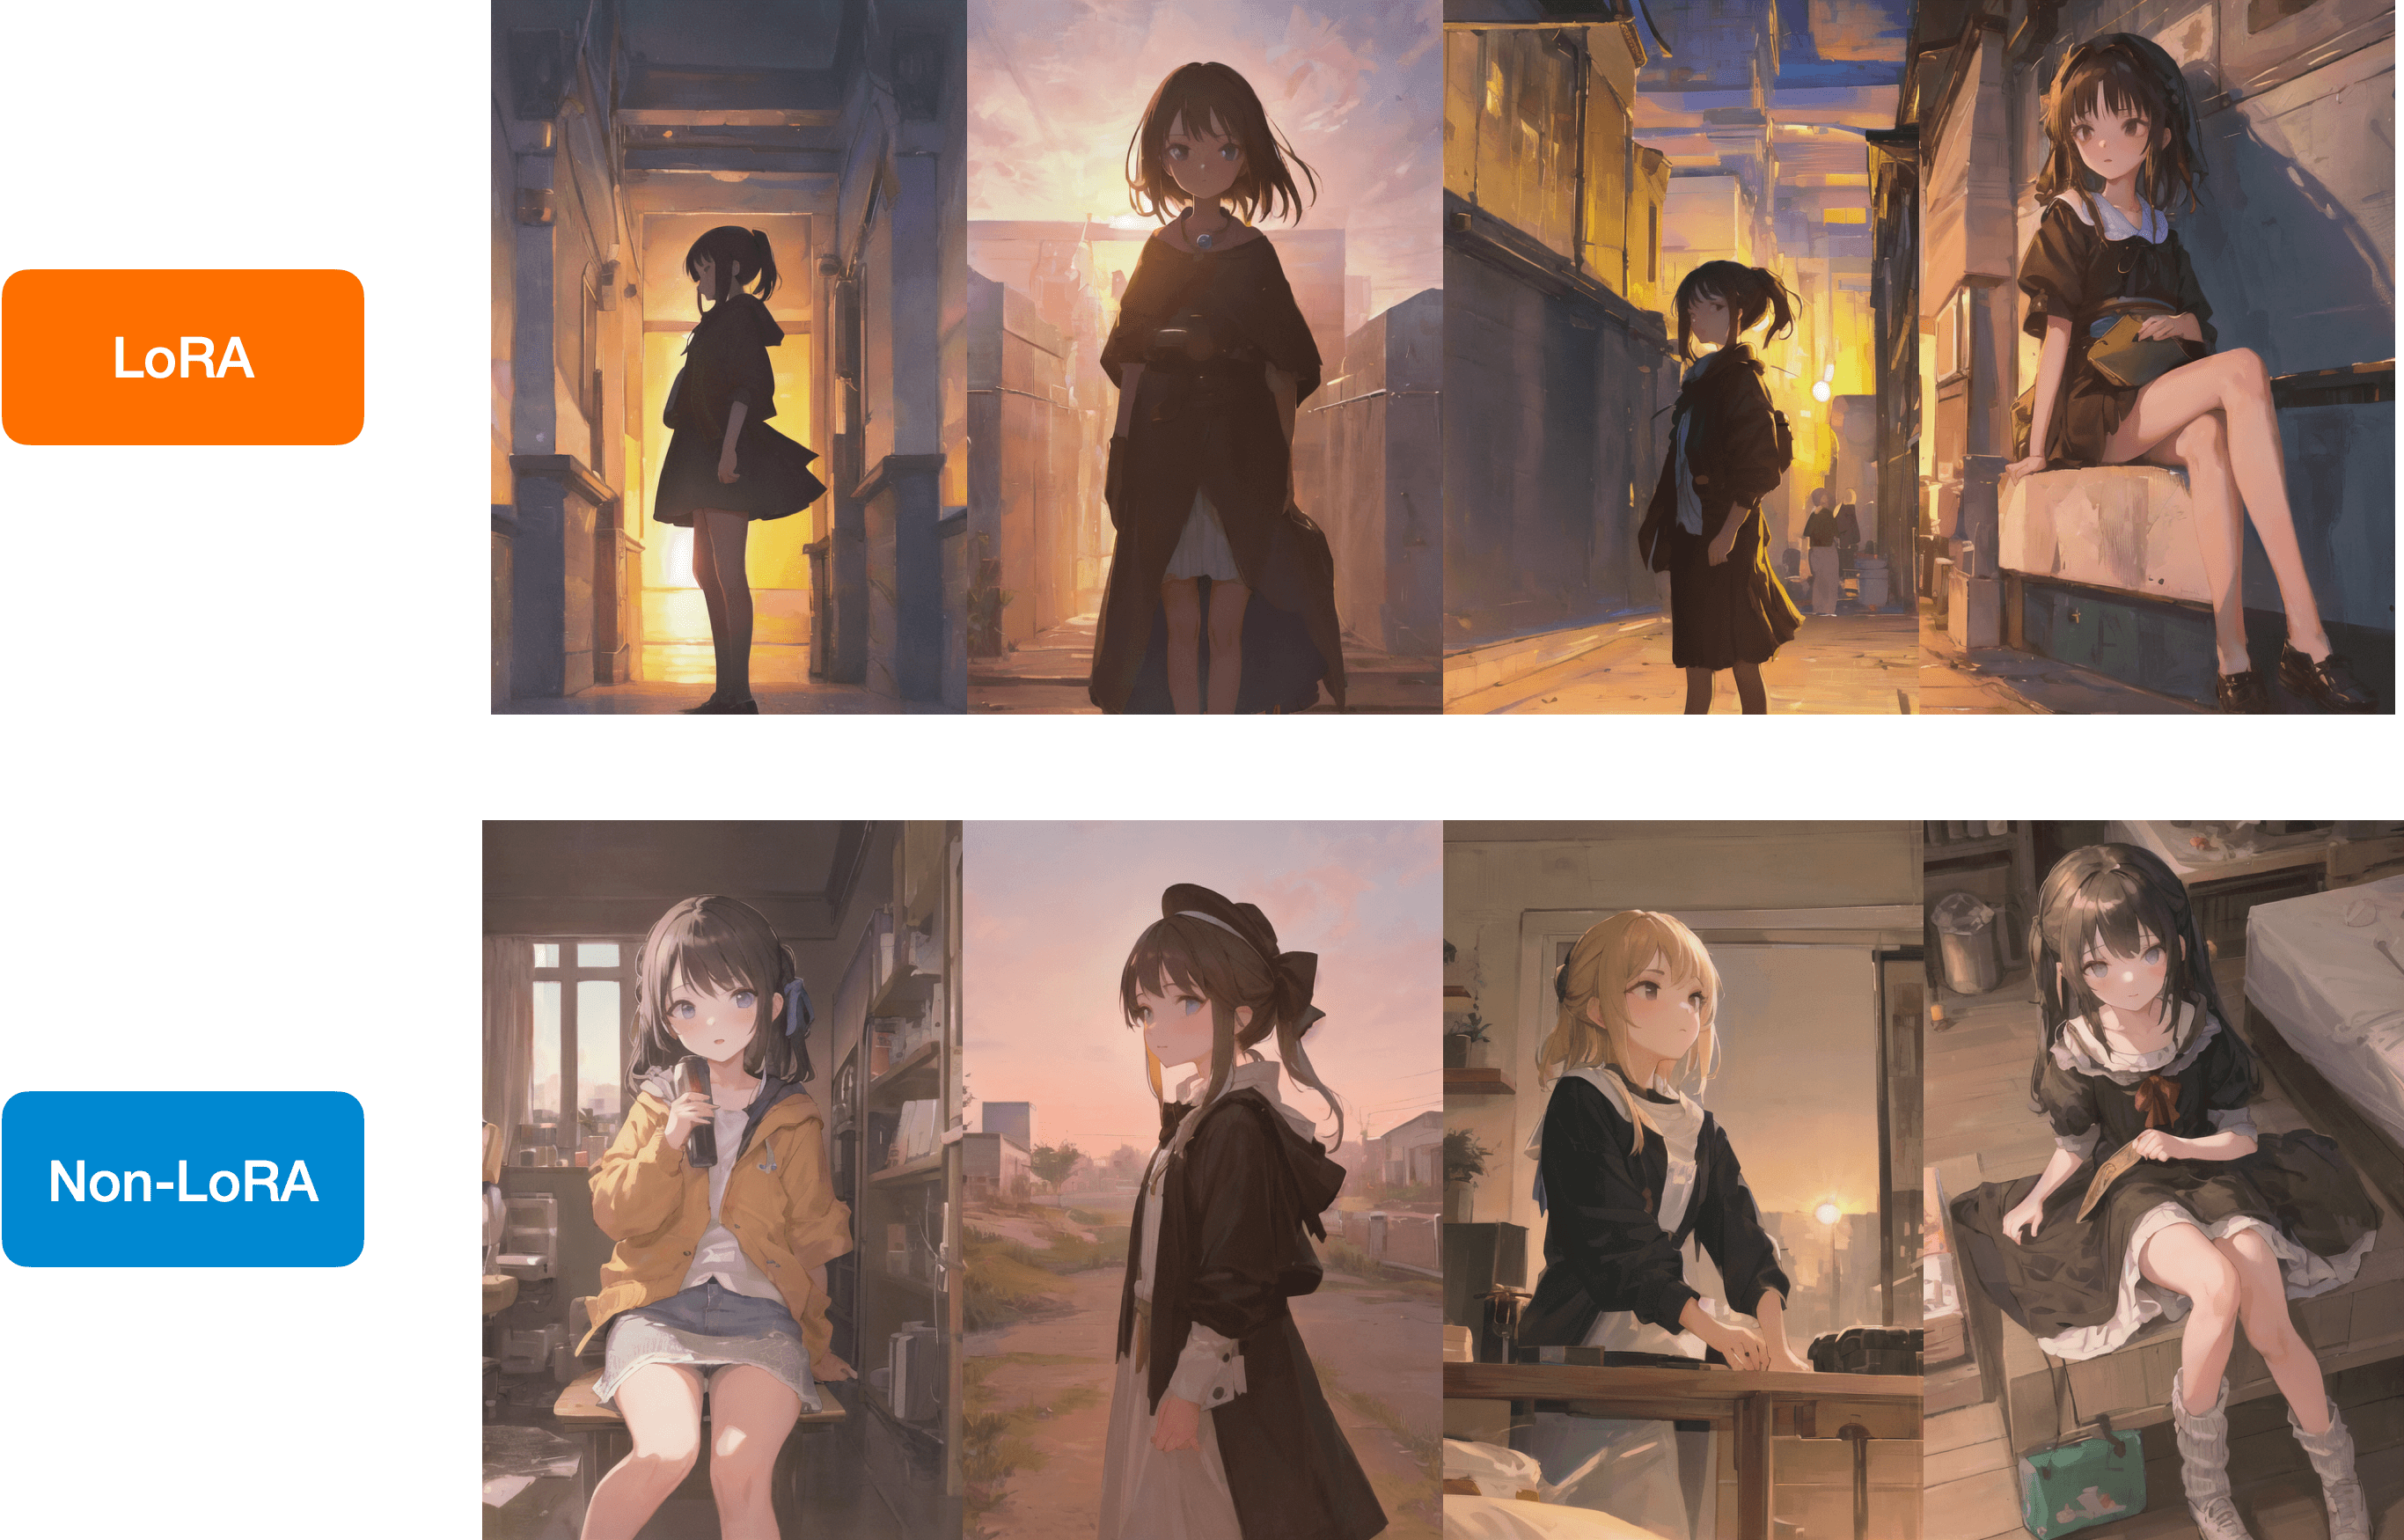
Check out the docs to learn more.
Thanks to @takuma104 for contributing this feature via this PR.
Torch 2.0 Compile Speed-up
We introduced Torch 2.0 support for computing attention efficiently in 0.13.0. Since then, we have made a number of improvements to ensure the number of "graph breaks" in our models is reduced so that the models can be compiled with torch.compile(). As a result, we are happy to report massive improvements in the inference speed of our most popular pipelines. Check out this doc to know more.
Thanks to @Chillee for helping us with this. Thanks to @patrickvonplaten for fixing the problems stemming from "graph breaks" in this PR.
VAE pre-processing
We added a Vae Image processor class that provides a unified API for pipelines to prepare their image inputs, as well as post-processing their outputs. It supports resizing, normalization, and conversion between PIL Image, PyTorch, and Numpy arrays.
With that, all Stable diffusion pipelines now accept image inputs in the format of Pytorch Tensor and Numpy array, in addition to PIL Image, and can produce outputs in these 3 formats. It will also accept and return latents. This means you can now take generated latents from one pipeline and pass them to another as inputs, without leaving the latent space. If you work with multiple pipelines, you can pass Pytorch Tensor between them without converting to PIL Image.
To learn more about the API, check out our doc here
ControlNet Img2Img & Inpainting
ControlNet is one of the most used diffusion models and upon strong demand from the community we added controlnet img2img and controlnet inpaint pipelines.
This allows to use any controlnet checkpoint for both image-2-image setting as well as for inpaint.
👉 Inpaint: See controlnet inpaint model here
👉 Image-to-Image: Any controlnet checkpoint can be used for image to image, e.g.:
from diffusers import StableDiffusionControlNetImg2ImgPipeline, ControlNetModel, UniPCMultistepScheduler
from diffusers.utils import load_image
import numpy as np
import torch

import cv2
from PIL import Image

# download an image
image = load_image(
    "https://hf.co/datasets/huggingface/documentation-images/resolve/main/diffusers/input_image_vermeer.png"
)
np_image = np.array(image)

# get canny image
np_image = cv2.Canny(np_image, 100, 200)
np_image = np_image[:, :, None]
np_image = np.concatenate([np_image, np_image, np_image], axis=2)
canny_image = Image.fromarray(np_image)

# load control net and stable diffusion v1-5
controlnet = ControlNetModel.from_pretrained("lllyasviel/sd-controlnet-canny", torch_dtype=torch.float16)
pipe = StableDiffusionControlNetImg2ImgPipeline.from_pretrained(
    "runwayml/stable-diffusion-v1-5", controlnet=controlnet, torch_dtype=torch.float16
)

# speed up diffusion process with faster scheduler and memory optimization
pipe.scheduler = UniPCMultistepScheduler.from_config(pipe.scheduler.config)
pipe.enable_model_cpu_offload()

# generate image
generator = torch.manual_seed(0)
image = pipe(
    "futuristic-looking woman",
    num_inference_steps=20,
    generator=generator,
    image=image,
    control_image=canny_image,
).images[0]
Diffedit Zero-Shot Inpainting Pipeline
This pipeline (introduced in DiffEdit: Diffusion-based semantic image editing with mask guidance) allows for image editing with natural language. Below is an end-to-end example.
First, let’s load our pipeline:
import torch
from diffusers import DDIMScheduler, DDIMInverseScheduler, StableDiffusionDiffEditPipeline

sd_model_ckpt = "stabilityai/stable-diffusion-2-1"
pipeline = StableDiffusionDiffEditPipeline.from_pretrained(
    sd_model_ckpt,
    torch_dtype=torch.float16,
    safety_checker=None,
)
pipeline.scheduler = DDIMScheduler.from_config(pipeline.scheduler.config)
pipeline.inverse_scheduler = DDIMInverseScheduler.from_config(pipeline.scheduler.config)
pipeline.enable_model_cpu_offload()
pipeline.enable_vae_slicing()
generator = torch.manual_seed(0)
Then, we load an input image to edit using our method:
from diffusers.utils import load_image

img_url = "https://github.com/Xiang-cd/DiffEdit-stable-diffusion/raw/main/assets/origin.png"
raw_image = load_image(img_url).convert("RGB").resize((768, 768))
Then, we employ the source and target prompts to generate the editing mask:
source_prompt = "a bowl of fruits"
target_prompt = "a basket of fruits"
mask_image = pipeline.generate_mask(
    image=raw_image,
    source_prompt=source_prompt,
    target_prompt=target_prompt,
    generator=generator,
)
Then, we employ the caption and the input image to get the inverted latents:
inv_latents = pipeline.invert(prompt=source_prompt, image=raw_image, generator=generator).latentsNow, generate the image with the inverted latents and semantically generated mask:
`...
Contributors
Assets 2
Patch Release: v0.16.1
v0.16.1: Patch Release to fix IF naming, community pipeline versioning, and to allow disable VAE PT 2 attention
- merge conflict by @apolinario (direct commit on v0.16.1-patch)
- Fix community pipelines by @patrickvonplaten in #3266
- Allow disabling torch 2_0 attention by @patrickvonplaten in #3273
Contributors
Assets 2
v0.16.0 DeepFloyd IF & ControlNet v1.1
DeepFloyd's IF: The open-sourced Imagen
IF
IF is a pixel-based text-to-image generation model and was released in late April 2023 by DeepFloyd.
The model architecture is strongly inspired by Google's closed-sourced Imagen and a novel state-of-the-art open-source text-to-image model with a high degree of photorealism and language understanding:

Installation
pip install torch --upgrade  # diffusers' IF is optimized for torch 2.0
pip install diffusers --upgrade
Accept the License
Before you can use IF, you need to accept its usage conditions. To do so:
- Make sure to have a Hugging Face account and be logged in
- Accept the license on the model card of DeepFloyd/IF-I-XL-v1.0
- Log-in locally
from huggingface_hub import login

login()
and enter your Hugging Face Hub access token.
Code example
from diffusers import DiffusionPipeline
from diffusers.utils import pt_to_pil
import torch

# stage 1
stage_1 = DiffusionPipeline.from_pretrained("DeepFloyd/IF-I-XL-v1.0", variant="fp16", torch_dtype=torch.float16)
stage_1.enable_model_cpu_offload()

# stage 2
stage_2 = DiffusionPipeline.from_pretrained(
    "DeepFloyd/IF-II-L-v1.0", text_encoder=None, variant="fp16", torch_dtype=torch.float16
)
stage_2.enable_model_cpu_offload()

# stage 3
safety_modules = {
    "feature_extractor": stage_1.feature_extractor,
    "safety_checker": stage_1.safety_checker,
    "watermarker": stage_1.watermarker,
}
stage_3 = DiffusionPipeline.from_pretrained(
    "stabilityai/stable-diffusion-x4-upscaler", **safety_modules, torch_dtype=torch.float16
)
stage_3.enable_model_cpu_offload()

prompt = 'a photo of a kangaroo wearing an orange hoodie and blue sunglasses standing in front of the eiffel tower holding a sign that says "very deep learning"'
generator = torch.manual_seed(1)

# text embeds
prompt_embeds, negative_embeds = stage_1.encode_prompt(prompt)

# stage 1
image = stage_1(
    prompt_embeds=prompt_embeds, negative_prompt_embeds=negative_embeds, generator=generator, output_type="pt"
).images
pt_to_pil(image)[0].save("./if_stage_I.png")
# stage 2
image = stage_2(
image=image,
prompt_embeds=prompt_embeds,
negative_prompt_embeds=negative_embeds,
generator=generator,
output_type="pt",
).images
pt_to_pil(image)[0].save("./if_stage_II.png")# stage 3
image = stage_3(prompt=prompt, image=image, noise_level=100, generator=generator).images
image[0].save("./if_stage_III.png")For more details about speed and memory optimizations, please have a look at the blog or docs below.
Useful links
👉 The official codebase
👉 Blog post
👉 Space Demo
👉 In-detail docs
ControlNet v1.1
Lvmin Zhang has released improved ControlNet checkpoints as well as a couple of new ones.
You can find all 🧨 Diffusers checkpoints here
Please have a look directly at the model cards on how to use the checkpoins:
Improved checkpoints:
| Model Name | Control Image Overview | Control Image Example | Generated Image Example |
|---|---|---|---|
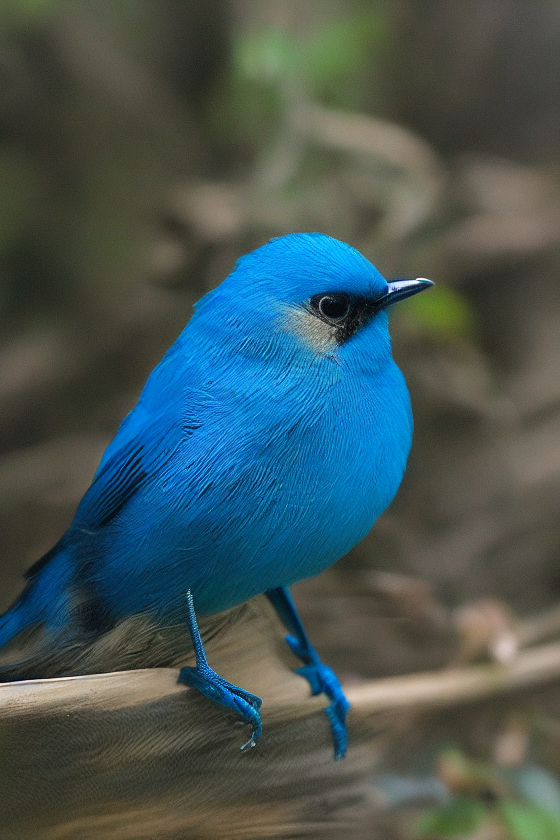
| lllyasviel/control_v11p_sd15_canny Trained with canny edge detection |
A monochrome image with white edges on a black background. | 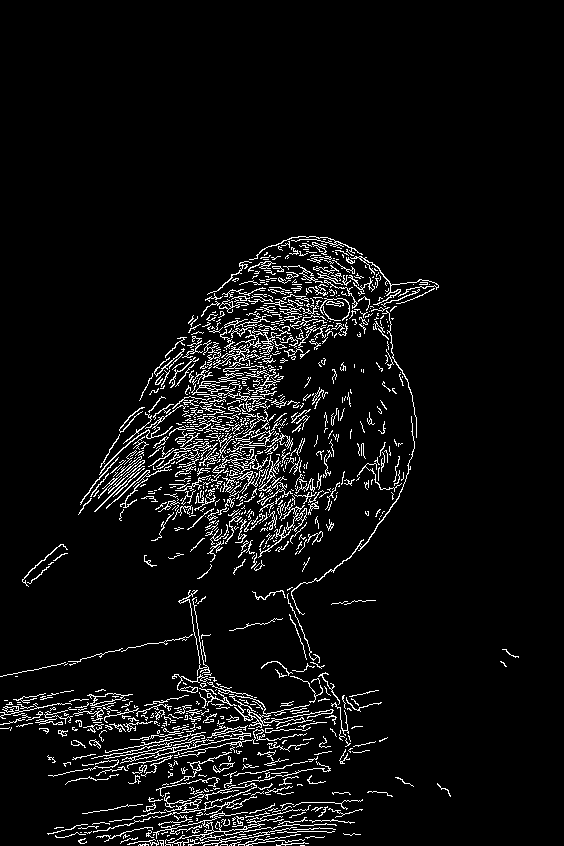 |
 |
| lllyasviel/control_v11p_sd15_mlsd Trained with multi-level line segment detection |
An image with annotated line segments. |  |
 |
| lllyasviel/control_v11f1p_sd15_depth Trained with depth estimation |
An image with depth information, usually represented as a grayscale image. |  |
 |
| lllyasviel/control_v11p_sd15_normalbae Trained with surface normal estimation |
An image with surface normal information, usually represented as a color-coded image. | 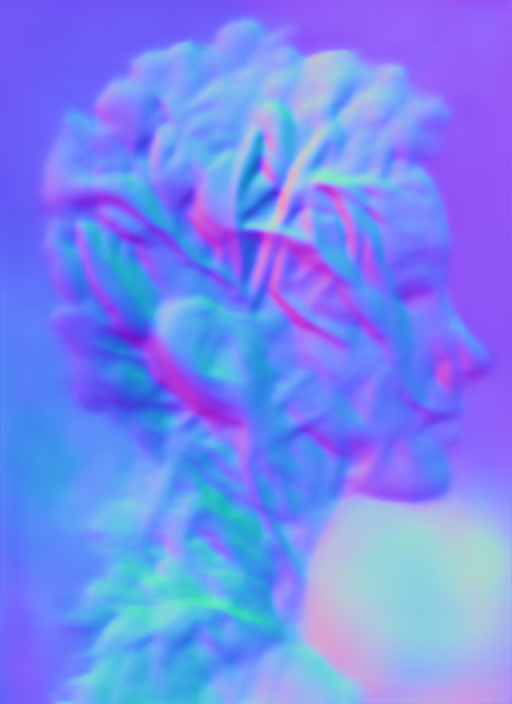 |
 |
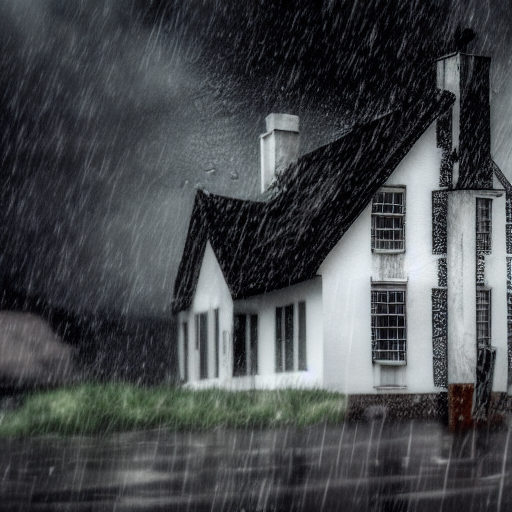
| lllyasviel/control_v11p_sd15_seg Trained with image segmentation |
An image with segmented regions, usually represented as a color-coded image. | 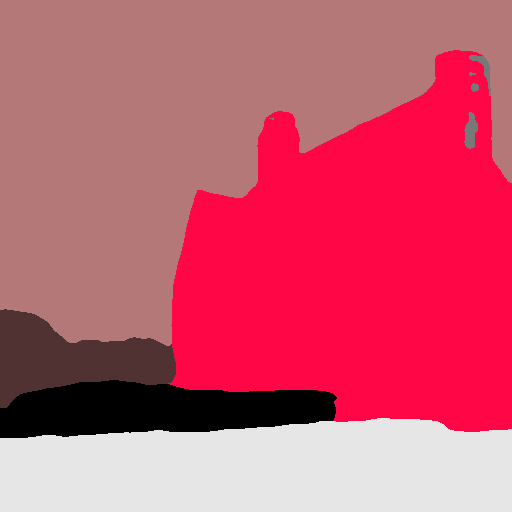 |
 |
| lllyasviel/control_v11p_sd15_lineart Trained with line art generation |
An image with line art, usually black lines on a white background. | 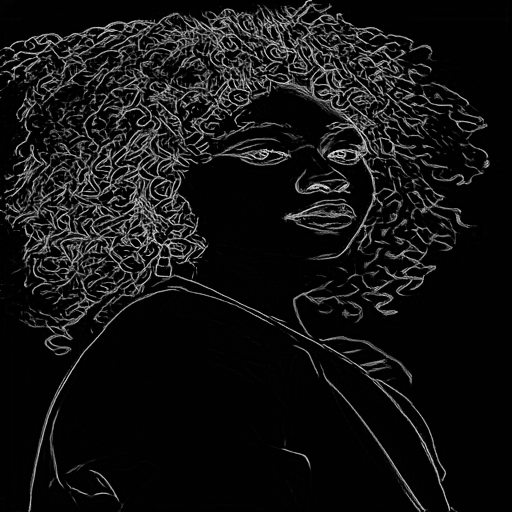 |
 |
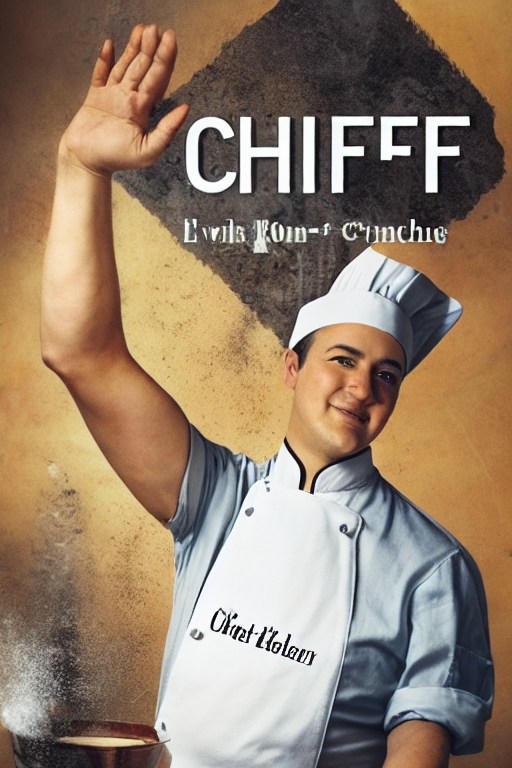
| lllyasviel/control_v11p_sd15_openpose Trained with human pose estimation |
An image with human poses, usually represented as a set of keypoints or skeletons. | 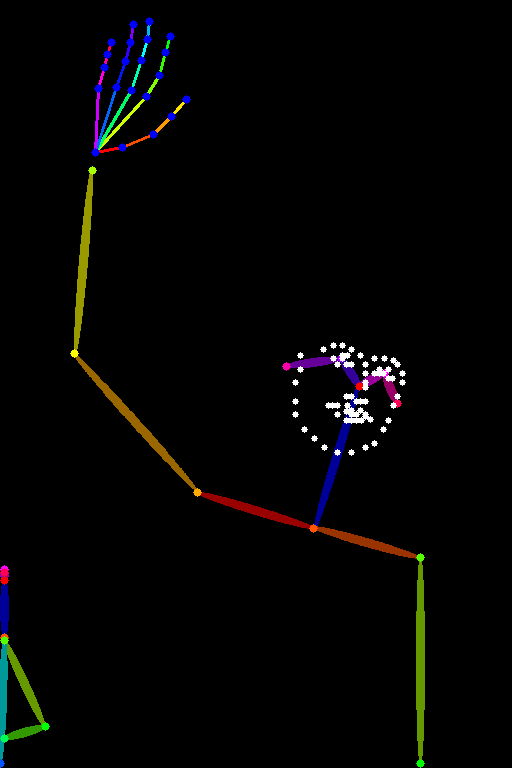 |
 |
| lllyasviel/control_v11p_sd15_scribble Trained with scribble-based image generation |
An image with scribbles, usually random or user-drawn strokes. | 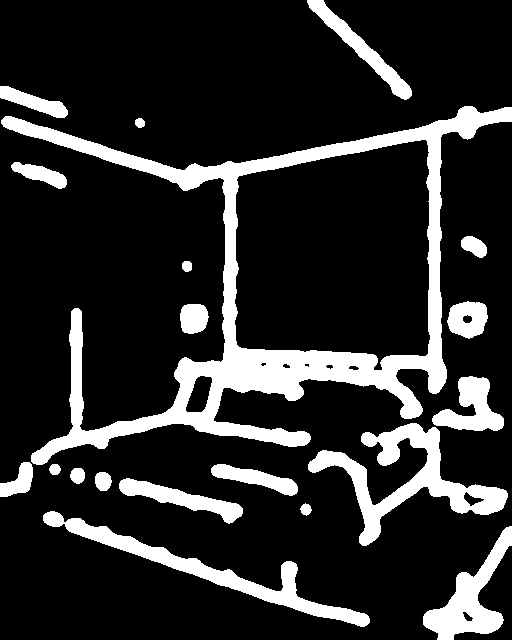 |
 |
| lllyasviel/control_v11p_sd15_softedge Trained with soft edge image generation |
An image with soft edges, usually to create a more painterly or artistic effect. |  |
<img width="64" src="https://huggingface.co/lllyasviel/control_v11p_sd15_sof... |
Contributors
Assets 2
v0.15.1: Patch Release to fix safety checker, config access and uneven scheduler
Fixes bugs related to missing global pooling in controlnet, img2img processor issue with safety checker, uneven timesteps and better config deprecation
- [Bug fix] Add global pooling to controlnet by @patrickvonplaten in #3121
- [Bug fix] Fix img2img processor with safety checker by @patrickvonplaten in #3127
- [Bug fix] Make sure correct timesteps are chosen for img2img by @patrickvonplaten in #3128
- [Bug fix] Fix config deprecation by @patrickvonplaten in #3129
Contributors
Assets 2
v0.15.0 Beyond Image Generation
Taking Diffusers Beyond Image Generation
We are very excited about this release! It brings new pipelines for video and audio to diffusers, showing that diffusion is a great choice for all sorts of generative tasks. The modular, pluggable approach of diffusers was crucial to integrate the new models intuitively and cohesively with the rest of the library. We hope you appreciate the consistency of the APIs and implementations, as our ultimate goal is to provide the best toolbox to help you solve the tasks you're interested in. Don't hesitate to get in touch if you use diffusers for other projects!
In addition to that, diffusers 0.15 includes a lot of new features and improvements. From performance and deployment improvements (faster pipeline loading) to increased flexibility for creative tasks (Karras sigmas, weight prompting, support for Automatic1111 textual inversion embeddings) to additional customization options (Multi-ControlNet) to training utilities (ControlNet, Min-SNR weighting). Read on for the details!
🎬 Text-to-Video
Text-guided video generation is not a fantasy anymore - it's as simple as spinning up a colab and running any of the two powerful open-sourced video generation models.
Text-to-Video
Alibaba's DAMO Vision Intelligence Lab has open-sourced a first research-only video generation model that can generatae some powerful video clips of up to a minute. To see Darth Vader riding a wave simply copy-paste the following lines into your favorite Python interpreter:
import torch
from diffusers import DiffusionPipeline, DPMSolverMultistepScheduler
from diffusers.utils import export_to_video

pipe = DiffusionPipeline.from_pretrained("damo-vilab/text-to-video-ms-1.7b", torch_dtype=torch.float16, variant="fp16")
pipe.scheduler = DPMSolverMultistepScheduler.from_config(pipe.scheduler.config)
pipe.enable_model_cpu_offload()

prompt = "Spiderman is surfing"
video_frames = pipe(prompt, num_inference_steps=25).frames
video_path = export_to_video(video_frames)
For more information you can have a look at "damo-vilab/text-to-video-ms-1.7b"
Text-to-Video Zero
Text2Video-Zero is a zero-shot text-to-video synthesis diffusion model that enables low cost yet consistent video generation with only pre-trained text-to-image diffusion models using simple pre-trained stable diffusion models, such as Stable Diffusion v1-5. Text2Video-Zero also naturally supports cool extension works of pre-trained text-to-image models such as Instruct Pix2Pix, ControlNet and DreamBooth, and based on which we present Video Instruct Pix2Pix, Pose Conditional, Edge Conditional and, Edge Conditional and DreamBooth Specialized applications.
Ftb9VnoakAE_B7T.mp4
For more information please have a look at PAIR/Text2Video-Zero
🔉 Audio Generation
Text-guided audio generation has made great progress over the last months with many advances being based on diffusion models.
The 0.15.0 release includes two powerful audio diffusion models.
AudioLDM
Inspired by Stable Diffusion, AudioLDM
is a text-to-audio latent diffusion model (LDM) that learns continuous audio representations from CLAP
latents. AudioLDM takes a text prompt as input and predicts the corresponding audio. It can generate text-conditional
sound effects, human speech and music.
from diffusers import AudioLDMPipeline
import torch

repo_id = "cvssp/audioldm"
pipe = AudioLDMPipeline.from_pretrained(repo_id, torch_dtype=torch.float16)
pipe = pipe.to("cuda")

prompt = "Techno music with a strong, upbeat tempo and high melodic riffs"
audio = pipe(prompt, num_inference_steps=10, audio_length_in_s=5.0).audios[0]
The resulting audio output can be saved as a .wav file:
import scipy

scipy.io.wavfile.write("techno.wav", rate=16000, data=audio)
For more information see cvssp/audioldm
Spectrogram Diffusion
This model from the Magenta team is a MIDI to audio generator. The pipeline takes a MIDI file as input and autoregressively generates 5-sec spectrograms which are concated together in the end and decoded to audio via a Spectrogram decoder.
from diffusers import SpectrogramDiffusionPipeline, MidiProcessor

pipe = SpectrogramDiffusionPipeline.from_pretrained("google/music-spectrogram-diffusion")
pipe = pipe.to("cuda")
processor = MidiProcessor()

# Download MIDI from: wget http://www.piano-midi.de/midis/beethoven/beethoven_hammerklavier_2.mid
output = pipe(processor("beethoven_hammerklavier_2.mid"))

audio = output.audios[0]
📗 New Docs
Documentation is crucially important for diffusers, as it's one of the first resources where people try to understand how everything works and fix any issues they are observing. We have spent a lot of time in this release reviewing all documents, adding new ones, reorganizing sections and bringing code examples up to date with the latest APIs. This effort has been led by @stevhliu (thanks a lot! 🙌) and @yiyixuxu, but many others have chimed in and contributed.
Check it out: https://huggingface.co/docs/diffusers/index
Don't hesitate to open PRs for fixes to the documentation, they are greatly appreciated as discussed in our (revised, of course) contribution guide.

🪄 Stable UnCLIP
Stable UnCLIP is the best open-sourced image variation model out there. Pass an initial image and optionally a prompt to generate variations of the image:
from diffusers import DiffusionPipeline
from diffusers.utils import load_image
import torch

pipe = DiffusionPipeline.from_pretrained("stabilityai/stable-diffusion-2-1-unclip-small", torch_dtype=torch.float16)
pipe.to("cuda")

# get image
url = "https://huggingface.co/datasets/hf-internal-testing/diffusers-images/resolve/main/stable_unclip/tarsila_do_amaral.png"
image = load_image(url)

# run image variation
image = pipe(image).images[0]
For more information you can have a look at "stabilityai/stable-diffusion-2-1-unclip"
Fsei9kLaUAM27yZ.mp4
🚀 More ControlNet
ControlNet was released in diffusers in version 0.14.0, but we have some exciting developments: Multi-ControlNet, a training script, and upcoming event and a community image-to-image pipeline contributed by @mikegarts!
Multi-ControlNet
Thanks to community member @takuma104, it's now possible to use several ControlNet conditioning models at once! It works with the same API as before, only supplying a list of ControlNets instead of just once:
import torch
from diffusers import StableDiffusionControlNetPipeline, ControlNetModel

controlnet_canny = ControlNetModel.from_pretrained("lllyasviel/sd-controlnet-canny",
                                                   torch_dtype=torch.float16).to("cuda")
controlnet_pose = ControlNetModel.from_pretrained("lllyasviel/sd-controlnet-openpose",
                                                   torch_dtype=torch.float16).to("cuda")

pipe = StableDiffusionControlNetPipeline.from_pretrained(
	"example/a-sd15-variant-model", torch_dtype=torch.float16,
	controlnet=[controlnet_pose, controlnet_canny]
).to("cuda")

pose_image = ...
canny_image = ...
prompt = ...

image = pipe(prompt=prompt, image=[pose_image, canny_image]).images[0]
And this is an example of how this affects generation:
| Control Image1 | Control Image2 | Generated |
|---|---|---|
 |
 |
 |
|
(none) |  |
|
(none) |  |
ControlNet Training
We have created a training script for ControlNet, and can't wait to see what new ideas the community may come up with! In fact, we are so pumped about it that we are organizing a JAX Diffusers sprint with a special focus on ControlNet, where participant teams will be assigned TPUs v4-8 to work on their projects 🤯. Those are some mean machines, so make sure you join our discord to follow the event: https://discord.com/channels/879548962464493619/897387888663232554/1092751149217615902.
🐈⬛ Textual Inversion, Revisited
Several great contributors have been working on textual inversion to get the most of it. @isamu-isozaki made it possible to perform multitoken training, and @pies...
Contributors
Assets 2
ControlNet, 8K VAE decoding
🚀 ControlNet comes to 🧨 Diffusers!
Thanks to an amazing collaboration with community member @takuma104 🙌, diffusers fully supports ControlNet! All 8 control models from the paper are available for you to use: depth, scribbles, edges, and more. Best of all is that you can take advantage of all the other goodies and optimizations that Diffusers provides out of the box, making this an ultra fast implementation of ControlNet. Take it for a spin to see for yourself.
ControlNet works by training a copy of some of the layers of the original Stable Diffusion model on additional signals, such as depth maps or scribbles. After training, you can provide a depth map as a strong hint of the composition you want to achieve, and have Stable Diffusion fill in the details for you. For example:
| Before | After |
|---|---|
 |
 |
Currently, there are 8 published control models, all of which were trained on runwayml/stable-diffusion-v1-5 (i.e., Stable Diffusion version 1.5). This is an example that uses the scribble controlnet model:
| Before | After |
|---|---|
 |
 |
Or you can turn a cartoon into a realistic photo with incredible coherence:
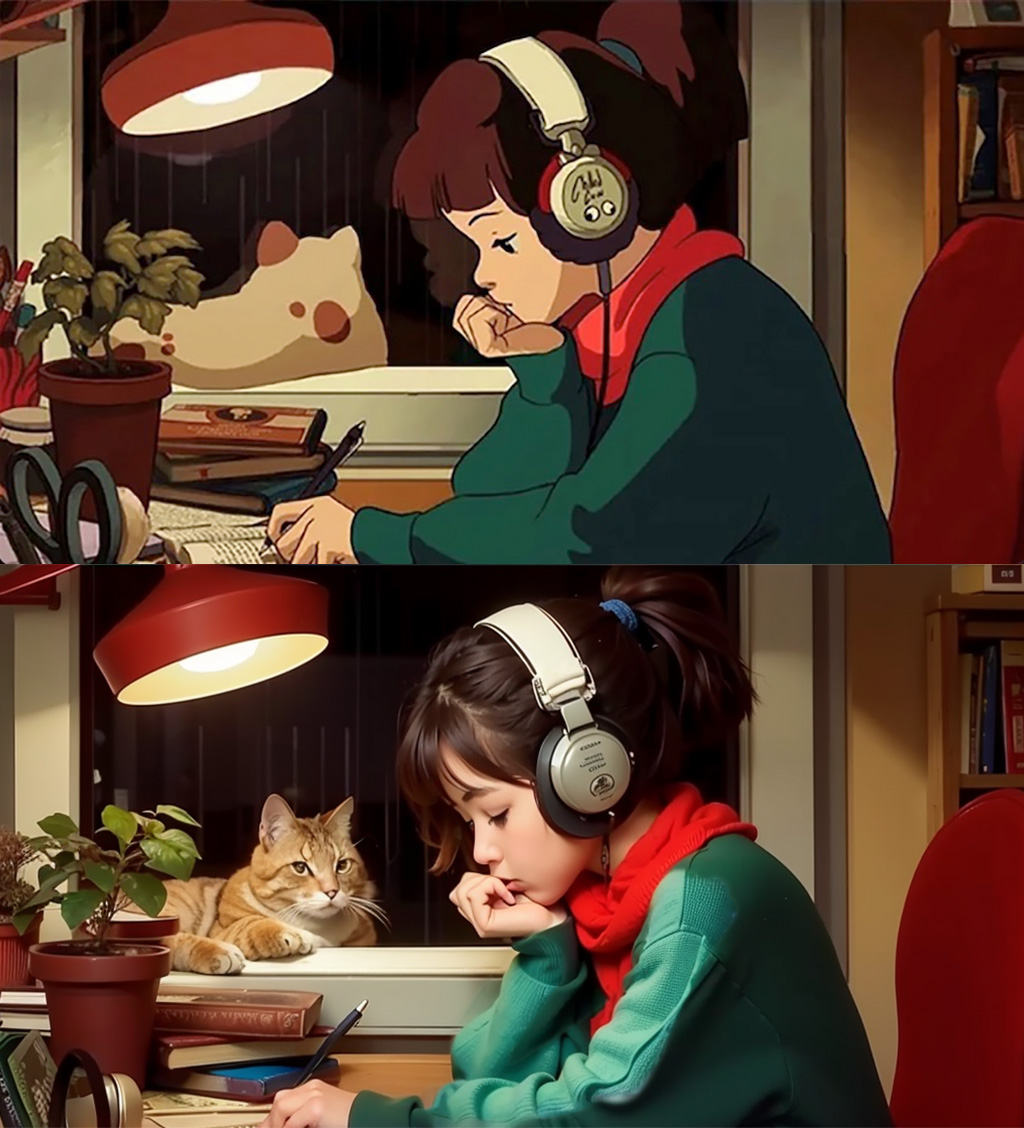
How do you use ControlNet in diffusers? Just like this (example for the canny edges control model):
from diffusers import StableDiffusionControlNetPipeline, ControlNetModel
import torch

controlnet = ControlNetModel.from_pretrained("lllyasviel/sd-controlnet-canny", torch_dtype=torch.float16)
pipe = StableDiffusionControlNetPipeline.from_pretrained(
    "runwayml/stable-diffusion-v1-5", controlnet=controlnet, torch_dtype=torch.float16
)
As usual, you can use all the features in the diffusers toolbox: super-fast schedulers, memory-efficient attention, model offloading, etc. We think 🧨 Diffusers is the best way to iterate on your ControlNet experiments!
Please, refer to our blog post and documentation for details.
(And, coming soon, ControlNet training – stay tuned!)
💠 VAE tiling for ultra-high resolution generation
Another community member, @kig, conceived, proposed and fully implemented an amazing PR that allows generation of ultra-high resolution images without memory blowing up 🤯. They follow a tiling approach during the image decoding phase of the process, generating a piece of the image at a time and then stitching them all together. Tiles are blended carefully to avoid visible seems between them, and the final result is amazing. This is the additional code you need to use to enjoy high-resolution generations:
pipe.vae.enable_tiling()That's it!
For a complete example, refer to the PR or the code snippet we reproduce here for your convenience:
import torch
from diffusers import StableDiffusionPipeline

pipe = StableDiffusionPipeline.from_pretrained("runwayml/stable-diffusion-v1-5", revision="fp16", torch_dtype=torch.float16)
pipe = pipe.to("cuda")
pipe.enable_xformers_memory_efficient_attention()
pipe.vae.enable_tiling()

prompt = "a beautiful landscape photo"
image = pipe(prompt, width=4096, height=2048, num_inference_steps=10).images[0]

image.save("4k_landscape.jpg")
All commits
- [Docs] Add a note on SDEdit by @sayakpaul in #2433
- small bugfix at StableDiffusionDepth2ImgPipeline call to check_inputs and batch size calculation by @mikegarts in #2423
- add demo by @yiyixuxu in #2436
- fix: code snippet of instruct pix2pix from the docs. by @sayakpaul in #2446
- Update train_text_to_image_lora.py by @haofanwang in #2464
mpstest fixes by @pcuenca in #2470- Fix test
train_unconditionalby @pcuenca in #2481 - add MultiDiffusion to controlling generation by @omerbt in #2490
- image_noiser -> image_normalizer comment by @williamberman in #2496
- [Safetensors] Make sure metadata is saved by @patrickvonplaten in #2506
- Add 4090 benchmark (PyTorch 2.0) by @pcuenca in #2503
- [Docs] Improve safetensors by @patrickvonplaten in #2508
- Disable ONNX tests by @patrickvonplaten in #2509
- attend and excite batch test causing timeouts by @williamberman in #2498
- move pipeline based test skips out of pipeline mixin by @williamberman in #2486
- pix2pix tests no write to fs by @williamberman in #2497
- [Docs] Include more information in the "controlling generation" doc by @sayakpaul in #2434
- Use "hub" directory for cache instead of "diffusers" by @pcuenca in #2005
- Sequential cpu offload: require accelerate 0.14.0 by @pcuenca in #2517
- is_safetensors_compatible refactor by @williamberman in #2499
- [Copyright] 2023 by @patrickvonplaten in #2524
- Bring Flax attention naming in sync with PyTorch by @pcuenca in #2511
- [Tests] Fix slow tests by @patrickvonplaten in #2526
- PipelineTesterMixin parameter configuration refactor by @williamberman in #2502
- Add a ControlNet model & pipeline by @takuma104 in #2407
- 8k Stable Diffusion with tiled VAE by @kig in #1441
- Textual inv make save log both steps by @isamu-isozaki in #2178
- Fix convert SD to diffusers error by @fkunn1326 in #1979)
- Small fixes for controlnet by @patrickvonplaten in #2542
- Fix ONNX checkpoint loading by @anton-l in #2544
- [Model offload] Add nice warning by @patrickvonplaten in #2543
Significant community contributions
The following contributors have made significant changes to the library over the last release:
- @takuma104
- Add a ControlNet model & pipeline (#2407)
New Contributors
- @mikegarts made their first contribution in #2423
- @fkunn1326 made their first contribution in #2529
Full Changelog: v0.13.0...v0.14.0
Contributors
Assets 2
v0.13.1: Patch Release to fix warning when loading from `revision="fp16"`
- fix transformers naming by @patrickvonplaten in #2430
- remove author names. by @sayakpaul in #2428
- Fix deprecation warning by @patrickvonplaten in #2426
- fix the get_indices function by @yiyixuxu in #2418
- Update pipeline_utils.py by @haofanwang in #2415
Contributors
Assets 2
Controllable Generation: Pix2Pix0, Attend and Excite, SEGA, SAG, ...
🎯 Controlling Generation
There has been much recent work on fine-grained control of diffusion networks!
Diffusers now supports:
- Instruct Pix2Pix
- Pix2Pix 0, more details in docs
- Attend and excite, more details in docs
- Semantic guidance, more details in docs
- Self-attention guidance, more details in docs
- Depth2image
- MultiDiffusion panorama, more details in docs
See our doc on controlling image generation and the individual pipeline docs for more details on the individual methods.
🆙 Latent Upscaler
Latent Upscaler is a diffusion model that is designed explicitly for Stable Diffusion. You can take the generated latent from Stable Diffusion and pass it into the upscaler before decoding with your standard VAE. Or you can take any image, encode it into the latent space, use the upscaler, and decode it. It is incredibly flexible and can work with any SD checkpoints.
| Original output image | 2x upscaled output image |
|---|---|
 |
 |
The model was developed by Katherine Crowson in collaboration with Stability AI
from diffusers import StableDiffusionLatentUpscalePipeline, StableDiffusionPipeline
import torch

pipeline = StableDiffusionPipeline.from_pretrained("CompVis/stable-diffusion-v1-4", torch_dtype=torch.float16)
pipeline.to("cuda")

upscaler = StableDiffusionLatentUpscalePipeline.from_pretrained("stabilityai/sd-x2-latent-upscaler", torch_dtype=torch.float16)
upscaler.to("cuda")

prompt = "a photo of an astronaut high resolution, unreal engine, ultra realistic"
generator = torch.manual_seed(33)

# we stay in latent space! Let's make sure that Stable Diffusion returns the image
# in latent space
low_res_latents = pipeline(prompt, generator=generator, output_type="latent").images

upscaled_image = upscaler(
    prompt=prompt,
    image=low_res_latents,
    num_inference_steps=20,
    guidance_scale=0,
    generator=generator,
).images[0]

# Let's save the upscaled image under "upscaled_astronaut.png"
upscaled_image.save("astronaut_1024.png")

# as a comparison: Let's also save the low-res image
with torch.no_grad():
    image = pipeline.decode_latents(low_res_latents)
image = pipeline.numpy_to_pil(image)[0]

image.save("astronaut_512.png")
⚡ Optimization
In addition to new features and an increasing number of pipelines, diffusers cares a lot about performance. This release brings a number of optimizations that you can turn on easily.
xFormers
Memory efficient attention, as implemented by xFormers, has been available in diffusers for some time. The problem was that installing xFormers could be complicated because there were no official pip wheels (or they were outdated), and you had to resort to installing from source.
From xFormers 0.0.16, official pip wheels are now published with every release, so installing and using xFormers is now as simple as these two steps:
pip install xformersin your terminal.pipe.enable_xformers_memory_efficient_attention()in your code to opt-in in your pipelines.
These actions will unlock dramatic memory savings, and usually faster inference too!
See more details in the documentation.
Torch 2.0
Speaking of memory-efficient attention, Accelerated PyTorch 2.0 Transformers now comes with built-in native support for it! When PyTorch 2.0 is released you'll no longer have to install xFormers or any third-party package to take advantage of it. In diffusers we are already preparing for that, and it works out of the box. So, if you happen to be using the latest "nightlies" of PyTorch 2.0 beta, then you're all set – diffusers will use Accelerated PyTorch 2.0 Transformers by default.
In our tests, the built-in PyTorch 2.0 implementation is usually as fast as xFormers', and sometimes even faster. Performance depends on the card you are using and whether you run your code in float16 or float32, so check our documentation for details.
Coarse-grained CPU offload
Community member @keturn, with whom we have enjoyed thoughtful software design conversations, called our attention to the fact that enabling sequential cpu offloading via enable_sequential_cpu_offload worked great to save a lot of memory, but made inference much slower.
This is because enable_sequential_cpu_offload() is optimized for memory, and it recursively works across all the submodules contained in a model, moving them to GPU when they are needed and back to CPU when another submodule needs to run. These cpu-to-gpu-to-cpu transfers happen hundreds of times during the stable diffusion denoising loops, because the UNet runs multiple times and it consists of several PyTorch modules.
This release of diffusers introduces a coarser enable_model_cpu_offload() pipeline API, which copies whole models (not modules) to GPU and makes sure they stay there until another model needs to run. The consequences are:
- Less memory savings than
enable_sequential_cpu_offload, but: - Almost as fast inference as when the pipeline is used without any type of offloading.
Pix2Pix Zero
Remember the CycleGAN days where one would turn a horse into a zebra in an image while keeping the rest of the content almost untouched? Well, that day has arrived but in the context of Diffusion. Pix2Pix Zero allows users to edit a particular image (be it real or generated), targeting a source concept (horse, for example) and replacing it with a target concept (zebra, for example).
| Input image | Edited image |
|---|---|
 |
 |
Pix2Pix Zero was proposed in Zero-shot Image-to-Image Translation. The StableDiffusionPix2PixZeroPipeline allows you to
- Edit an image generated from an input prompt
- Provide an input image and edit it
For the latter, it uses the newly introduced DDIMInverseScheduler to first obtain the inverted noise from the input image and use that in the subsequent generation process.
Both of the use cases leverage the idea of "edit directions", used for steering the generation toward the target concept gradually from the source concept. To know more, we recommend checking out the official documentation.
Attend and excite
Attend-and-Excite: Attention-Based Semantic Guidance for Text-to-Image Diffusion Models. Attend-and-Excite, guides the generative model to modify the cross-attention values during the image synthesis process to generate images that more faithfully depict the input text prompt. It allows creating images that are more semantically faithful with respect to the input text prompts. Thanks to community contributor @evinpinar for leading the charge to add this pipeline!
- Attend and excite 2 by @evinpinar @yiyixuxu #2369
Semantic guidance
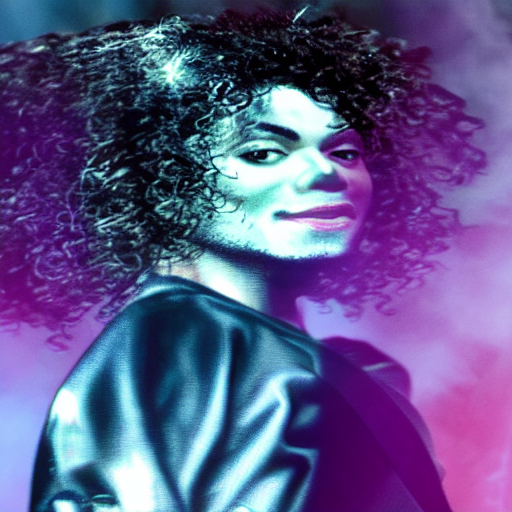
Semantic Guidance for Diffusion Models was proposed in SEGA: Instructing Diffusion using Semantic Dimensions and provides strong semantic control over image generation. Small changes to the text prompt usually result in entirely different output images. However, with SEGA, a variety of changes to the image are enabled that can be controlled easily and intuitively and stay true to the original image composition. Thanks to the lead author of SEFA, Manuel (@manuelbrack), who added the pipeline in #2223.
Here is a simple demo:
import torch
from diffusers import SemanticStableDiffusionPipeline

pipe = SemanticStableDiffusionPipeline.from_pretrained("runwayml/stable-diffusion-v1-5", torch_dtype=torch.float16)
pipe = pipe.to("cuda")

out = pipe(
    prompt="a photo of the face of a woman",
    num_images_per_prompt=1,
    guidance_scale=7,
    editing_prompt=[
        "smiling, smile",  # Concepts to apply
        "glasses, wearing glasses",
        "curls, wavy hair, curly hair",
        "beard, full beard, mustache",
    ],
    reverse_editing_direction=[False, False, False, False],  # Direction of guidance i.e. increase all concepts
    edit_warmup_steps=[10, 10, 10, 10],  # Warmup period for each concept
...Contributors
Assets 2
v0.12.1: Patch Release to fix local files only
Make sure cached models can be loaded in offline mode.
- Don't call the Hub if
local_files_onlyis specifiied by @patrickvonplaten in #2119