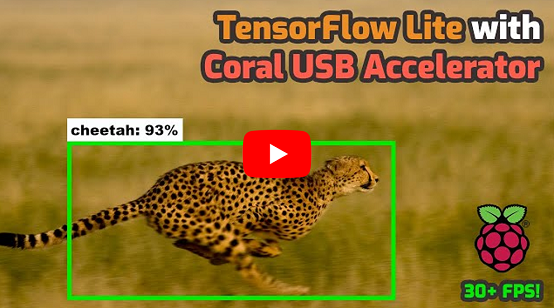
Part 2 - How to Run TensorFlow Lite Object Detection Models on the Raspberry Pi (with Optional Coral USB Accelerator)

This guide provides step-by-step instructions for how to set up TensorFlow Lite on the Raspberry Pi and use it to run object detection models. It also shows how to set up the Coral USB Accelerator on the Pi and run Edge TPU detection models. It works for the Raspberry Pi 3 and Raspberry Pi 4 running either Rasbpian Buster or Rasbpian Stretch.
This guide is the second part of my larger TensorFlow Lite tutorial series:
- How to Train, Convert, and Run Custom TensorFlow Lite Object Detection Models on Windows 10
- How to Run TensorFlow Lite Object Detection Models on the Raspberry Pi (with Optional Coral USB Accelerator) <--- You are here!
- How to Run TensorFlow Lite Object Detection Models on Android Devices
TensorFlow Lite (TFLite) models run much faster than regular TensorFlow models on the Raspberry Pi. You can see a comparison of framerates obtained using regular TensorFlow, TensorFlow Lite, and Coral USB Accelerator models in my TensorFlow Lite Performance Comparison YouTube video.
This portion of the guide is split in to three sections:
- Section 1. Run TensorFlow Lite Object Detection Models on the Raspberry Pi
- Section 2. Run Edge TPU Object Detection Models on the Raspberry Pi Using the Coral USB Accelerator
- Section 3. Compile Custom Edge TPU Object Detection Models
This repository also includes scripts for running the TFLite and Edge TPU models on images, videos, or webcam/Picamera feeds.
Setting up TensorFlow Lite on the Raspberry Pi is much easier than regular TensorFlow! These are the steps needed to set up TensorFlow Lite:
- 1a. Update the Raspberry Pi
- 1b. Download this repository and create virtual environment
- 1c. Install TensorFlow and OpenCV
- 1d. Set up TensorFlow Lite detection model
- 1e. Run TensorFlow Lite model!
I also made a YouTube video that walks through this guide:

First, the Raspberry Pi needs to be fully updated. Open a terminal and issue:
sudo apt-get update
sudo apt-get dist-upgrade
Depending on how long it’s been since you’ve updated your Pi, the update could take anywhere between a minute and an hour.
While we're at it, let's make sure the camera interface is enabled in the Raspberry Pi Configuration menu. Click the Pi icon in the top left corner of the screen, select Preferences -> Raspberry Pi Configuration, and go to the Interfaces tab and verify Camera is set to Enabled. If it isn't, enable it now, and reboot the Raspberry Pi.

Next, clone this GitHub repository by issuing the following command. The repository contains the scripts we'll use to run TensorFlow Lite, as well as a shell script that will make installing everything easier. Issue:
git clone https://github.com/EdjeElectronics/TensorFlow-Lite-Object-Detection-on-Android-and-Raspberry-Pi.git
This downloads everything into a folder called TensorFlow-Lite-Object-Detection-on-Android-and-Raspberry-Pi. That's a little long to work with, so rename the folder to "tflite1" and then cd into it:
mv TensorFlow-Lite-Object-Detection-on-Android-and-Raspberry-Pi tflite1
cd tflite1
We'll work in this /home/pi/tflite1 directory for the rest of the guide. Next up is to create a virtual environment called "tflite1-env".
I'm using a virtual environment for this guide because it prevents any conflicts between versions of package libraries that may already be installed on your Pi. Keeping TensorFlow installed in its own environment allows us to avoid version conflicts. For example, if you've already installed TensorFlow v1.8 on the Pi using my other guide, you can leave that installation as-is without having to worry about overriding it.
Install virtualenv by issuing:
sudo pip3 install virtualenv
Then, create the "tflite1-env" virtual environment by issuing:
python3 -m venv tflite1-env
This will create a folder called tflite1-env inside the tflite1 directory. The tflite1-env folder will hold all the package libraries for this environment. Next, activate the environment by issuing:
source tflite1-env/bin/activate
You'll need to issue the source tflite1-env/bin/activate command from inside the /home/pi/tflite1 directory to reactivate the environment every time you open a new terminal window. You can tell when the environment is active by checking if (tflite1-env) appears before the path in your command prompt, as shown in the screenshot below.
At this point, here's what your tflite1 directory should look like if you issue ls.

If your directory looks good, it's time to move on to Step 1c!
Next, we'll install TensorFlow, OpenCV, and all the dependencies needed for both packages. OpenCV is not needed to run TensorFlow Lite, but the object detection scripts in this repository use it to grab images and draw detection results on them.
To make things easier, I wrote a shell script that will automatically download and install all the packages and dependencies. Run it by issuing:
bash get_pi_requirements.sh
This downloads about 400MB worth of installation files, so it will take a while. Go grab a cup of coffee while it's working! If you'd like to see everything that gets installed, simply open get_pi_dependencies.sh to view the list of packages.
NOTE: If you get an error while running the bash get_pi_requirements.sh command, it's likely because your internet connection timed out, or because the downloaded package data was corrupted. If you get an error, try re-running the command a few more times.
ANOTHER NOTE: The shell script automatically installs the latest version of TensorFlow. If you'd like to install a specific version, issue pip3 install tensorflow==X.XX (where X.XX is replaced with the version you want to install) after running the script. This will override the existing installation with the specified version.
That was easy! On to the next step.
Next, we'll set up the detection model that will be used with TensorFlow Lite. This guide shows how to either download a sample TFLite model provided by Google, or how to use a model that you've trained yourself by following Part 1 of my TensorFlow Lite tutorial series.
A detection model has two files associated with it: a detect.tflite file (which is the model itself) and a labelmap.txt file (which provides a labelmap for the model). My preferred way to organize the model files is to create a folder (such as "BirdSquirrelRaccoon_TFLite_model") and keep both the detect.tflite and labelmap.txt in that folder. This is also how Google's downloadable sample TFLite model is organized.
Google provides a sample quantized SSDLite-MobileNet-v2 object detection model which is trained off the MSCOCO dataset and converted to run on TensorFlow Lite. It can detect and identify 80 different common objects, such as people, cars, cups, etc.
Download the sample model (which can be found on the Object Detection page of the official TensorFlow website) by issuing:
wget https://storage.googleapis.com/download.tensorflow.org/models/tflite/coco_ssd_mobilenet_v1_1.0_quant_2018_06_29.zip
Unzip it to a folder called "Sample_TFLite_model" by issuing (this command automatically creates the folder):
unzip coco_ssd_mobilenet_v1_1.0_quant_2018_06_29.zip -d Sample_TFLite_model
Okay, the sample model is all ready to go!
You can also use a custom object detection model by moving the model folder into the /home/pi/tflite directory. If you followed Part 1 of my TensorFlow Lite guide to train and convert a TFLite model on your PC, you should have a folder named "TFLite_model" with a detect.tflite and labelmap.txt file. (It will also have a tflite_graph.pb and tflite_graph.pbtxt file, which are not needed by TensorFlow Lite but can be left in the folder.)
You can simply copy that folder to a USB drive, insert the USB drive in your Raspberry Pi, and move the folder into the /home/pi/tflite1 directory. (Or you can email it to yourself, or put it on Google Drive, or do whatever your preferred method of file transfer is.) Here's an example of what my "BirdSquirrelRaccoon_TFLite_model" folder looks like in my /home/pi/tflite1 directory:

Now your custom model is ready to go!
It's time to see the TFLite object detection model in action! First, free up memory and processing power by closing any applications you aren't using. Also, make sure you have your webcam or Picamera plugged in.
Run the real-time webcam detection script by issuing the following command from inside the /home/pi/tflite1 directory. (Before running the command, make sure the tflite1-env environment is active by checking that (tflite1-env) appears in front of the command prompt.) The TFLite_detection_webcam.py script will work with either a Picamera or a USB webcam.
python3 TFLite_detection_webcam.py --modeldir=Sample_TFLite_model
If your model folder has a different name than "Sample_TFLite_model", use that name instead. For example, I would use --modeldir=BirdSquirrelRaccoon_TFLite_model to run my custom bird, squirrel, and raccoon detection model.
After a few moments of initializing, a window will appear showing the webcam feed. Detected objects will have bounding boxes and labels displayed on them in real time.
Part 3 of my TensorFlow Lite training guide gives instructions for using the TFLite_detection_image.py and TFLite_detection_video.py scripts. Make sure to use python3 rather than python when running the scripts.
Section 2 - Run Edge TPU Object Detection Models on the Raspberry Pi Using the Coral USB Accelerator
The Coral USB Accelerator is a USB hardware accessory for speeding up TensorFlow models. You can buy one here (Amazon Associate link).
The USB Accelerator uses the Edge TPU (tensor processing unit), which is an ASIC (application-specific integrated circuit) chip specially designed with highly parallelized ALUs (arithmetic logic units). While GPUs (graphics processing units) also have many parallelized ALUs, the TPU has one key difference: the ALUs are directly connected to eachother. The output of one ALU can be directly passed to the input of the next ALU without having to be stored and retrieved from a memory buffer. The extreme paralellization and removal of the memory bottleneck means the TPU can perform up to 4 trillion arithmetic operations per second! This is perfect for running deep neural networks, which require millions of multiply-accumulate operations to generate outputs from a single batch of input data.

My Master's degree was in ASIC design, so the Edge TPU is very interesting to me! If you're a computer architecture nerd like me and want to learn more about the Edge TPU, here is a great article that explains how it works.
It makes object detection models run WAY faster, and it's easy to set up. These are the steps we'll go through to set up the Coral USB Accelerator:
- 2a. Install libedgetpu library
- 2b. Set up Edge TPU detection model
- 2c. Run super-speed detection!
This section of the guide assumes you have already completed Section 1 for setting up TFLite object detection on the Pi. If you haven't done that portion, scroll back up and work through it first.
First, we'll download and install the Edge TPU runtime, which is the library needed to interface with the USB Acccelerator. These instructions follow the USB Accelerator setup guide from official Coral website.
Open a command terminal and move into the /home/pi/tflite1 directory and activate the tflite1-env virtual environment by issuing:
cd /home/pi/tflite1
source tflite1-env/bin/activate
Add the Coral package repository to your apt-get distribution list by issuing the following commands:
echo "deb https://packages.cloud.google.com/apt coral-edgetpu-stable main" | sudo tee /etc/apt/sources.list.d/coral-edgetpu.list
curl https://packages.cloud.google.com/apt/doc/apt-key.gpg | sudo apt-key add -
sudo apt-get update
Install the libedgetpu library by issuing:
sudo apt-get install libedgetpu1-std
You can also install the libedgetpu1-max library, which runs the USB Accelerator at an overclocked frequency, allowing it to achieve even faster framerates. However, it also causes the USB Accelerator to get hotter. Here are the framerates I get when running TFLite_detection_webcam.py with 1280x720 resolution for each option with a Raspberry Pi 4 4GB model:
- libedgetpu1-std: 22.6 FPS
- libedgetpu1-max: 26.1 FPS
I didn't measure the temperature of the USB Accelerator, but it does get a little hotter to the touch with the libedgetpu1-max version. However, it didn't seem hot enough to be unsafe or harmful to the electronics.
If you want to use the libedgetpu-max library, install it by using sudo apt-get install libedgetpu1-max. (You can't have both the -std and the -max libraries installed. If you install the -max library, the -std library will automatically be uninstalled.)
Alright! Now that the libedgetpu runtime is installed, it's time to set up an Edge TPU detection model to use it with.
Edge TPU models are TensorFlow Lite models that have been compiled specifically to run on Edge TPU devices like the Coral USB Accelerator. They reside in a .tflite file and are used the same way as a regular TF Lite model. My preferred method is to keep the Edge TPU file in the same model folder as the TFLite model it was compiled from, and name it as "edgetpu.tflite".
I'll show two options for setting up an Edge TPU model: using the sample model from Google, or using a custom model you compiled yourself.
Google provides a sample Edge TPU model that is compiled from the quantized SSDLite-MobileNet-v2 we used in Step 1e. Download it and move it into the Sample_TFLite_model folder (while simultaneously renaming it to "edgetpu.tflite") by issuing these commands:
wget https://dl.google.com/coral/canned_models/mobilenet_ssd_v2_coco_quant_postprocess_edgetpu.tflite

mv mobilenet_ssd_v2_coco_quant_postprocess_edgetpu.tflite Sample_TFLite_model/edgetpu.tflite
Now the sample Edge TPU model is all ready to go. It will use the same labelmap.txt file as the TFLite model, which should already be located in the Sample_TFLite_model folder.
If you trained a custom TFLite detection model, you can compile it for use with the Edge TPU. Unfortunately, the edgetpu-compiler package doesn't work on the Raspberry Pi: you need a Linux PC to use it on. Section 3 of this guide will give a couple options for compiling your own model if you don't have a Linux box. While I'm working on writing it, here are the official instructions that show how to compile an Edge TPU model from a TFLite model.
Assuming you've been able to compile your TFLite model into an EdgeTPU model, you can simply copy the .tflite file onto a USB and transfer it to the model folder on your Raspberry Pi. For my "BirdSquirrelRaccoon_TFLite_model" example from Step 1e, I can compile my "BirdSquirrelRaccoon_TFLite_model" on a Linux PC, put the resulting edgetpu.tflite file on a USB, transfer the USB to my Pi, and move the edgetpu.tflite file into the /home/pi/tflite1/BirdSquirrelRaccoon_TFLite_model folder. It will use the same labelmap.txt file that already exists in the folder to get its labels.
Once the edgetpu.tflite file has been moved into the model folder, it's ready to go!
Now that everything is set up, it's time to test out the Coral's ultra-fast detection speed! Make sure to free up memory and processing power by closing any programs you aren't using. Make sure you have a webcam plugged in.
Plug in your Coral USB Accelerator into one of the USB ports on the Raspberry Pi. If you're using a Pi 4, make sure to plug it in to one of the blue USB 3.0 ports.
Insert picture of Coral USB Accelerator plugged into Raspberry Pi here!
Make sure the tflite1-env environment is activate by checking that (tflite1-env) appears in front of the command prompt in your terminal. Then, run the real-time webcam detection script with the --edgetpu argument:
python3 TFLite_detection_webcam.py --modeldir=Sample_TFLite_model --edgetpu
The --edgetpu argument tells the script to use the Coral USB Accelerator and the EdgeTPU-compiled .tflite file. If your model folder has a different name than "Sample_TFLite_model", use that name instead.
After a brief initialization period, a window will appear showing the webcam feed with detections drawn on each from. The detection will run SIGNIFICANTLY faster with the Coral USB Accelerator.
If you'd like to run the video or image detection scripts with the Accelerator, use these commands:
python3 TFLite_detection_video.py --modeldir=Sample_TFLite_model --edgetpu
python3 TFLite_detection_image.py --modeldir=Sample_TFLite_model --edgetpu
Have fun with the blazing detection speeds of the Coral USB Accelerator!
To use a custom model on the Coral USB Accelerator, you have to run it through Coral's Edge TPU Compiler tool. Unfortunately, the compiler only works on Linux operating systems, and only on certain CPU architectures.
The easiest way to compile the Edge TPU model is to use a Google Colab session. I created a Colab page specifically for compiling Edge TPU models. Please click the link below and follow the instructions in the Colab notebook.
https://colab.research.google.com/drive/1o6cNNNgGhoT7_DR4jhpMKpq3mZZ6Of4N?usp=sharing
This appendix lists common errors that have been encountered by users following this guide, and solutions showing how to resolve them.
Feel free to create Pull Requests to add your own errors and resolutions! I'd appreciate any help.
The 'NoneType' error means that the program received an empty array from the webcam, which typically means something is wrong with the webcam or the interface to the webcam. Try plugging and re-plugging the webcam in a few times, and/or power cycling the Raspberry Pi, and see if that works. If not, you may need to try using a new webcam.
This error occurs when you try to run any of the TFLite_detection scripts without activating the 'tflite1-env' first. It happens because Python cannot find the path to the OpenCV library (cv2) to import it.
Resolve the issue by closing your terminal window, re-opening it, and issuing:
cd tflite1
source tflite1-env/bin/activate
Then, try re-running the script as described in Step 1e.
This error can occur when you run the bash get_pi_requirements.sh command in Step 1c. It occurs because the package data got corrupted while downloading. You can resolve the error by re-running the bash get_pi_requirements.sh command a few more times until it successfully completes without reporting that error.
4. Unsupported data type in custom op handler: 6488064Node number 2 (EdgeTpuDelegateForCustomOp) failed to prepare.
This error occurs when trying to use a newer version of the libedgetpu library (v13.0 or greater) with an older version of TensorFlow (v2.0 or older). It can be resolved by uninstalling your current version of TensorFlow and installing the latest version of the tflite_runtime package. Issue these commands (make sure you are inside the tflite1-env virtual environment):
pip3 uninstall tensorflow
pip3 install https://dl.google.com/coral/python/tflite_runtime-2.1.0.post1-cp37-cp37m-linux_armv7l.whl
(Or, if you're using Python 3.5, use pip3 install https://dl.google.com/coral/python/tflite_runtime-2.1.0.post1-cp35-cp35m-linux_armv7l.whl instead.)
Then, re-run the TFLite detection script. It should work now!
Note: the URLs provided in these commands may change as newer versions of tflite_runtime are released. Check the TFLite Python Quickstart page for download URLs to the latest version of tflite_runtime.
This error usually occurs when you try using an "image classification" model rather than an "object detection" model. Image classification models apply a single label to an image, while object detection models locate and label multiple objects in an image. The code in this repository is written for object detection models.
Many people run in to this error when using models from Teachable Machine. This is because Teachable Machine creates image classification models rather than object detection models. To create an object detection model for TensorFow Lite, you'll have to follow the guide in this repository.
If you'd like to see how to use an image classification model on the Raspberry Pi, please see this example: https://github.com/tensorflow/examples/tree/master/lite/examples/image_classification/raspberry_pi