A fursuit fan controller, that can be manually triggered or when a set temperature is hit.
I made this because i have a fan, which is quite powerful but i do not hear anything when its running.
I havent had much time to test and tune in the temps, this also depends from fursuit to fursuit, though i recommend to keep the warning temp and overheat temp within 5-10° from eachother.
The config is in °C, this can can be adjusted to use °F
The temps in the config are the ones i used for testing. They need to be adjusted to your preferred temps as i doubt you'd want you and your suit to ever reach 60°C
Features:
- Manual fan control using a reed switch (i attached a magnet to my paw to trigger it)
- Optional reset switch (also via a reed switch)
- Temperature monitoring: current temp, min temp, max temp, and average temp (of the last 20 measurements)
- Hi temp warning: if the temp reaches above 50, a warning will start to flash.
- Automatic cooling: if the temp reaches above 60, the fan will kick in and stop when a temperature lower than 50 (the warning threshold) is reached.
- A 'Last water' timestamp, which is basically just the time since the system was powered up, so you need to restart / reset to restart this timer.
The configuration can be found in the conf.h file If you want the temps to be displayed and configured in °F, set USE_F to true in said file.
Note that this is just a project i made. I do not have much experience with c so i this entire project is made with a 'if it works, dont touch it' mindset and might not look the greatest
For this project, you will need:
- An arduino nano
- A USB, or any other 5v powered fan
- A TIP29A NPN transistor, or similar, it needs to be able to run the fan you use, with a 1k gate resistor
- A USB cable, and a powerbank with a a low power mode, since the arduino doesnt consume that much current some powerbanks might not detect this and shut off. Some have a low power mode where the output will be always on. I used an Iniu B42 (the one with the paw on it). You can use one USB connection but i chose to separate the control circuit from the fan itself
- 1 DS18B20 temperature sensor (3 wire version). If there is no board, you also will need a 4k7 resistor.
- A reed switch and magnet (there are prebuilt reed switch shields)
- (optional) An OLED screen with i2c control (SDA / SCL pins), i used this one
- Arduino editor downloaded on your pc
- Soldering skills and material
- Wires to connect everything
- A pcb to mount the components on. While you can just hardwire eveything, a pcb is easier, it also is easier to hide and less messy.
- Shrink tube / hotglue. Since the oled will be mounted inside of the head, where it can be humid, the display should be protected.
This all cost me around 50 euros, not including shipping.
You dont really need to have any experience with c or any programming language in general.
You have to use a transistor to switch on the output fan since the nano can deliver a max of 20mA output, the fan i use is 200mA.
The default i2c adress for the oled i used was 0x3c. These displays can also have 0x3d as address, you can usually find yours by looking at the back side of the panel.
SDA is connected to pin A4, SCL to A5. These pins can not be changed
The display is really small (0.98in) and can either be mounted inside of your suit (if you have enough space) or somewhere outside.
The wiring diagram can be found below
Here the transistor is replaced by a LED, and the button is your reed switch. Some reed switches have 3 pins, make sure to use the NO (normally open) pin
You can choose how you want to control the switch, all you need is a magnet.
If your temperature sensor does not come with a board, it will also need a 4k7 resistor.
To reset the nano, press the little reset switch. This will restart the program. ALternatively, you can connect a switch to the RST pin to reset via there. Note that this switch needs to be connected to ground, not to 5v. The image uses the default pins i used. If you changed them, make sure to connect to the right pin.

By default, the fan will turn on above the configured overheat threshold. This however can be overriden by using the switch. Do note this will not get rid of the message, and will only reset once the temp drops below the warning threshold. The fan will also automatically turn off once this is reached.
You will also need to install the following libraries:
- Adafruit GFX Library
- Adafruit SSD1306
- OneWire
- DallasTemperature
- AverageValue
Once you downloaded the source code, unzip it and import it in the arduino IDE (File > Open)
The editor will ask you if you want to create a folder called fursuit_fan. Click yes. Then go to the folder location and copy over all the .h files into that folder. The LICENSE and README files aren't needed.
When that is done, you should see all the files in the editor.

Next, go to the library tab 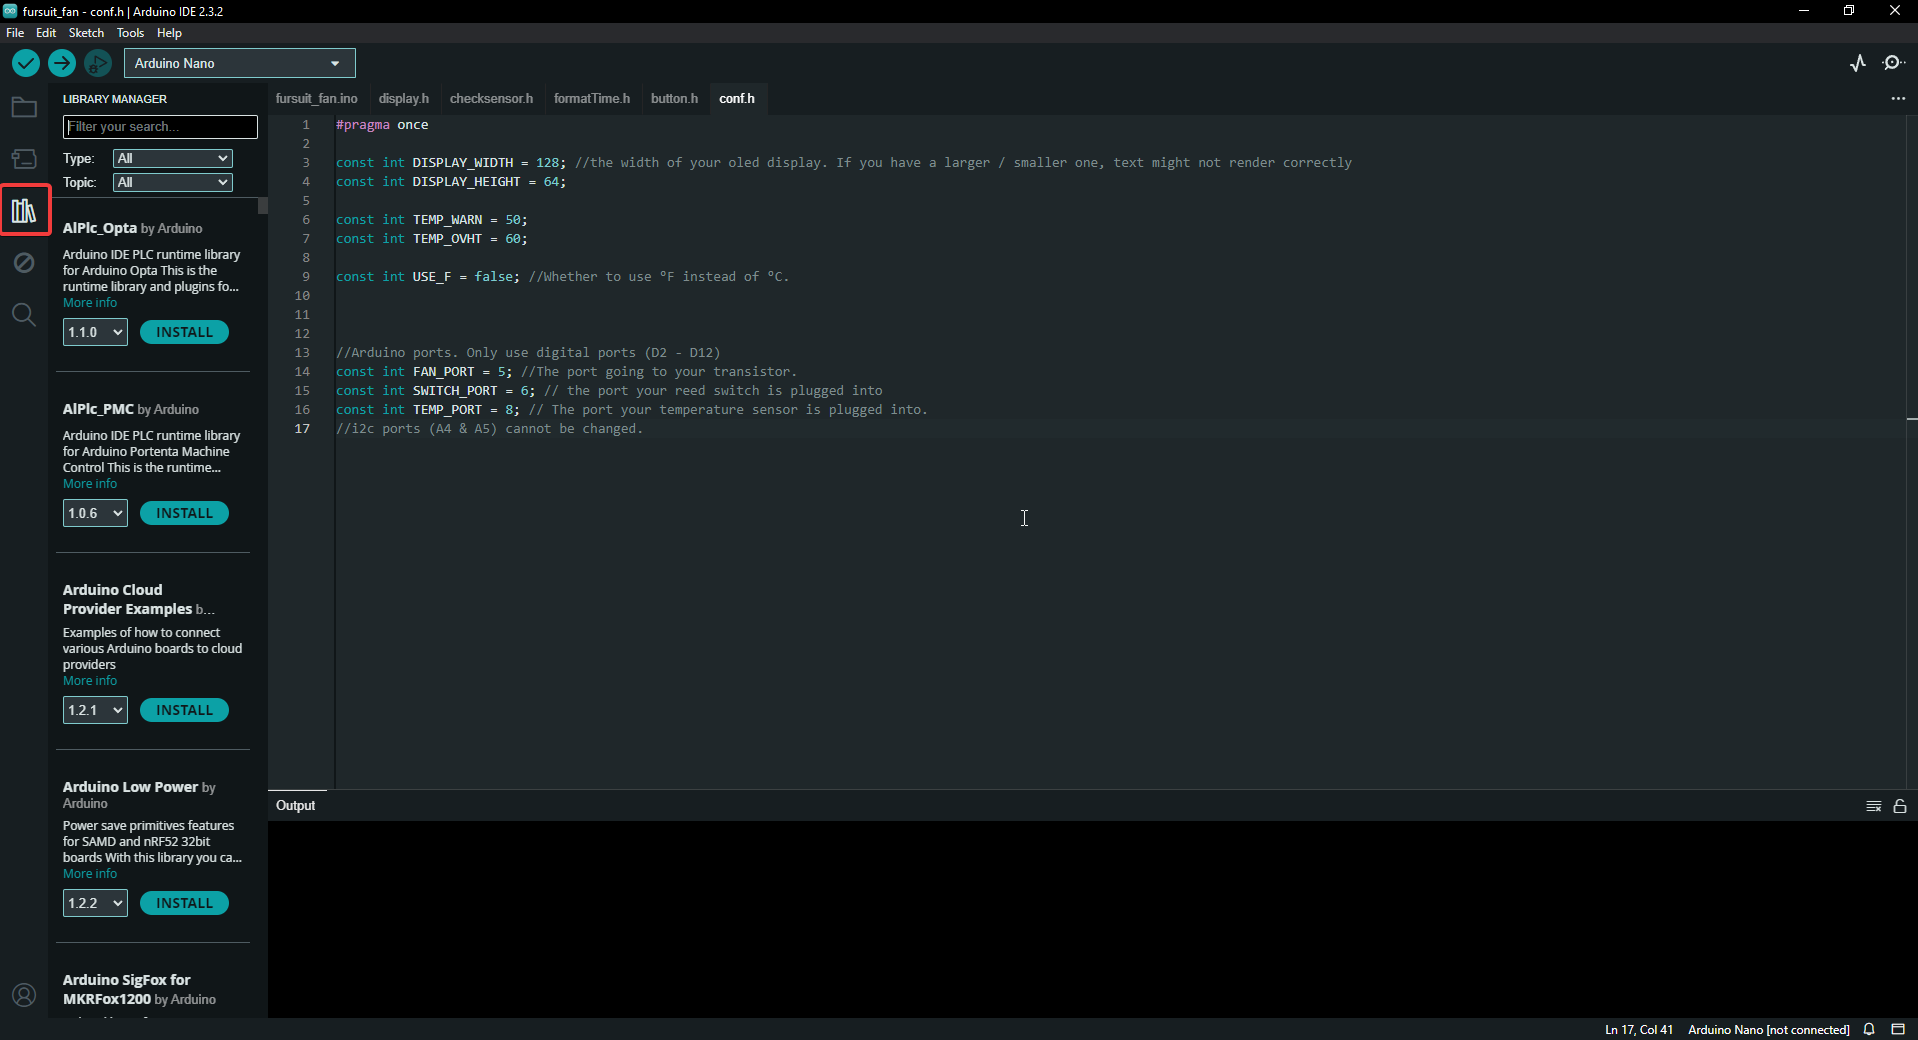
Once thats done, head to the board manager (the tab above the library manager, and search for arduino nano (the package should be named Arduino AVR Boards). Then, go to Tools > Board > Arduino AVR Boards and select Arduino Nano. If you're using an arduino nano every, like i did and it took me 2 hours to figure out, download the Arduino megaAVR boards.
If all is configured well, you should be able to compile (press the checkmark button).
Then go to Tools > Port and select the port (if all is correct, this should be detected automatically). Your arduino has to be plugged in, and you might have to install some drivers (the IDE should ask for it, if not, its a quick google search)
For the hardware part, connect everything according to this schema. The led here is used as a replacement for the transistor, the only thing you need is the purple wire, which goes to the base of the transistor. You can choose to use a reset switch or not, it the same as disconnecting the power and plugging it in again.
The transistor needs to be connected like this

Note that if you use a different transistor, the pins might differ. Check its datasheet for the correct pinout.
The VCC and GND have to be connected directly to the powerbank. They must not be routed through the arduino
I made a 5v and GND rail on my pcb and from there made my connections.
Make sure you connect the ground of the powerbank to the arduino aswell, this to make sure both are at the same ground level to avoid issues.
The VCC and GND cables can come directly from the USB connection, they do not neccesarily need to be connected via the arduino, though both will work.
When wired up, i recommend to not quickly switch the fan on and off. When starting up, the current of the fan can peak, so wait until it fully spooled up until you turn it off again. The transistor can handle it but in the long term it can heat up.
I also used hotglue on the connections to strengthen them, and will design a case for it to fit in.
None of this has been tested exstensively, so i do not have any idea yet about how hot it gets, how long it lasts, how reliable it is, etc...
As for the position of the temperature sensor, i'd recommend to put it in the mouth but not directly in the breathing path.
If you end up using my project, it would mean a lot if you could star it and support me. I spent a lot of time making this and optimising it for other people to read and use, even the smallest amount helps me out, and i plan on making more fursuit-related projects in the future
If you have any questions or any problems, feel free to contact me at mail@wolvinny.dev
Special thanks to my friend on discord for helping me with some code, and testing it for me!
If you end up using this, make sure to check this repo regularly. I plan on adding some more features later on.
- The average value isnt always accurate and might go up when the temp goes down, though this stabilizes.
- display is always on
- if you have the display not in your suit, you will not get the overheat warning.